(Last updated on March 9th, 2023)
Sometimes images you create in Photoshop can look flat. Different objects may blend into each other, reducing the overall effectiveness of your work. A great way to change this is by adding shadows. A shadow underneath something like text or shapes can look fantastic. It adds separation and makes the item pop.
This is mainly done using the drop shadow tool, which I will cover in the guide below. It is one of my favorite tools in Photoshop, and the blending options panel is something I urge you to familiarise yourself with. After reading this guide, you will clearly know how to add shadows in Photoshop and use the drop shadow tool.
Important Tips for Adding Shadows in Photoshop
Before we get to the tutorial, there are some useful things to remember when working with shadows. The process itself is simple, but there are three things to remember that can make things easier and improve your understanding of the drop shadow tool.
1. Add Different Objects as Individual Layers
My number one advice for Photoshop, in general, is to use layers. The more layers you use, the greater control and flexibility you have over your images and photos. This is particularly important when working with shadows. Layers are an aspect of Photoshop that also makes it superior to software like Luminar.
For example, let’s say you have inserted a photo with two different shapes. If these were added on the same layer, if you add a drop shadow, it would be applied to both objects – or everything in that layer. This could create a problem if you only wanted a shadow applied to one shape.
In contrast, if you added each shape into a separate layer, you could use the blending options toolbar to edit them separately too.
Advisory Rule – Add each new object as a new layer in Photoshop
2. Merging Layers Can Affect How the Shadows Look
While I swear by using multiple layers, you must also be aware of how they interact with each other. Namely, export your image as a JPEG or other rasterized file type when merging your layers.
If you have two layers, like text and a shape, both of which have a drop shadow, if you merge them, the drop shadow effect will then be applied overall to the layer – not the single items. This can affect how the shadows look and create a strange finish.
It’s, therefore, preferable to simply use the Save As function to export your image as this will not affect how the shadows work. Also, always make sure that you save a PSD version of the image with all the layers intact! This allows you to make further changes in the future.
3. You Can’t Easily Add Shadows to a Photo
This guide on how to add shadows in Photoshop deals with object shadows – text and shapes. It is not about adding shadows to a photo – that is a completely different subject and much trickier.
If you want to add shadows to a photo in Photoshop, the Camera RAW module is the best tool. This is essentially like a mini Lightroom plugin where you can edit the base parameters of photos like shadows, highlights, contrast, and clarity.
The Drop Shadow Tool
We’ve got the boring stuff out of the way! (Please don’t ignore it, though, haha!) We can now learn how to add shadows in Photoshop. Always check the available tools too in your version of the software as different versions like Photoshop CC and CS6 may differ.
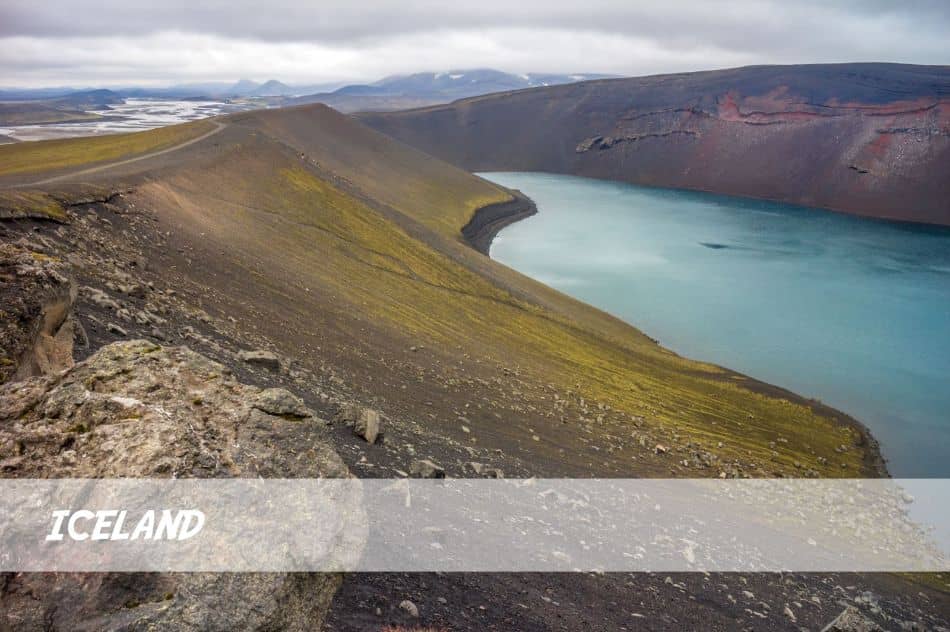
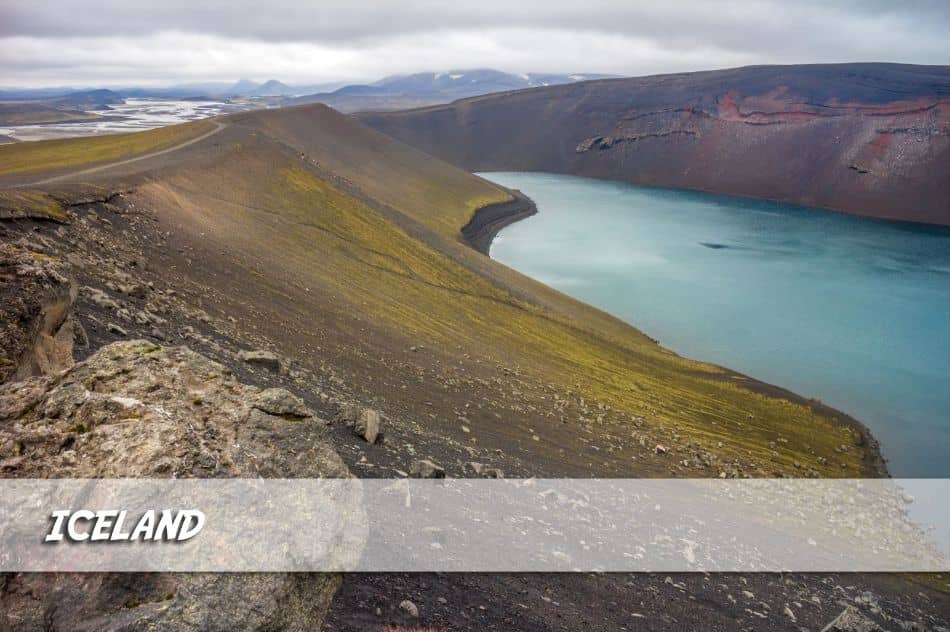
In this tutorial, I created a simple image – a photo I took from Iceland- and added a transparent white rectangle and some text. Below is the unedited image without any shadows. Sure, it looks ok, but as you will see, drop shadows can add an extra layer of depth.
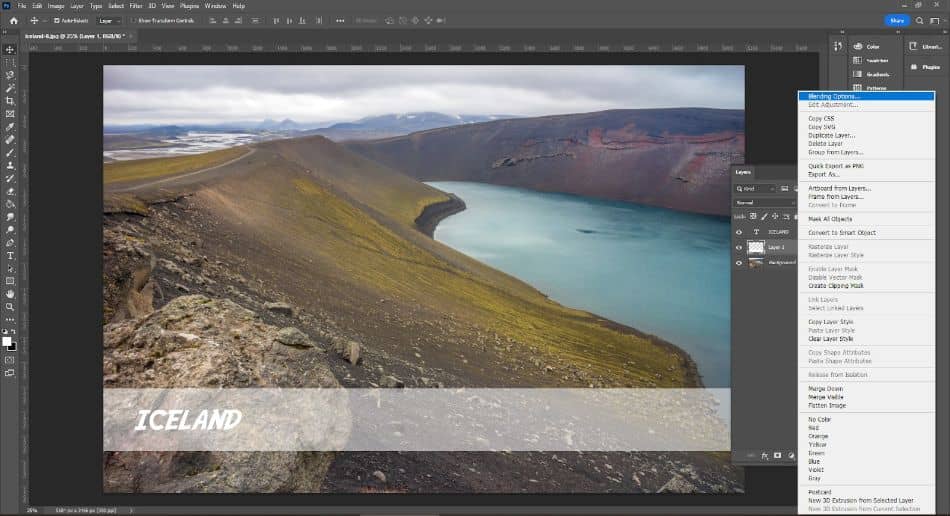
The rectangle and text were added as separate layers on top of the background photo for context. To add shadows in Photoshop, all you have to do is the following five steps:
- Rick-click on the layer you want to add a shadow too.
- Click on the “Blending Options” sub-menu.
- Tick the check box next to the “Drop Shadow” item.
- Adjust the shadow parameters as required.
- Click “OK” when finished.
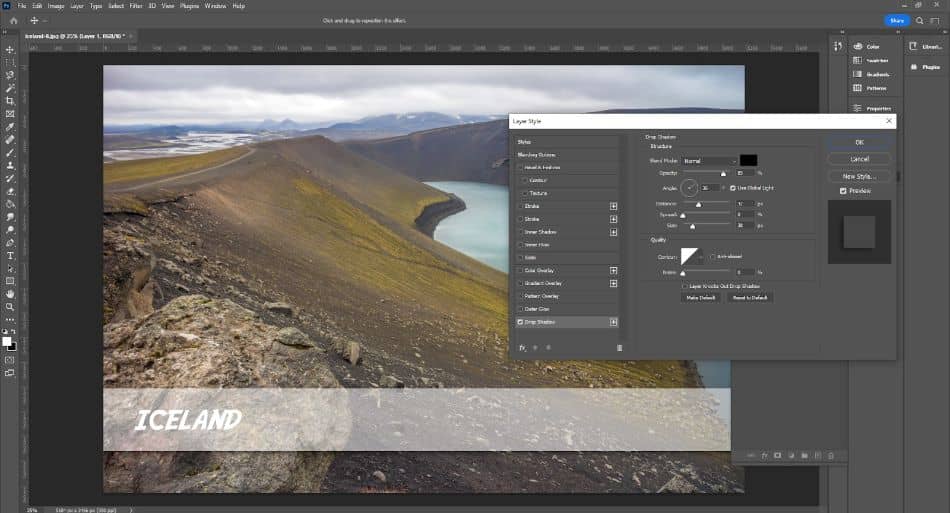
It’s really that simple! The complex part is the drop shadow settings. As you can see below, there is a range of options to change, which affect the size, direction, and strength of the shadow:
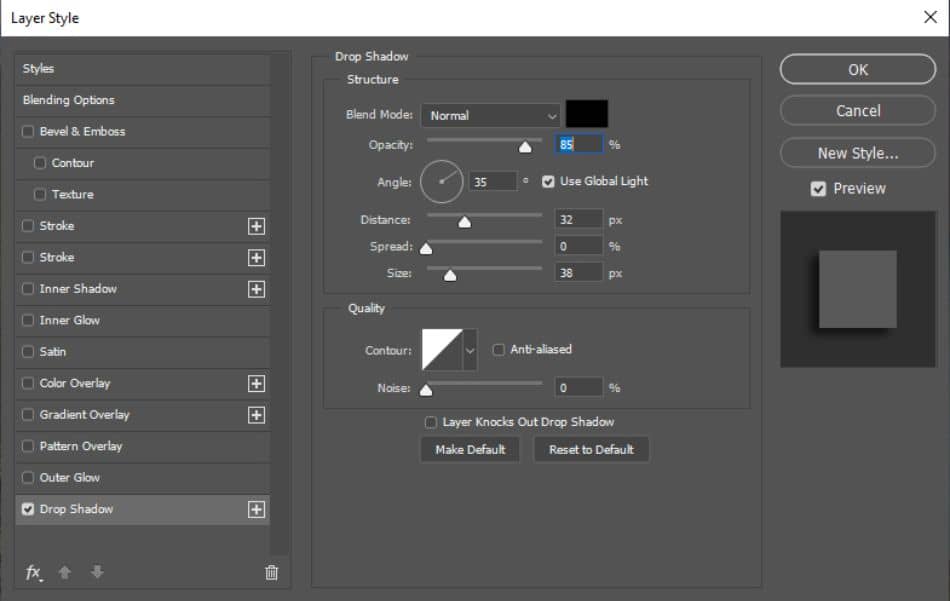
Below, I will describe what each property does and how it affects the drop shadow.
Blend Mode
The blend mode affects how the drop shadows blend with the layer beneath it. I would recommend leaving this as “normal”. However, you can play with the different blending modes as they can create some interesting shadow variations.
Opacity
The opacity is the main parameter you can change to affect the strength and visibility of the shadow. A simple thing to remember is:
- Higher percentage: stronger shadow
- Lower percentage: weaker shadow
If you want a prominent shadow, for example, you could move the opacity slider to 100%, making it much more visible.
Angle
The angle changes the direction in which the shadow springs from the object. You can click and drag the needle around the circle to alter the angle. The great thing here is that the object will update in real-time, so you can see how different angles affect the shadow.
Also, pay attention to the “Use Global Light” tick box. If you have this selected, when you change the drop shadow angle of one layer, it will also update the other layers with drop shadows. This is great if you want a consistent shadow, but simply untick it if you prefer to edit each angle separately.
Distance
Distance changes how close the shadow is to its linked object. If you have a distance of 0, the shadow will be directly underneath the object.
The larger the number, the further away the shadow will move. Also, the distance correlates with the angle you have chosen. For example, if you have a shadow angle of 45 degrees, changing the distance will move the shadow away from the object in a 45-degree orientation.
Spread
The spread basically changes how dense and full the shadow is. A smaller number means a lighter shadow with greater transparency. In contrast, a larger number creates a thick and dense shadow that is more opaque.
Size
Lastly, the size changes the shadow’s size and affects the transparency. By using a smaller size, you can create a shadow that is much more defined but in a smaller area surrounding the object.
The above image had a simple drop shadow added to the text and a transparent rectangle. As you can see, it adds more depth to the photo and makes the text stand out more.
There are no set parameters for the drop shadow tool that I can recommend. You simply have to change the settings and look at how this affects the shadow in real time. If you ever get any errors with file loading, there are simples ways to fix scratch disk errors.
Over time, you will get used to how the drop shadow works and be able to create the effects you want easily.
Add Depth and Distinction to Your Objects
The blending options toolset is one of the most useful items in Photoshop. I recommend trying different effects like drop shadow, inner shadow, emboss, and gradient overlay. They can totally transform the way you make graphics and allow you to add more depth to your work.
Adding a shadow in Photoshop is quite easy, and the drop shadow tool gives you great flexibility. Just remember to add objects like text and shapes as separate layers so you can assign shadows to each one individually.
Frequently Asked Questions
You can add shadows to objects within images in Photoshop, like text and shapes. This is done via the drop shadow tool when right-clicking on the layer containing the object and clicking the blending options toolbar. You can then add various effects like shadows, strokes, and bevels.
Not easily. The best way to do this would be to use the Camera RAW plugin in Photoshop and edit a photo’s highlights and shadows parameters. Otherwise, you would need to use brushes and try to add shadows manually.
Yes! Each layer in your image can have a drop shadow applied. Therefore, it is a good practice to always add new objects like text and shapes into your images as individual layers. This gives you greater control over things like shadows.
The drop shadow is incredibly useful and adds shadows to objects in Photoshop, such as text and shapes. You can also adjust the angle, size, colour, and depth of the shadow to create interesting effects.
Only when you save the final image. If you try to merge two layers with shadows, the depth and alignment of the shadows will be changed, which could create a strange outcome. It’s best practice to save a PSD version and then simply use the Save As function to export it as a rasterized file type.
Paul is a lifelong photographic hobbyist and has been taking epic shots from around the world for the last decade. His travels have taken him to places like Antarctica, Thailand, and Greenland and this has given him the chance to photograph places few people have seen. As a self-professed nerd, Paul loves photo editing and his programs of choice are Lightroom Classic and Photoshop. In recent years Paul quit the standard office life and became a full-time freelance writer to share his passion for photography and tech with those wanting to learn.