(Last updated on March 9th, 2023)
Photoshop has brilliant tools that allow you to merge or blend two images. These include layer masks, blend modes, and layer opacity.
There are many instances where blending images is useful. For example, you may want to merge a texture with a portrait. If you learn this skill, you can exponentially increase your creativity and potential in Photoshop.
In this guide, I explain how to blend two images in Photoshop using these methods.
Considerations for Blending Images in Photoshop
Before we start learning, there are a few important considerations to understand.
- The two images must use the same color space.
- They should also be the same size.
It’s vital that both images have the same color space. Otherwise, you can’t combine them into one canvas. You can check the color space by clicking Image > Mode. I would advise setting the color space to RGB, giving you the most editing potential.
Secondly, the images must be the same size. If you try to merge a smaller image into a larger one, you will see the outline of the smaller image, which will look strange.
To put it another way, the image you want to merge into another must fit over it without any visible edges.
Blend Modes
The method I prefer to use is the blend modes tool in the layers panel. This is incredibly easy and takes a few seconds. Plus, once you get used to what the different blend modes do, you can improve your workflow even more.
For each layer in an image, you can change the blend mode. This affects how it blends with the layer beneath it. We can use this to our advantage to effectively merge two images together. This is especially useful for things like merging textures and patterns with portraits and other objects.
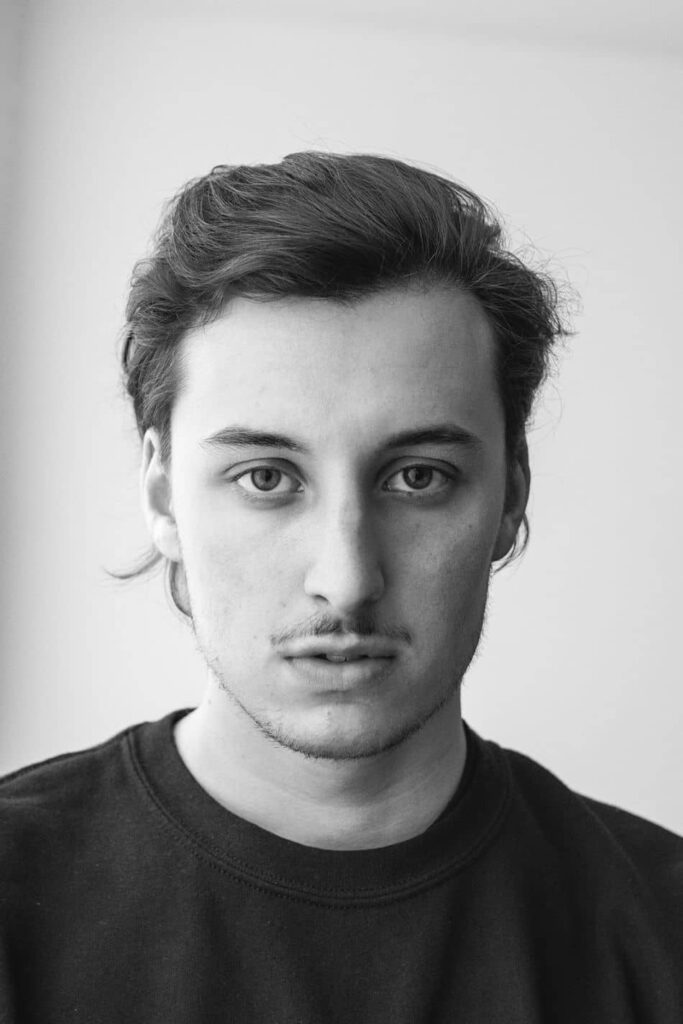
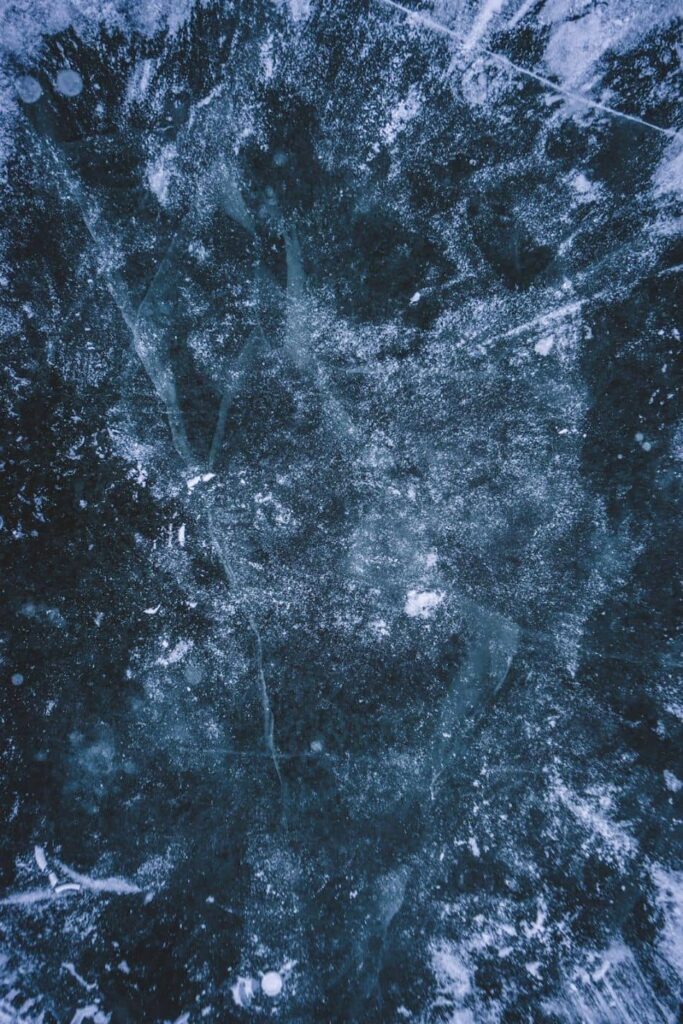
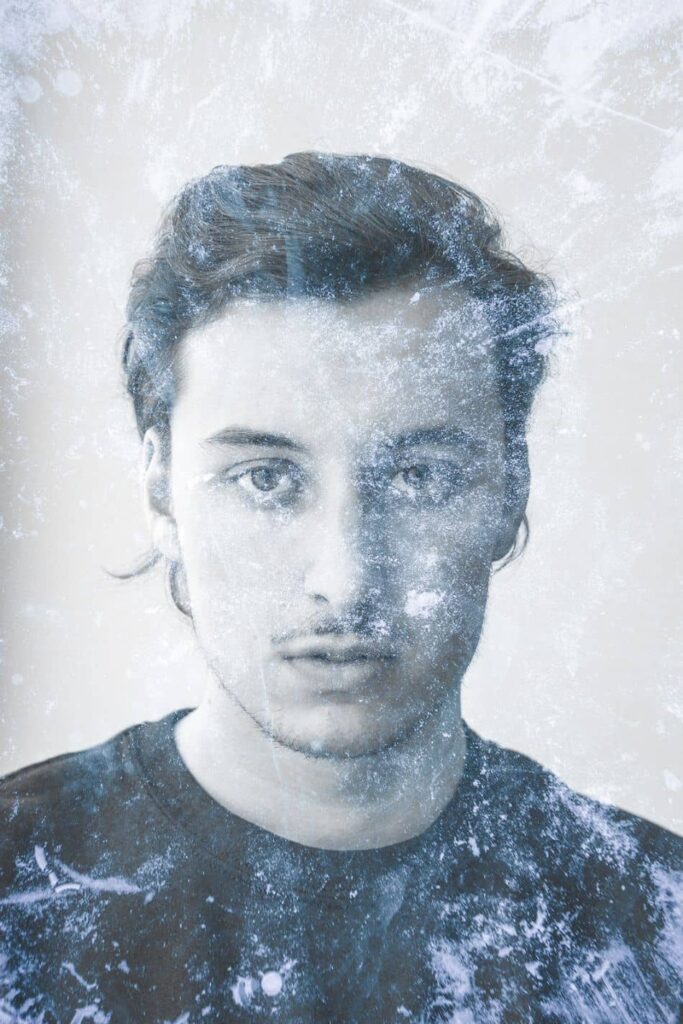
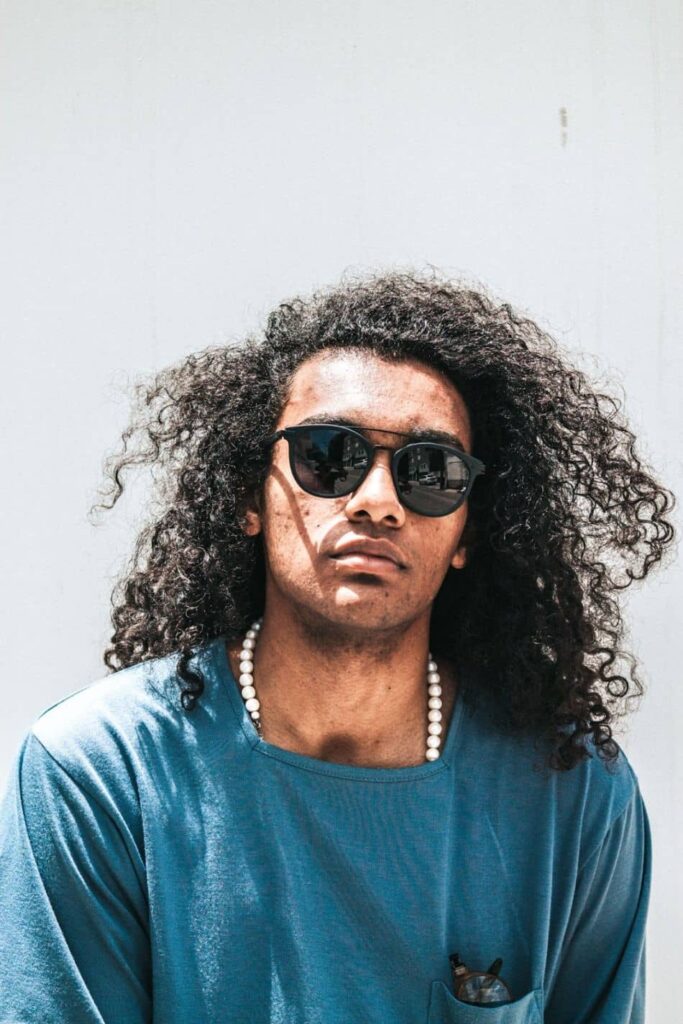
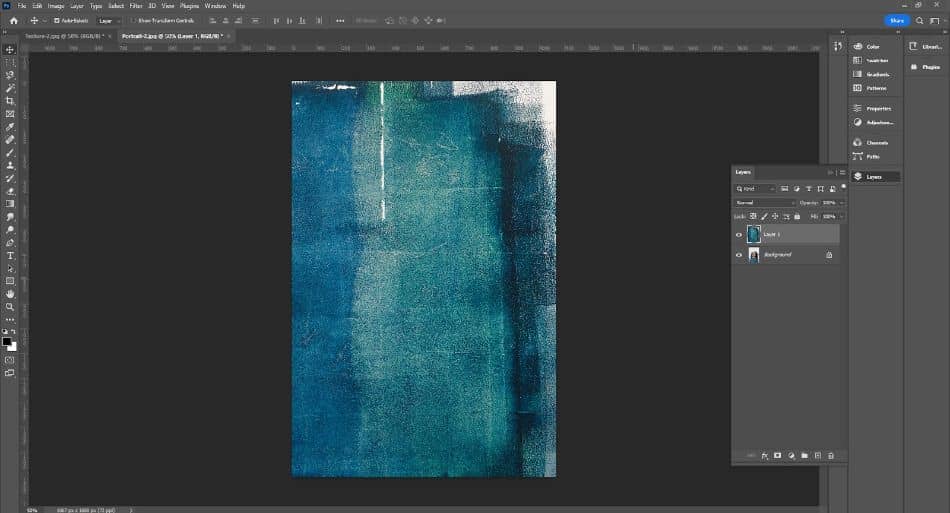
I found two images from Unsplash—a simple portrait of a man with a relatively plain background and an interesting blue texture. Let’s see how we can blend these two images together using the blend modes tool.
Step 1 – Open Both Images in Photoshop
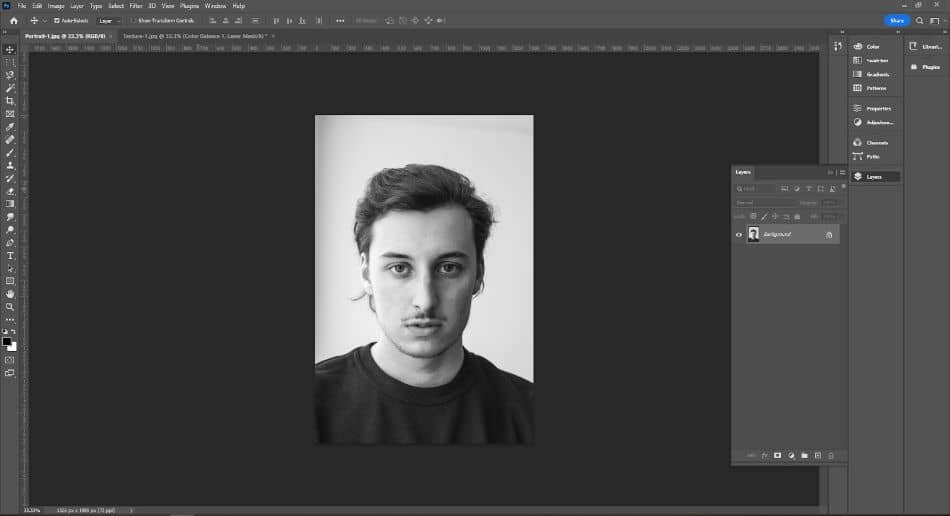
Obviously, we first have to have both images open. Simply go to File > Open, and Ctrl + click the two images you want to load. This should open them both as separate tabs, as shown below. You can also use the keyboard shortcut Ctrl + O to load the open file dialog box. This should be the same for any version of Photoshop, including the Chromebook one.
Step 2 – Drag One Image onto the Other
With both images loaded, we have to combine them into one image as two layers.
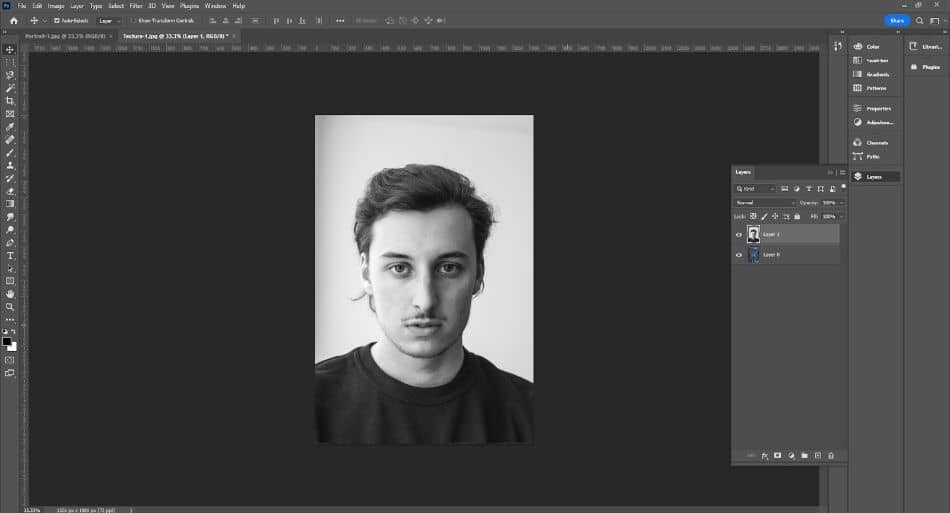
Click on one image so its tab is active. Next, click and hold somewhere on the image canvas. While still holding your mouse, drag the image across to the tab of the second image at the top and release your mouse.
This will add that image as a new layer onto the second image. If you open the layers tab, you should now see both images as separate layers.
Step 3 – Set the Order of the Layers
It’s important to consider the order of the layers as this will affect how the blend mode works and which image is dominant.
This is not something I can give a specific rule to. Instead, it just takes practice and trial and error. In this example, I used the texture as the bottom layer and the portrait as the top layer.
If you want to change the layer order, simply click and hold on one of the layers, and drag it above or below the other in the layers toolbar. There are other fun techniques you can learn with layers, too, including flipping them.
Step 4 – Change the Blend Mode of the Top Layer
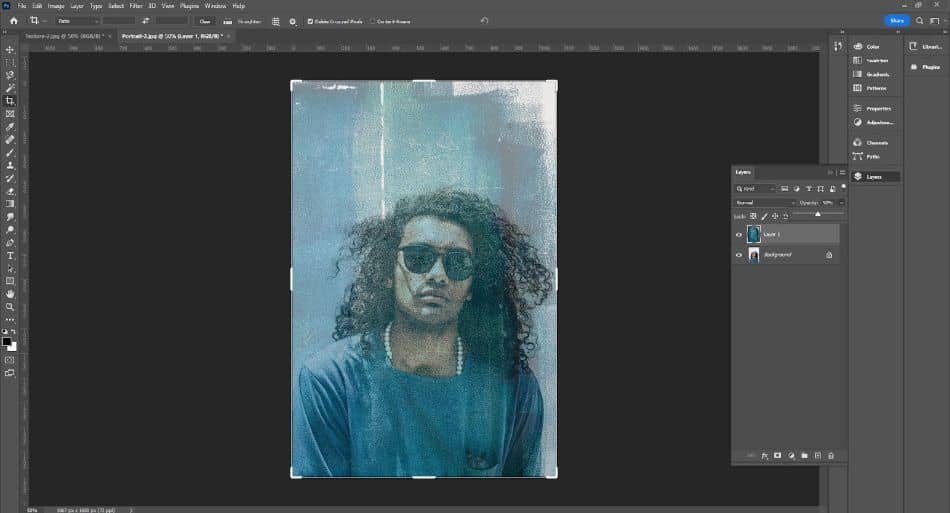
All you have to do now is to change the blend mode! First, select the top layer. Above this, there should be a drop-down box in the layers toolbar that says “normal” – this is the blend modes drop-down list. It is set to normal as default.
There are over 20 different blend modes to choose from. Just click on one – this will automatically apply, changing how the top layer blends with the layer beneath it. Make sure you don’t change any feather settings, but feathering is useful for other techniques.
I can’t tell you which blend mode to use! Typically, I scroll through them using the up and down arrows on my keyboard until I find one that achieves the desired effect. In the example below, I used the “screen” blend mode.
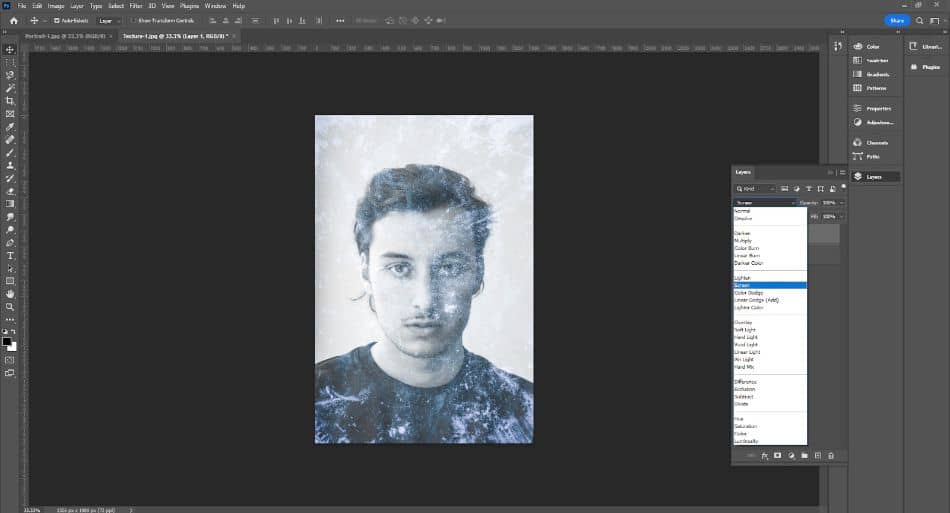
The screen, in this instance, allows the background to shine through without being too overpowering. Other options, like Hard Light, looked strange, and the background texture was too strong.
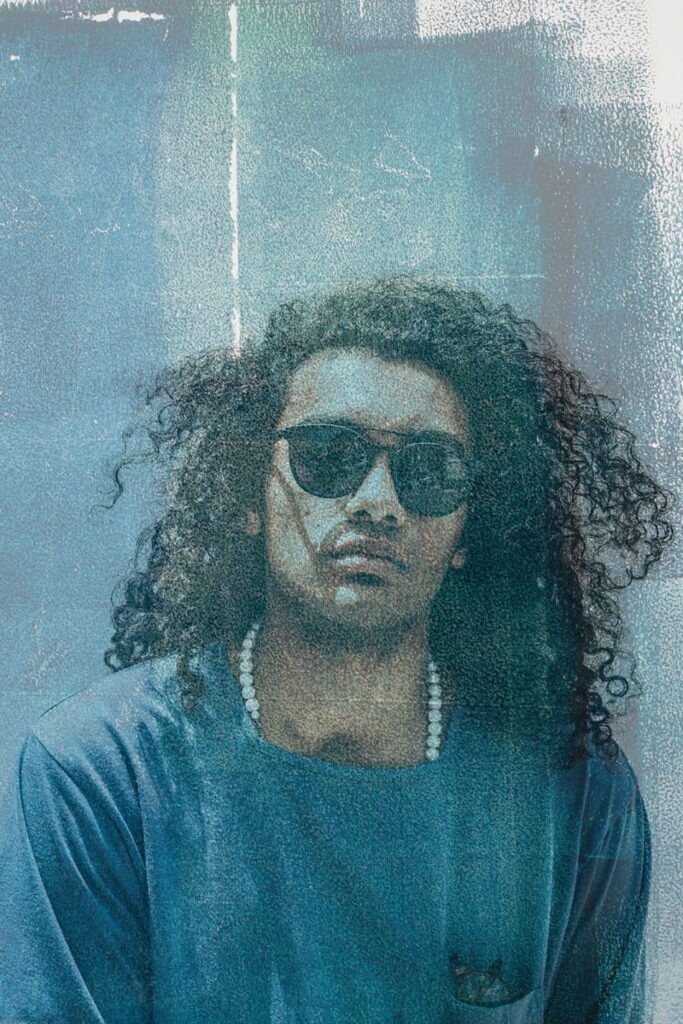
You can change things further by changing the opacity of the layers too. For example, you could put the texture layer on top, change its blend mode, and reduce the opacity to merge the images subtly.
As mentioned – there is no right or wrong answer for blend modes. It’s a case of testing the different effects and using what works for you. The final image below looks pretty cool and creates a unique portrait!
Layer Opacity
If you want to simplify the process, you can just change the layer opacity to blend two images in Photoshop. This is just as effective but doesn’t give the same control and creative potential as using the blend modes.
Using layer opacity is ideal when you have a main image and something that you want to blend into it subtly. For example, you may have a portrait photo with a plain background and want to add a little detail to it with a texture.
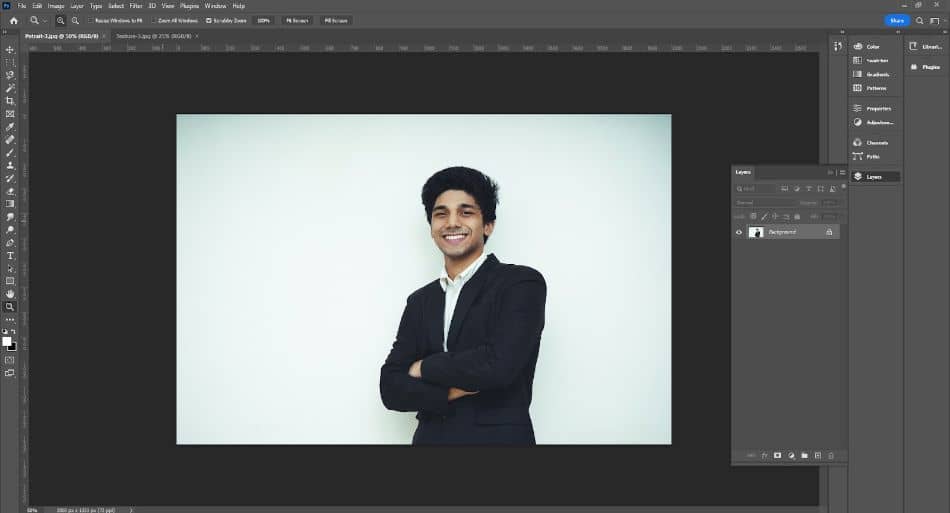
This is what I did with the example below. These are two photos taken from Unsplash. On the left, we have a portrait photo of a man set against a plain background. The right is a cool texture made using paint. As you will see, simply changing the layer opacity can merge these two images together to create a retro photo.
Step 1 – Open Both Images in Photoshop
Like before, we have to open both images in Photoshop. Simply click File > Open, locate the folder in which your images are saved, and Ctrl + click on both.
It’s important to note that the images must be the same color, space, and size to join together and merge without any noticeable edges.
Step 2 – Drag One Image onto the Other
We now need to combine the images onto one canvas. To do this, click and hold on the canvas of one image. While still holding, drag it up and across to the tab of the other photo. Release your mouse – this adds it as a copy and a new layer to the second photo.
When you do this, your original image should still stay open, too – so don’t forget to save and close it when you are finished.
Step 3 – Set the Order of the Layers
You may need to change the order of the layers depending on what you want to achieve. If you merge a texture into a photo, I advise using the texture as the top layer.
This is because we don’t want to reduce the opacity of the portrait – we want that to be completely opaque.
Essentially, the image you want to be more prominent should be the bottom or background layer.
Step 4 – Change the Opacity of the Top Layer
It’s now a simple case of changing the top layer’s opacity!
Click on the top layer in the layers toolbar on the right-hand side of Photoshop. Next to the blend modes drop-down, there should be the opacity parameter.
You can either click in the box where the percentage is displayed and type in a different number, then hit enter.
However, I prefer to click on the downward arrow next to the box. This opens the opacity slider – just click and drag left or right on the slide to change the opacity.
As you drag it, the opacity changes in real-time, so you can easily see its effect.
Once you have an ideal opacity, click out of the layers toolbar and save your image!
In the below example, I used a layer opacity of 50%. This allows the texture to show through, but you can still see plenty of detail in the portrait model too.
Layer Masks
The last mode involves using layer masks. I advise learning how to use layer masks, as they are incredibly useful in multiple scenarios.
A layer mask is essentially a transparent layer between two other layers. You can then edit that mask to determine how the two layers blend with each other.
This is perfect if you want to blend part of an image into another, and it offers far more control. In the example, I found a random architectural texture to overlay onto a simple portrait photo.


Step 1 – Open Both Images in Photoshop
The first step is always to open both images in Photoshop!
Step 2 – Drag One Image onto the Other
And we then always follow by dragging one image onto the other to create two layers in one canvas.
Step 3 – Set the Order of the Layers
If needed, re-order the layers too!
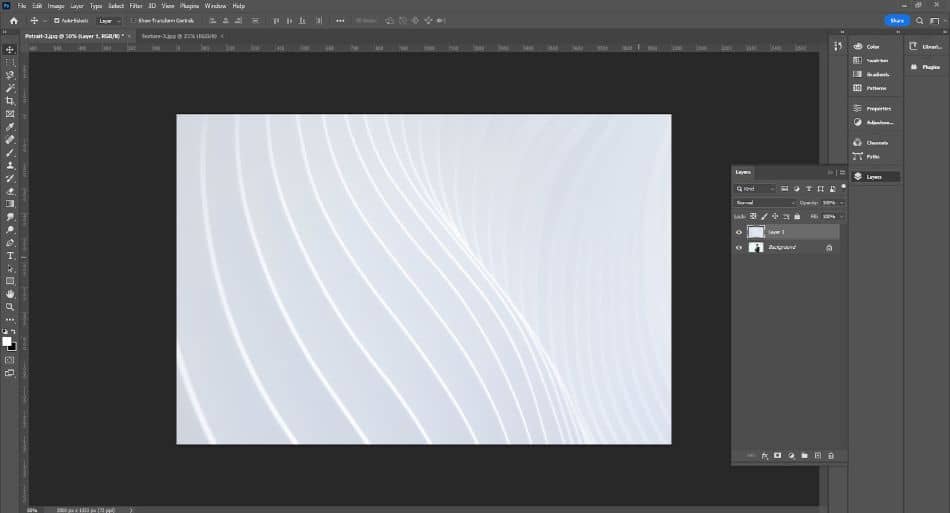
Step 4 – Create a New Layer Mask on the Top Layer
Now comes the interesting part. First, make sure that you have the layers toolbar open.
Next, select the top layer and click on the add vector mask button at the bottom of the toolbar (it looks like a camera icon).
This should add a layer mask to the top layer – you can see this has been done as a white box should appear next to the layer preview.

Step 5 – Draw a Gradient on the Mask Using the Gradient Tool
Now we can edit the layer mask to change how the two layers blend!
First, make sure that your default foreground and background colors are reset. These are found on the left-hand main toolbar near the bottom – they are two square boxes with color in them. If you press D on your keyboard, this should reset them.
We want the foreground color to be black and the background color to be white. This is essential as it affects when we apply a gradient to the layer mask.
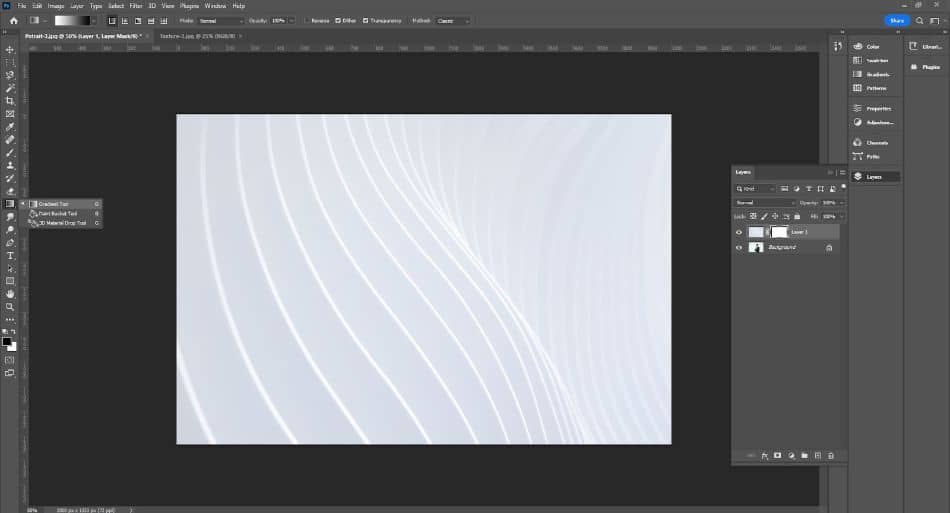
Next, select the gradient tool and ensure it is set to the “Foreground to Background” gradient. This should be the default option unless you have used the gradient tool since.
If it isn’t the default selection, click on the gradient bar in the top toolbar – this opens the list of presets. You should see a list of folders – click on “Basics” and select the first one on the left.

This next part is something you have to learn. The basic process is to draw a gradient on your image with the layer mask selected.
With the “Foreground to Background” gradient selected, the white areas will be opaque, and the black areas transparent. Or, the gradient’s black part will merge into the layer below.
Therefore, how you drag the gradient affects how the two layers are blended together. I advise experimenting with this and seeing how dragging the gradient tool merges the two layers – it’s difficult to explain.
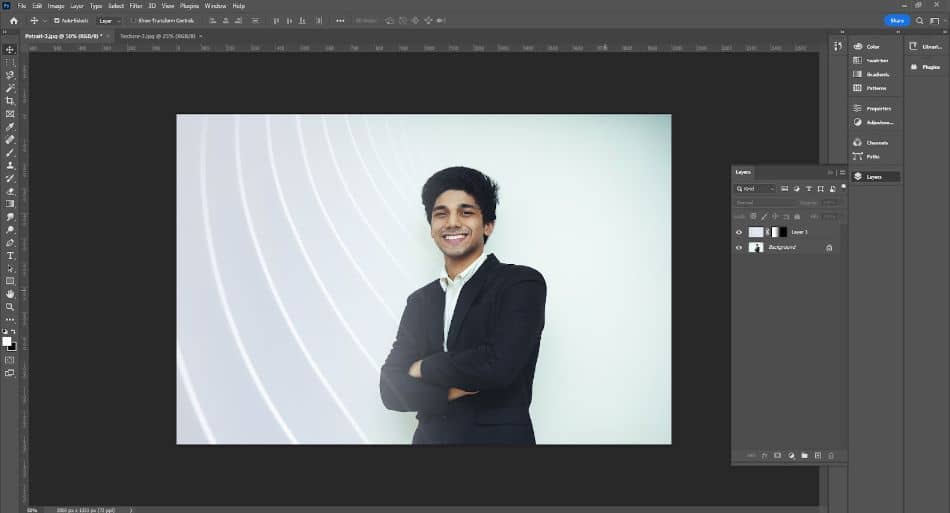
You should now have a layer mask applied, and depending on how the gradient was drawn, the layers should be blended! As you can see from the below image, this can create some interesting effects and be used to control what part of an image is merged into another.

Boost Your Photoshop Skills
I can’t stress the importance of layers, blend modes, and layer masks enough in Photoshop. These are vital tools if you want to make complex photos and images. Blend modes alone give you fantastic flexibility and allow you to merge different things together.
Additionally, layer masks are perhaps one of the most versatile features available. By using these and changing the layer opacity, you can easily blend two images in Photoshop. Indeed, you can apply these techniques for other things like merging text and shapes with background images – endless possibilities.
Frequently Asked Questions
No, Photoshop does not have a specific blend tool. However, it is possible to blend two images in the software using various methods. For example, you can use layer masks, change the layer opacity, or change the blend mode of the top image layer.
Yes! The simplest way is to use the blend modes feature. First, open both images and drag one onto the other. This should create a new layer. Next, re-order the layers, so you have them in the correct order you want them displayed. You can then simply change the top layer’s blend mode – this affects how it merges into the layer below.
There is no blending tool or blending option in Photoshop. The blend modes tool is closest to this and can be accessed in the layer toolbar. This allows you to change how a top layer blends or merges with the layer beneath it. There are some interesting effects; this is a primary method of blending two images in Photoshop.
You can first change the opacity of layers in photoshop. For example, you could reduce the opacity of a top layer image so that it blends with the background image. Secondly, you could use the blend mode option to change how two layers interact and merge with each other. There is also the option to use layer masks.
A layer mask allows you to merge two images in Photoshop or merge objects like text and shapes. You can assign a specific blend mode to a layer mask and add gradients so that the layers merge gradually or in specific ways.
Paul is a lifelong photographic hobbyist and has been taking epic shots from around the world for the last decade. His travels have taken him to places like Antarctica, Thailand, and Greenland and this has given him the chance to photograph places few people have seen. As a self-professed nerd, Paul loves photo editing and his programs of choice are Lightroom Classic and Photoshop. In recent years Paul quit the standard office life and became a full-time freelance writer to share his passion for photography and tech with those wanting to learn.