(Last updated on February 2nd, 2023)
Procreate’s layer opacity tool is one of the essential features of the software. It sounds similar to Photoshop’s layer opacity, but some key differences exist. We’ll go over how to use this tool and make layers in Procreate appear transparent.
Procreate’s Layer Opacity Function
Procreate is a more desirable app for artists using an iPad, but it takes some learning to master. One of the critical properties to become accustomed to early on is Layer Opacity. As the title implies, Layer Opacity determines how transparent or opaque a layer will appear.
The opacity measures in the same way Photoshop allows for layer opacity. The opacity is scaled on a range of 0 to 100. The closer the opacity is to 0, the closer it is to be fully transparent.
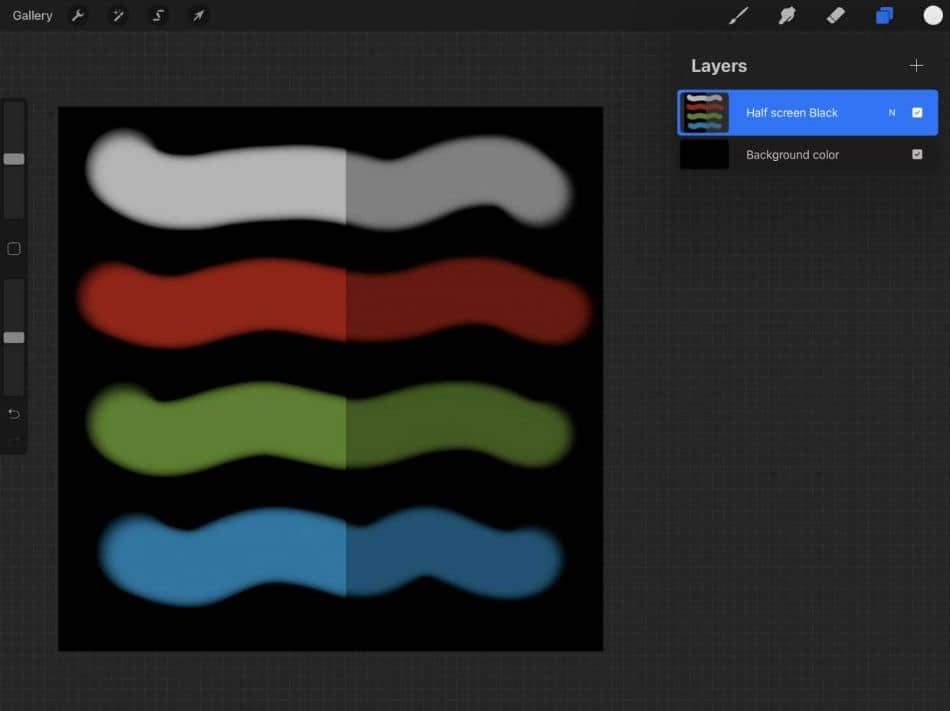
Layer opacity can be used to give more depth to your designs. A shiny effect can be made by creating a specularity layer and then turning down the opacity.
The Layer Opacity doesn’t even have to work with your drawings. Since it’s part of a layer, this can also work for images. Fade your photos into the background with this effect as well.
How To Use Layer Opacity
Here’s a step-by-step guide on how to apply layer opacity in Procreate.
- Start by selecting a layer with something on it. It could be a drawing or an image.
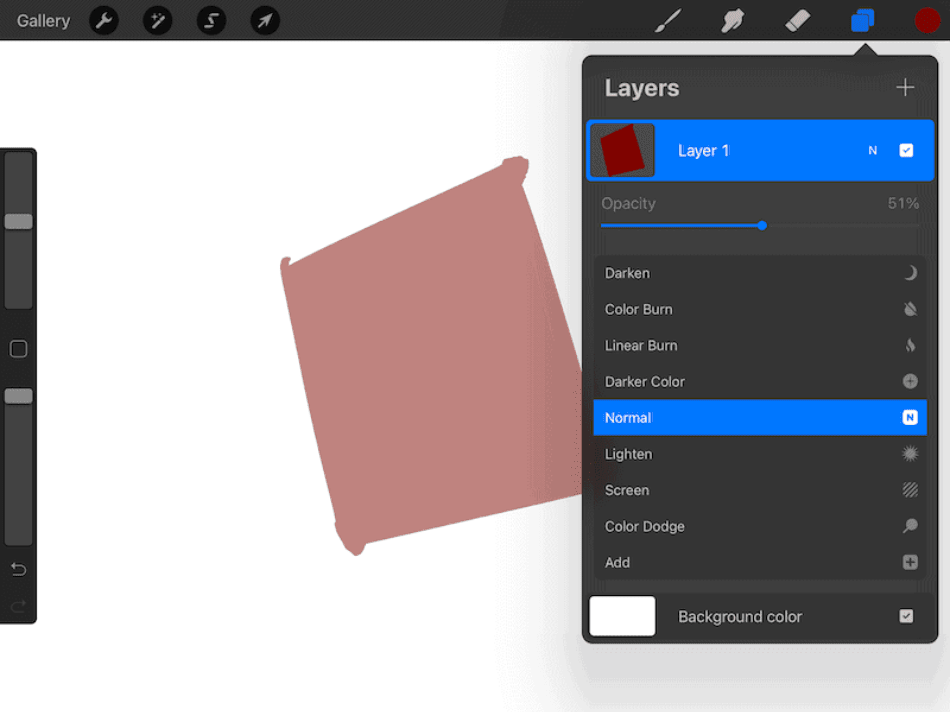
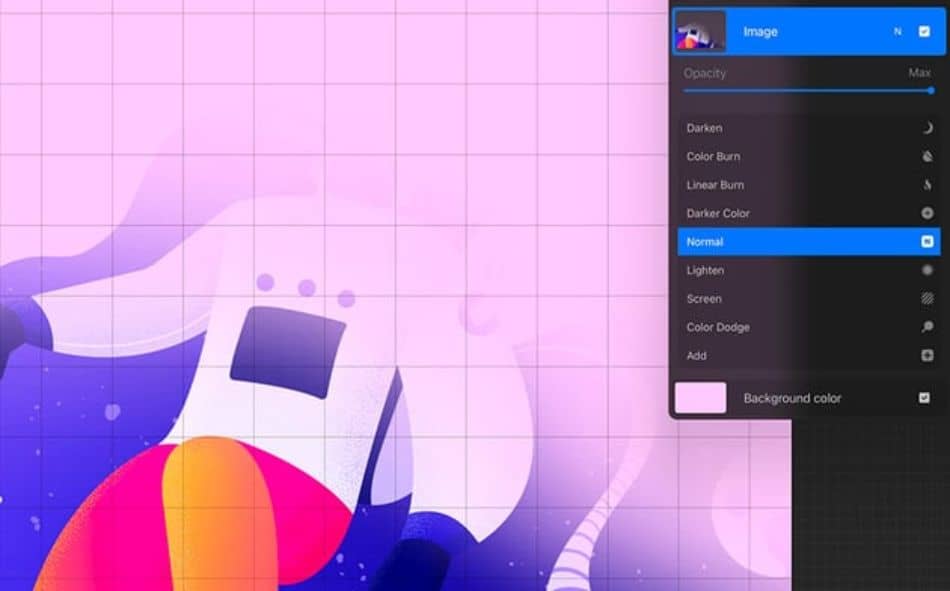
- With the Layers Panel open, navigate to your layer and expand that layer’s settings for more options. This can be accomplished by tapping on the layer and then tapping on the N within it.
- With the layer settings open, there should be a slider for opacity at the top of the selections. Drag the slider with your finger and watch as the opacity changes for that layer.
Like Photoshop, Procreate stores the opacity information in the layer settings at all times. This means you can go back and change your opacity at any time with just a few taps in the layers panel. Having the opacity easily editable can make for quick work when working with multiple layers that require experimentation in their transparencies.
Finding The Opacity
When you change the opacity of a layer, it’s essential to keep in mind the percentage change. This information is helpful if you want to remember a setting for future projects or duplicate layers. Of course, this may mean returning to the layer settings multiple times.
Thankfully, there are easier ways to bring up the Layer Opacity feature than the one previously mentioned. Another similarity to Photoshop, there was once a time when Procreate placed Opacity in the Adjustments tab. While the Opacity has been removed from that tab, there are easier ways to find Layer Opacity.
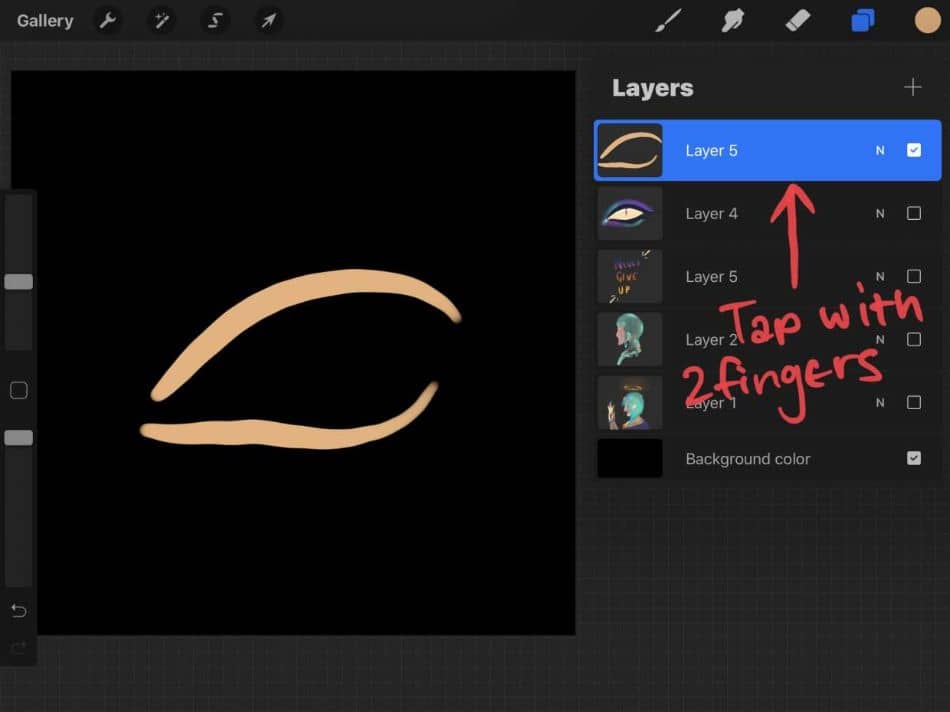
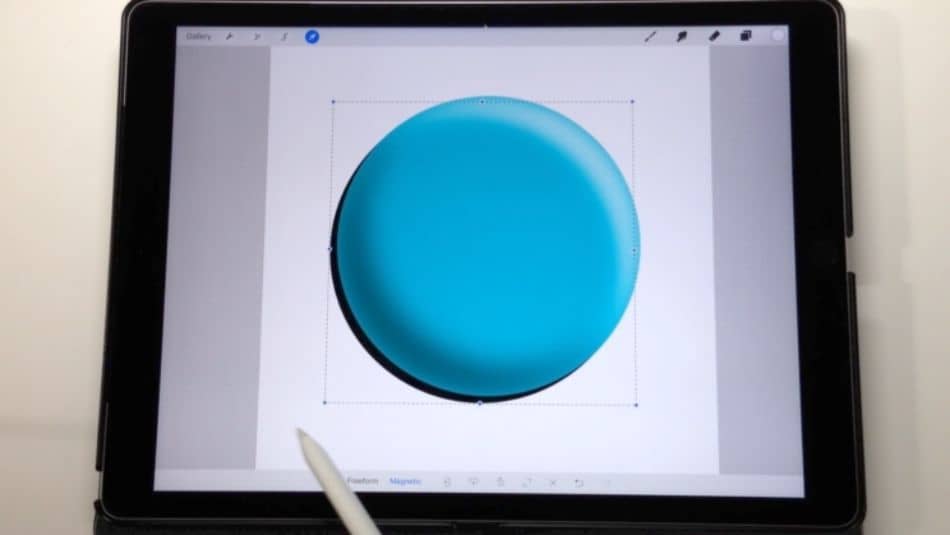
Procreate has a quick-selection function for opacity. All you have to do is select your layer from the Layers Panel and double-tap on that layer. Look at the top of the screen, and you should now see the opacity level at the top of the canvas, along with the slider. Tap and drag around the canvas to alter the opacity.
It’s up to you which method you feel works best. Quick-selecting the opacity can be a time-saver, but the layer settings method also has its benefits. There’s more to play with in the layer settings than just the opacity.
Look below the opacity slider in the layers panel, and you’ll see options for further blending the layer. These options at your fingertips can be a great way to experiment if the Layer Opacity is not producing the desired results. Maybe you just need to try Screen or Darken blending instead of trimming opacity levels down.
Challenges of Layer Opacity
Despite how easy it is to find the opacity tools, it can be challenging to use them just right. Too much transparency can make a layer appear blurry or pixelated, depending on the quality of the design. Too little transparency can create an undesired effect for an understated design.
Since the Layer Opacity affects more than just the visibility, it’s essential to consider what you’re placing within that layer. This is especially true of working with images as they carry different information than something you draw. Keep this in mind when you start working with opacity in your Procreate projects.
Using Layer Opacity in Procreate Pocket
For those using the mobile phone version of Procreate known as Procreate Pocket, you may be wondering if this feature exists in this version as well. The good news is that the iPhone adaptation of Procreate does have an opacity function. That being said, it’s a little different in terms of where to find this tool and how to use it.
Here’s a guide on how to use opacity on layers in Procreate Pocket:
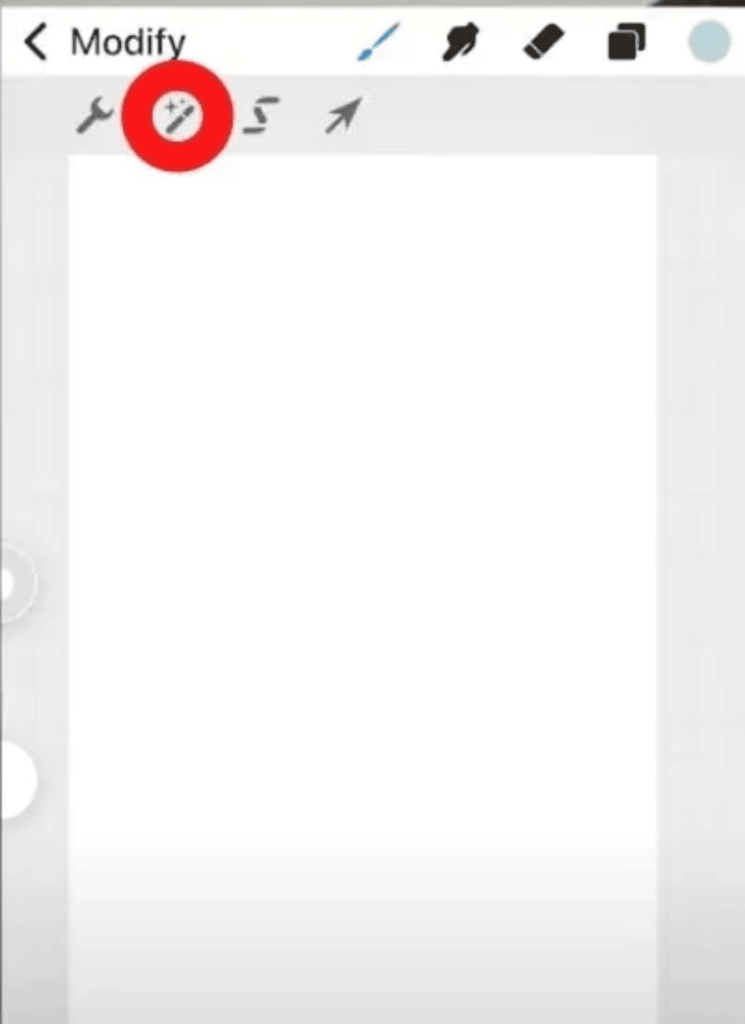
- With a layer selected in the app, navigate to the Modify option located at the top of the interface. Click it and then click on the magic wand.
- After selecting the magic wand symbol, you should now be able to select the Opacity option. This option will feature a slider that can be dragged around to determine the opacity levels.
Procreate Pocket’s opacity feature is functional enough for iPhones though not as intuitive as Procreate for iPads. The major difference is that the iPad has more space and the Apple Pencil to use while Procreate Pocket relies entirely on your fingers for its small screen. Bear this in mind if you’re deciding on which device to use with Procreate.
What Can Be Created With Layer Opacity?
- Shadows: If you’re drawing shadows, you may not want a deep black. Shadows often don’t look so dark if there are other light sources. Placing some lowered opacity on a shadow layer can make the shadows feel more natural and believable depending on the setting and tone. If you’re not going for some spooky tone, it can help to have lighter shadows to create a lighter feel.
- Shine: Let’s say you’re drawing a car and you want the car to have a shiny coat, looking as though it just got a fresh waxing. Layer Opacity can make these highlights of specularity feel more like a shine and less like white blotches.
- Lights: Suppose you’re creating a design where you want light coming through the window but don’t want it to be a blinding ray of white or yellow. Applying some lowered opacity to this layer makes the light feel more like it’s bleeding in from the outside and not blasting into the room.
- Reflections: Reflections on a surface that is not a mirror often have a faded effect. Layer Opacity can aid in making these reflections look more believable.
- Fading: Want to make that person in the background appear more like a ghost or a looming spirit? Tweaking the opacity levels can help that design better fade into the environment.
- Water Effects: Applying opacity to a layer with water effects can make the water feel more believable. This can include everything from blotches of darker blues to create depth or nets of white to recreate the refraction.
Tips and Tricks
- Keep It Subtle: Play around with the opacity somewhere in the middle for lighter effects. Sometimes the subtlest of opacity changes can significantly affect your designs.
- Remember The Levels: 0 is transparent while 100 is opaque for Layer Opacity levels. Keep this in mind for when you start applying opacity but later have to go back to make altercations.
- Always Have a Layer Selected: If you try the quick-select method for opacity, you won’t be able to apply an opacity if there’s no layer selected. Always have the correct layer selected to change the opacity levels.
- Quick-Select: Getting used to the quick-select method of triggering layer opacity in Procreate can be a huge time-saver, especially when it’s easier to tweak this way.
- It Can Always Be Altered: Opacity doesn’t exist in Procreate as an adjustment layer or an applied effect. It can be easily changed at any time, making for easy experimentation.
- Work With Multiple Layers: Playing around with the opacity on multiple layers can add great detail if you find the right mix. This can make a design feel more complete with shadows, light, specularity, and glows that look natural with the addition of layer opacity applied to each of these separated layers.
Frequently Asked Questions
Yes, Procreate does allow you to change the opacity of layers. You can apply opacity by either double-tapping on a layer to bring up the opacity options or by tapping the N in the layer for its settings.
Transparency can be applied in Procreate by altering the layer opacity. The opacity slider can be found in the layer settings by tapping the N of a layer. In that menu, you’ll find the slider for changing the opacity.
Images should be opaque in Procreate by default. If they’re not, you can change that by altering the layer opacity for the layer the image currently exists upon. This option can be found in the layer settings, where you’d find all the blending options. Tap and drag around the opacity slider to make the image layer more opaque by setting it to 100.
Similar to Photoshop, Procreate does have the ability to remove white backgrounds from images. To accomplish this, choose the selection tool, choose the automatic setting, and then drag around to select the white background. You can then erase that white area with an eraser tool if the foreground objects are isolated from your selection.
Layer Opacity is the only way to apply transparencies in Procreate properly. Keeping opacities organized through layers is easier to keep things together without hunting around for the specific design you’re trying to change. It’s also much easier to access opacity properties through the layers panel.

Mark McPherson has been working as a video editor and content writer for over ten years. His background started in animation and video editing before shifting into the realm of web development. He also branched out into content writing for various online publications. Mark is an expert in video editing, content writing, and 2D/3D animation.