(Last updated on November 2nd, 2022)
Wondering how to export Premiere Pro file as mp4? You have come to the right place!
In this tutorial, I will show you how to export step by step. Follow along to learn the basics of exporting and discover the many details of the export panel.
First, I will show you the basics of exporting a video as an mp4 file. Then, we will go over the export settings panel in detail.
Related: Adobe Premiere Pro vs Premiere Elements (2023 Comparison)
Exporting Premiere Pro files as MP4
To export Premiere Pro in MP4 format, follow these simple steps:
- Open up the interface.
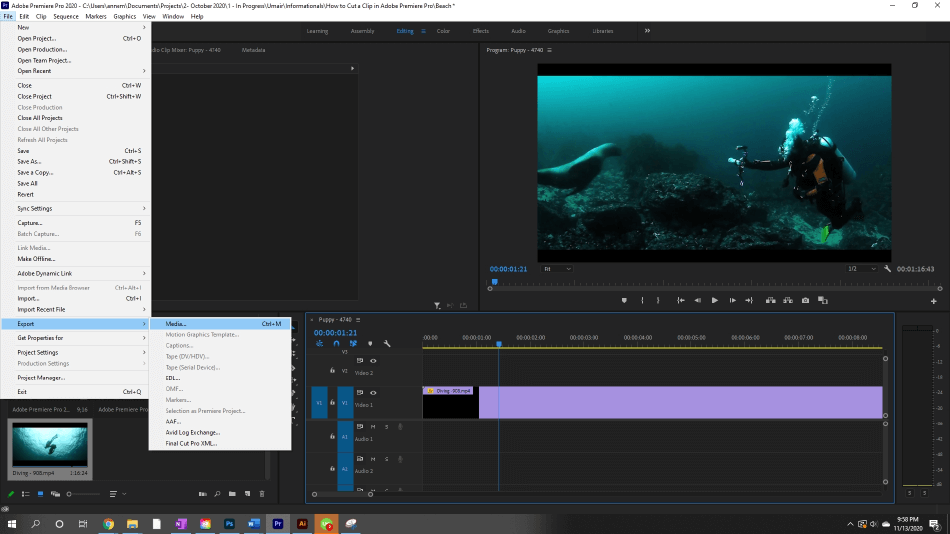
- Go to File > Export > Media, or Ctrl + M to open the Export Settings Panel.
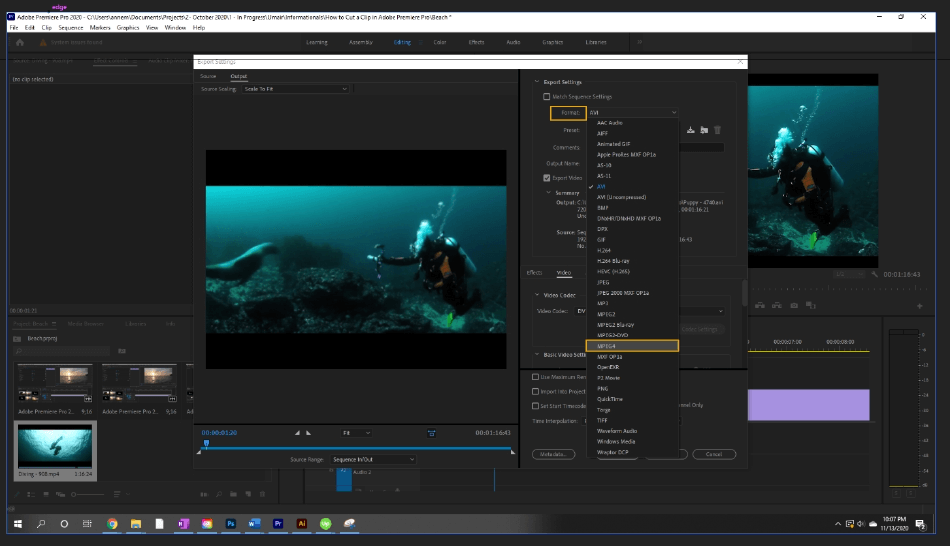
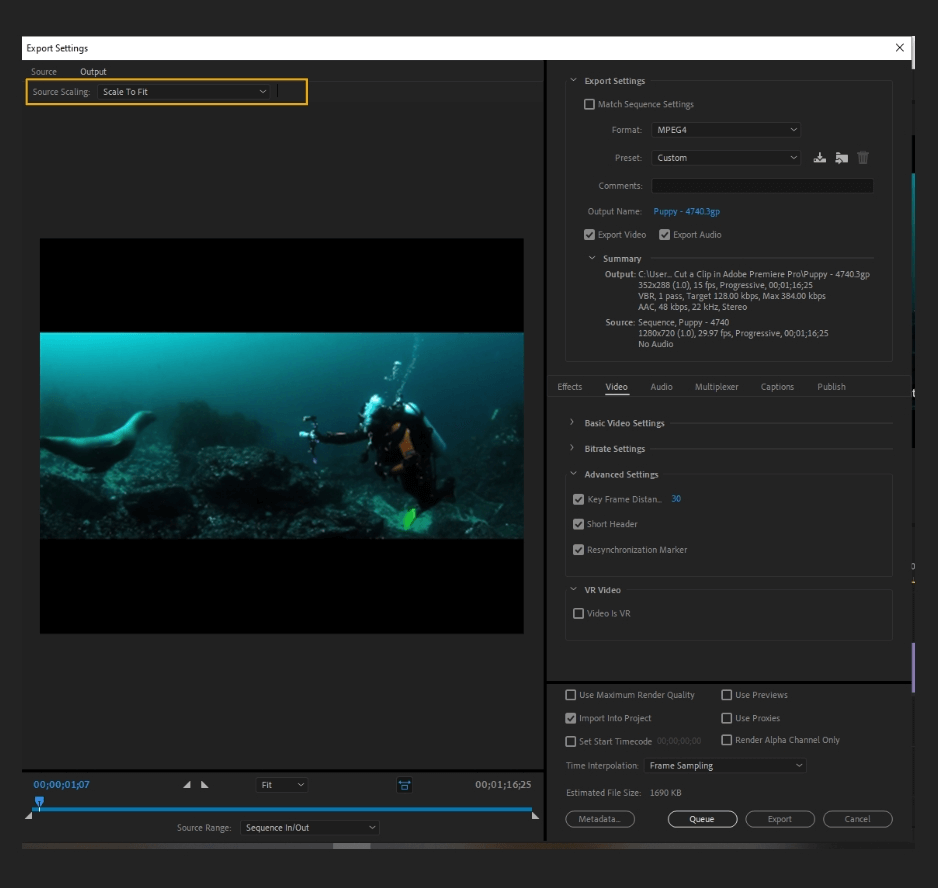
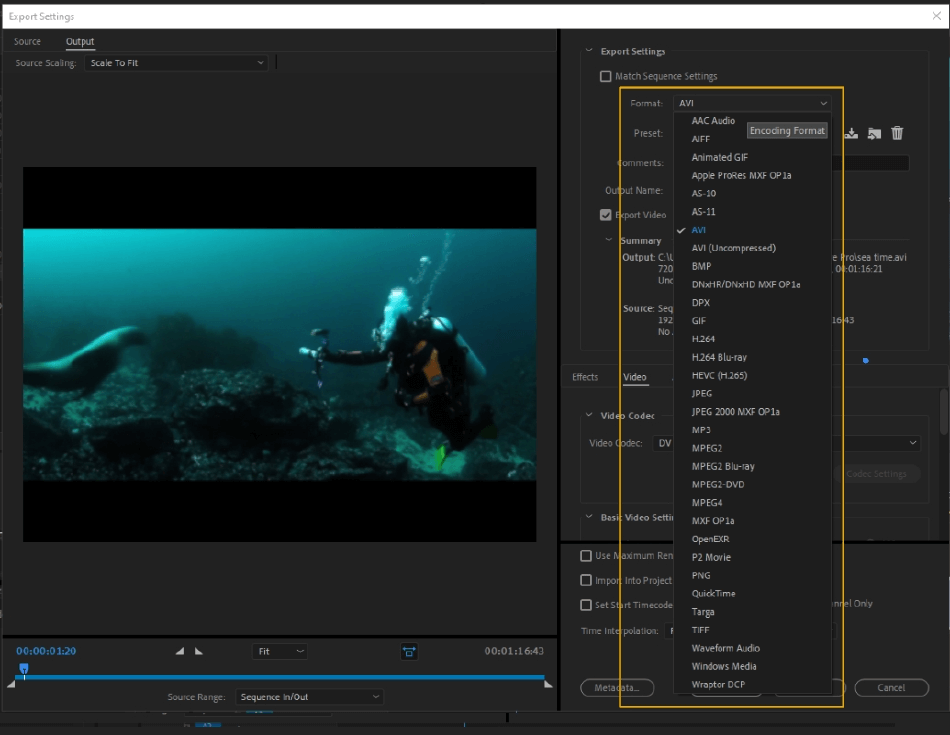
- To export as MP4, simply change the format to MPEG4 at the top of the panel.
- Click Export.
For more details, continue reading!
Step-by-Step Process (with Pictures)
- Go to File > Export > Media… or Ctrl + M (Windows) or Command + M (Mac)
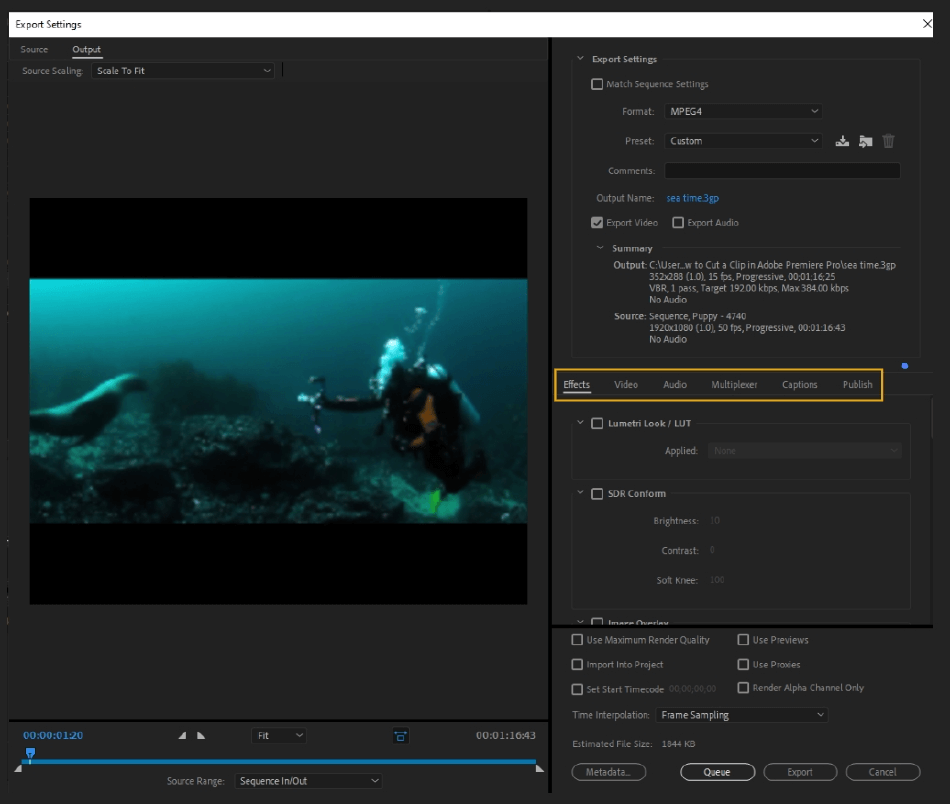
- This command will bring up the Export Settings Panel. Here, you can finetune every detail for your project. To export as a .mp4, change the format to MPEG4 at the top of the panel.
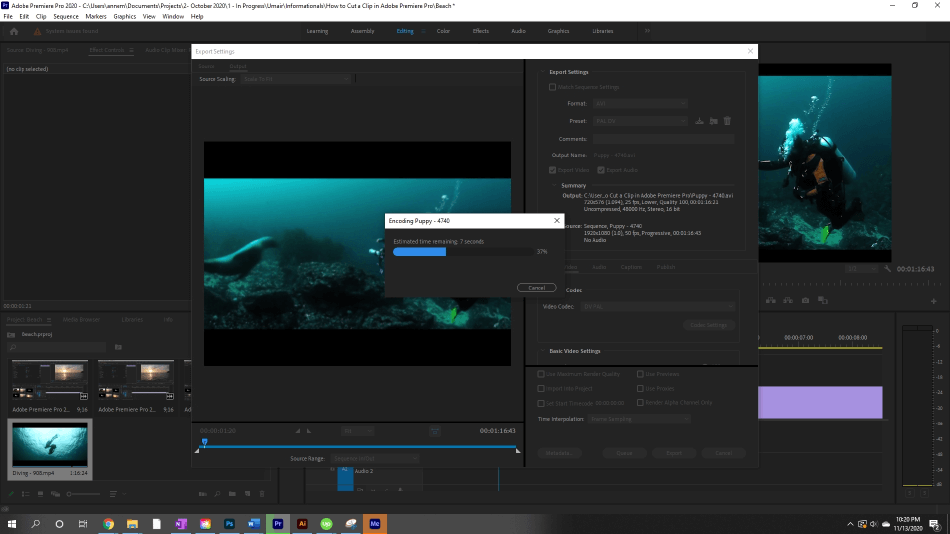
- After this, change any other settings you need (we’ll go over all of them later in this tutorial) and hit Export. The project will then process out.
Exporting a File Examined
Now, what about the other million settings on this panel? For a new video editor, this panel can seem daunting and overwhelming. Let’s explore everything on the panel and break it down.
For reference sake, I am looking at the options for MPEG4. For each format, the options can be different. You may have different tools that weren’t available, or some options won’t be available. It depends on the format. General settings will mostly stay the same.
First, let’s start with the upper left options, Source and Output.
Upper Left Panel
Source
Source shows you the source video before export settings are applied. You can switch between the Source and Output to preview how the export settings are applied to your media.
Here, you have the option to crop your image, letting you crop by a margin or by a Crop Proportion, providing you with different aspect ratios.
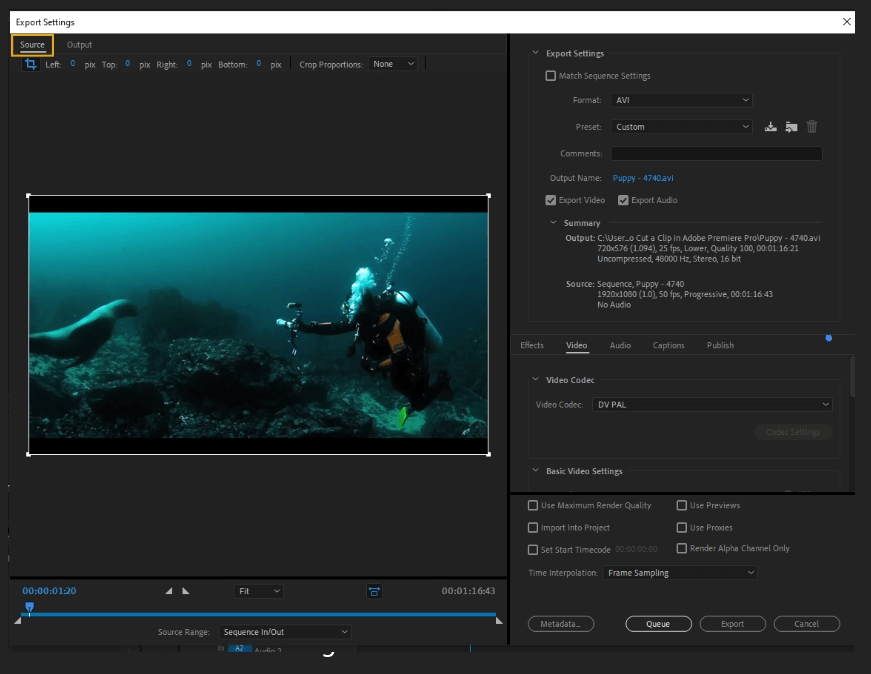
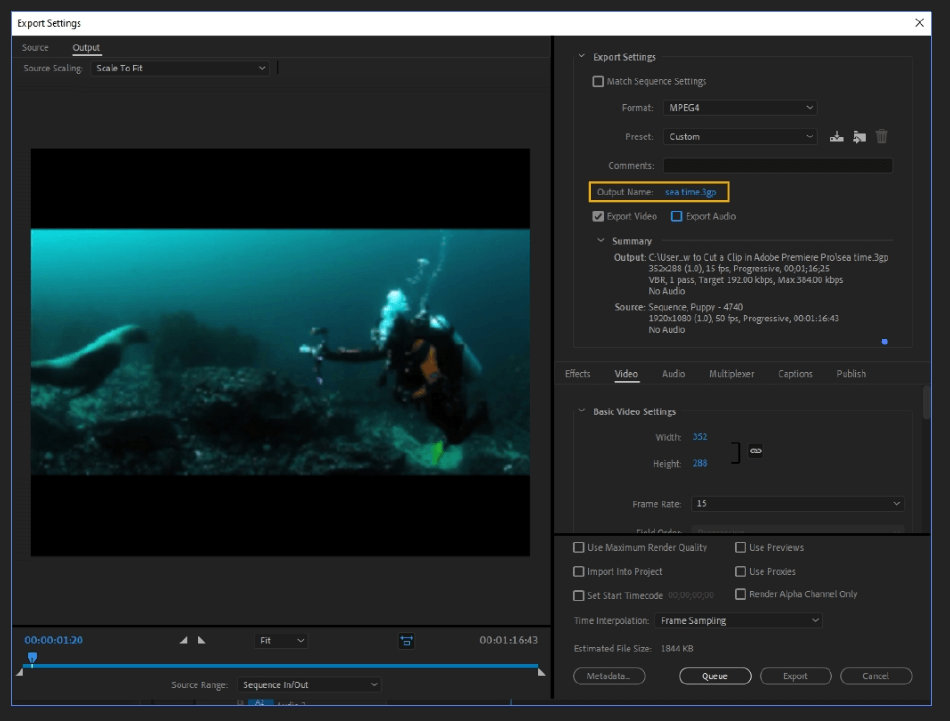
Output
The Output panel shows you what your final image will look like.
Bottom Left Panel
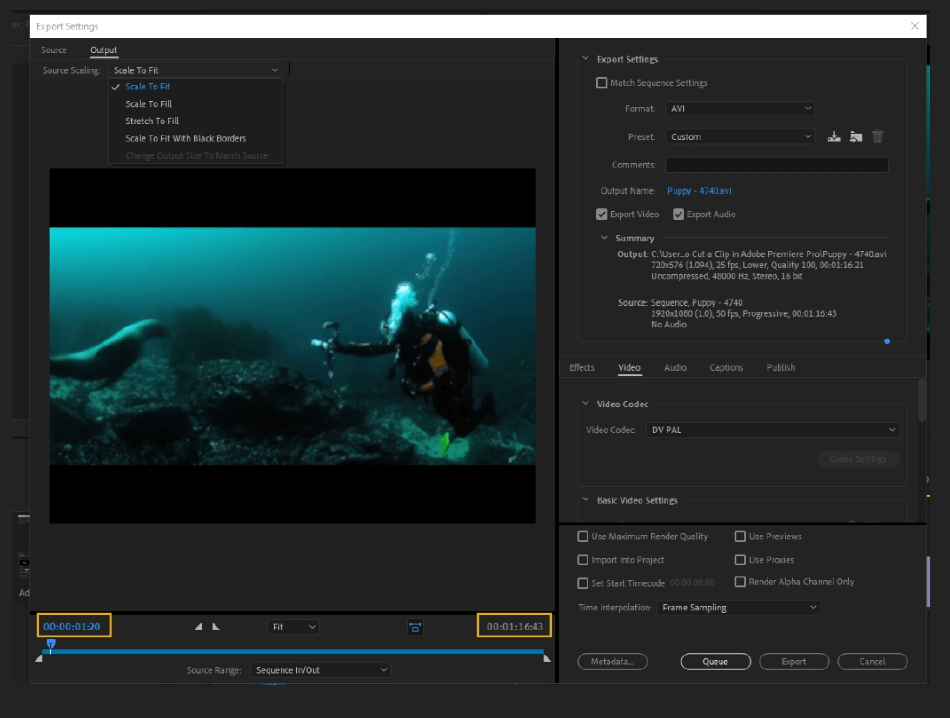
The number on the left represents where the playhead is located on the timeline. The number on the right is the total duration of the video.
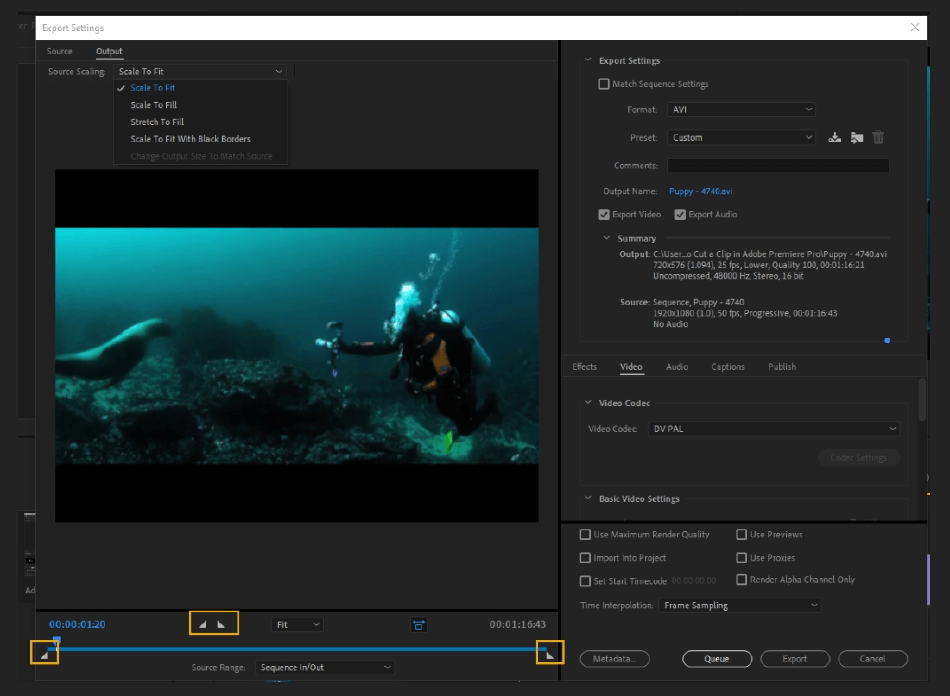
These two triangles set the In Point and the Out Point of the timeline. Another way to set the duration is by dragging the triangles underneath the timeline. You can set the video’s duration to any length, exporting the full video or a portion of it.
The timeline indicator is highlighted in blue if included in the export, greyed out if it’s trimmed out.
This button does Aspect Ratio Correction, able to be toggled on and off.
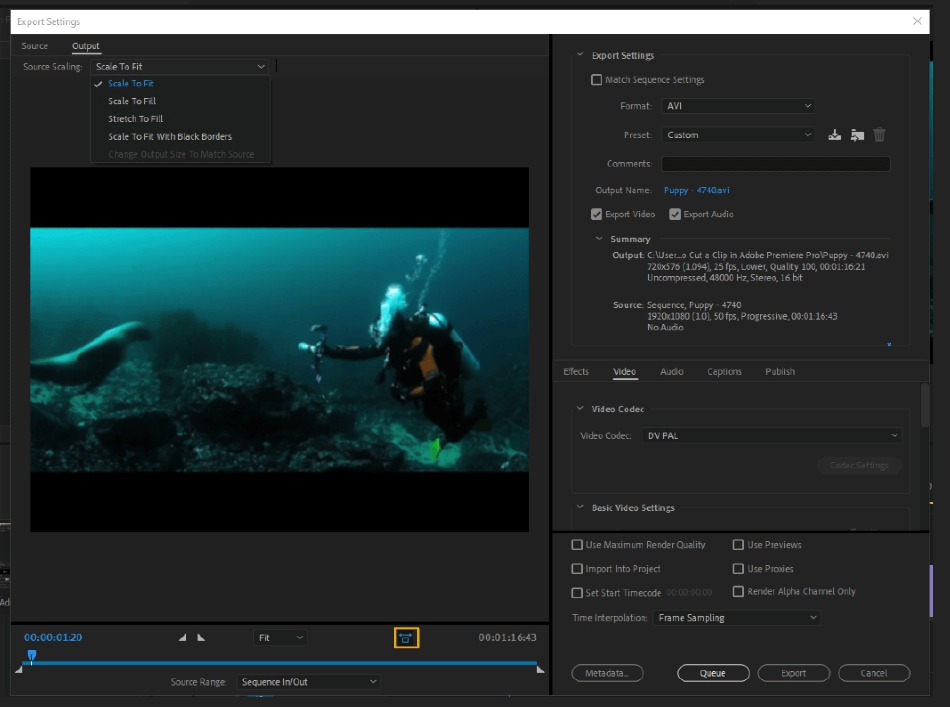
This feature adjusts the zoom in the Output preview. You can zoom in, out, or select Fit to have it fit perfectly in the frame.
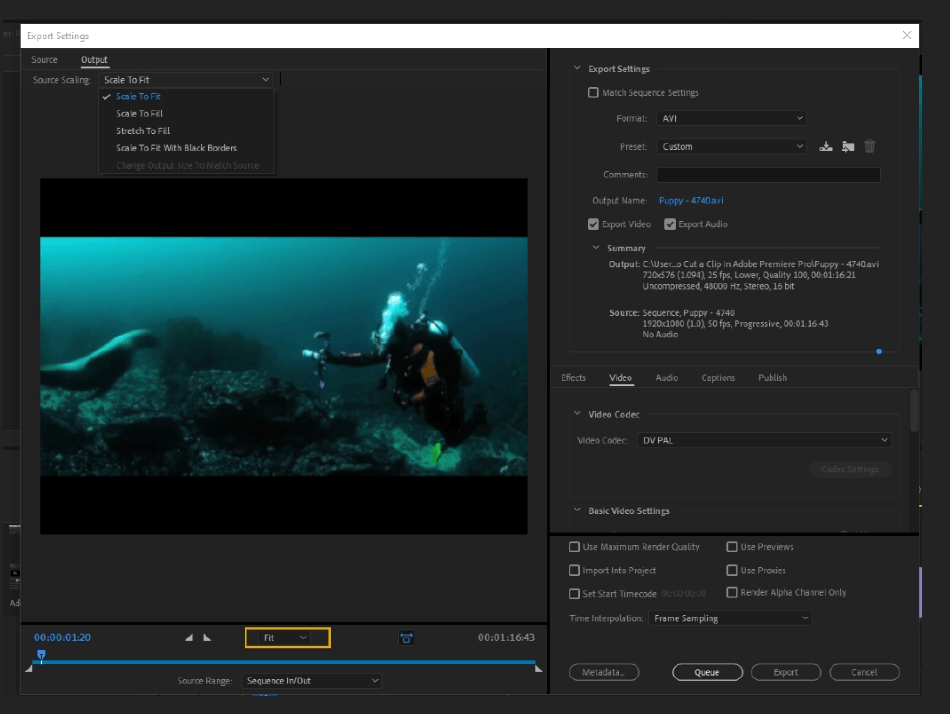
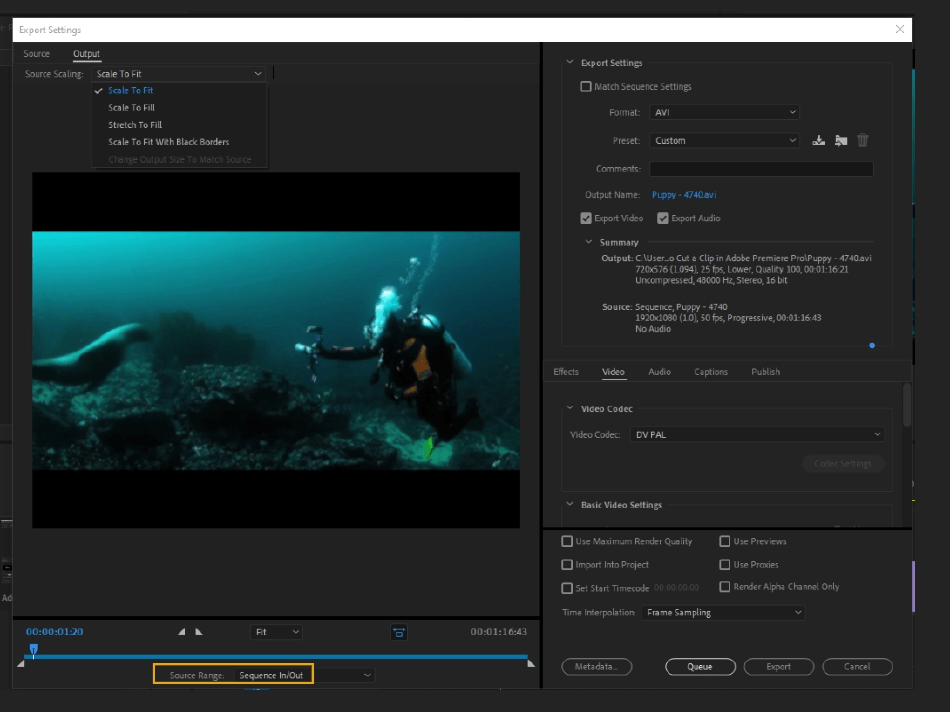
The Source Range feature lets you set the duration of your video quickly. You can choose:
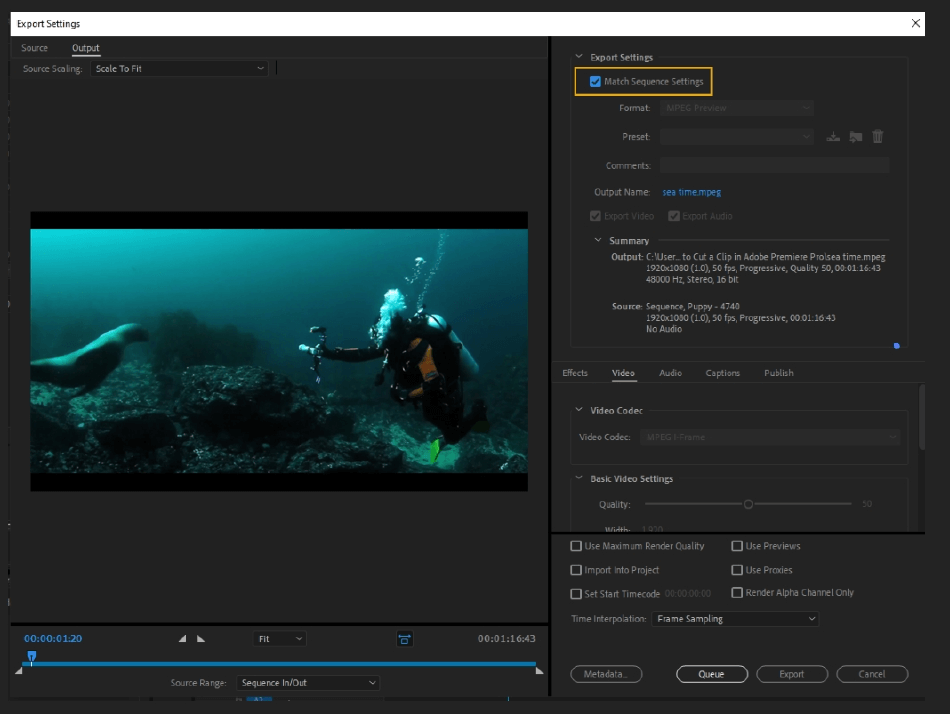
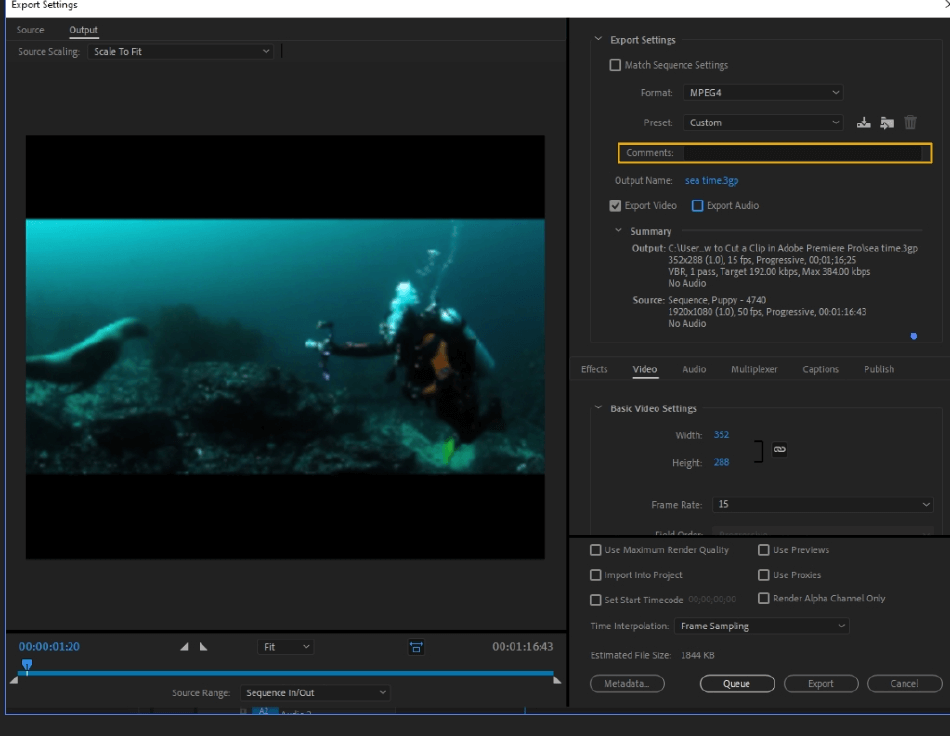
Export Settings, Top Right Panel
The Export Settings section lets you choose between presets and the format of your video. You can create custom presets to make this process even faster.

Middle Right Panel, Export Settings
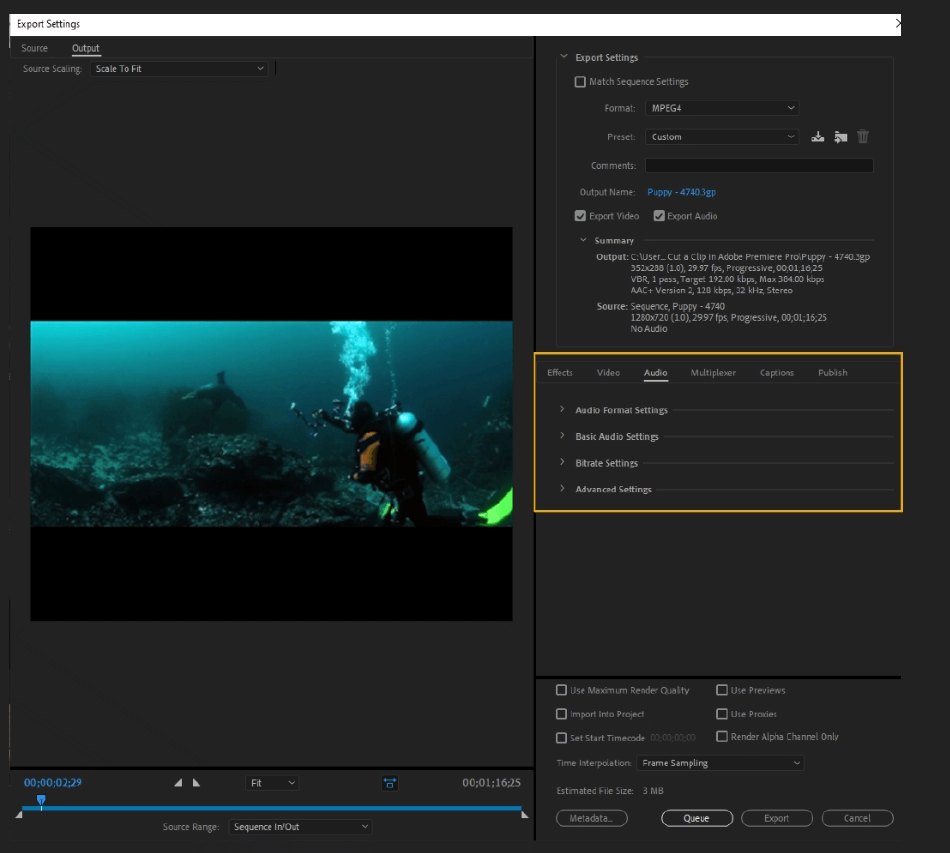
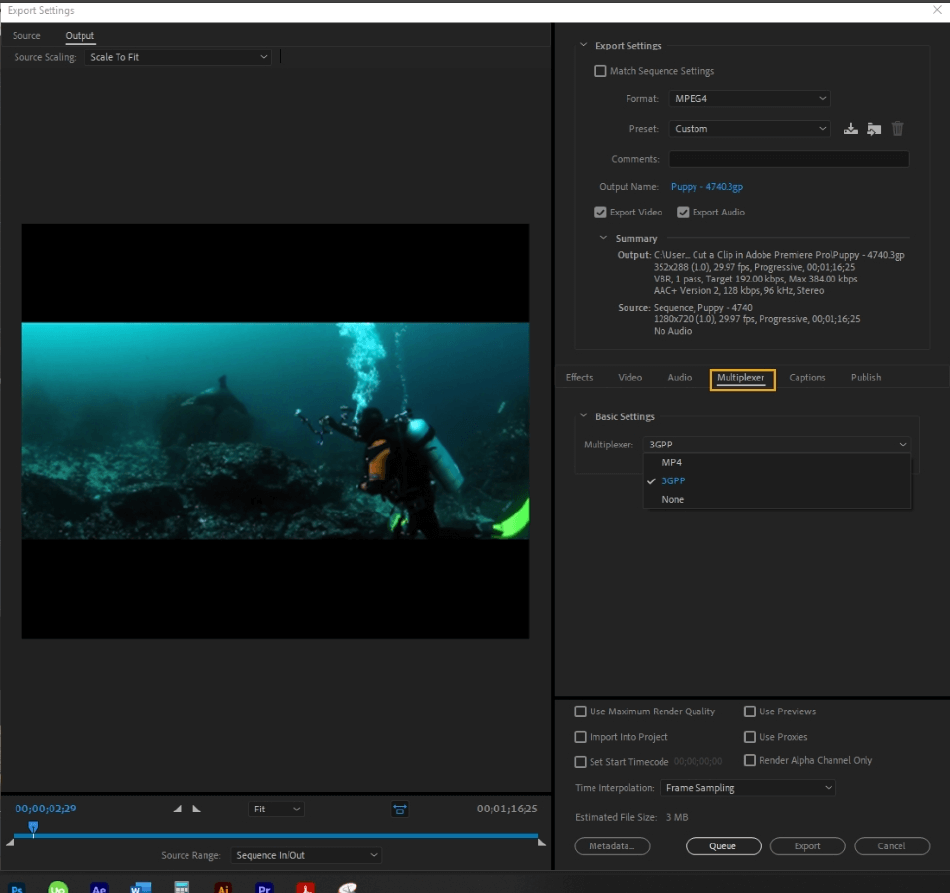
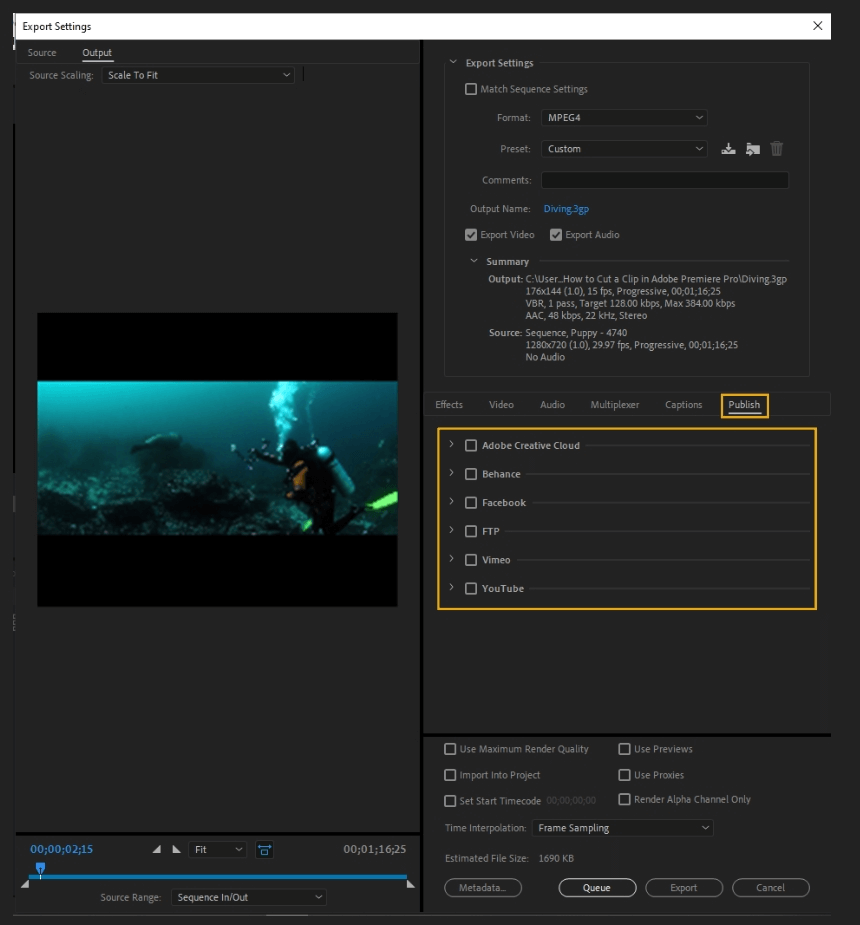
This panel has six tabs: Effects, Video, Audio, Multiplexer, Captions, and Publish. We’ll start with Effects and work our way right.
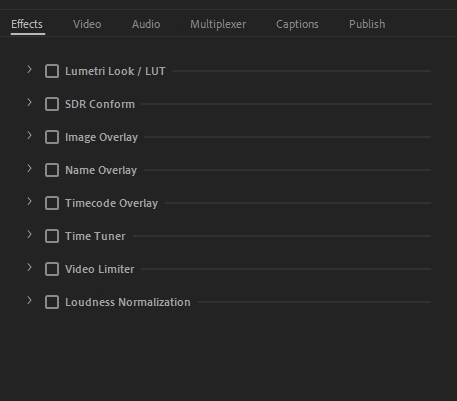
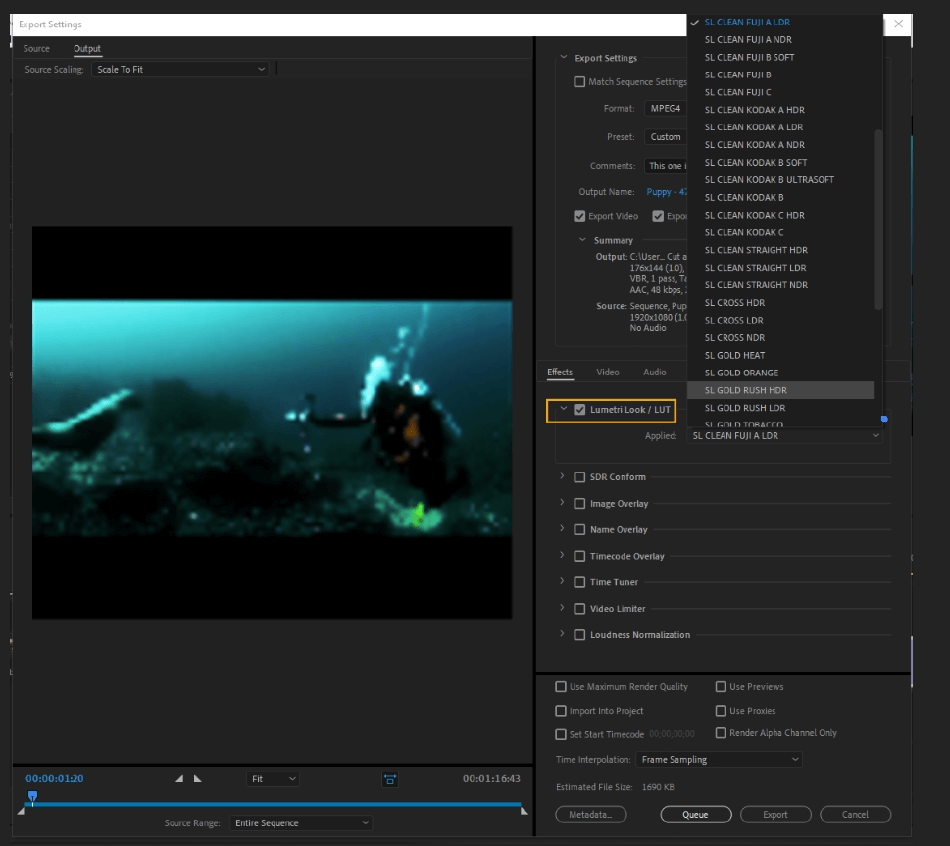
- Lumetri Look/LUT: With this effect, you can apply various color grades to the project. To apply a preset, check the box and choose a preset from the dropdown menu. You can also apply a custom preset using “Select…” on the preset options in the dropdown. The look will be applied, and you can preview it on the output screen.
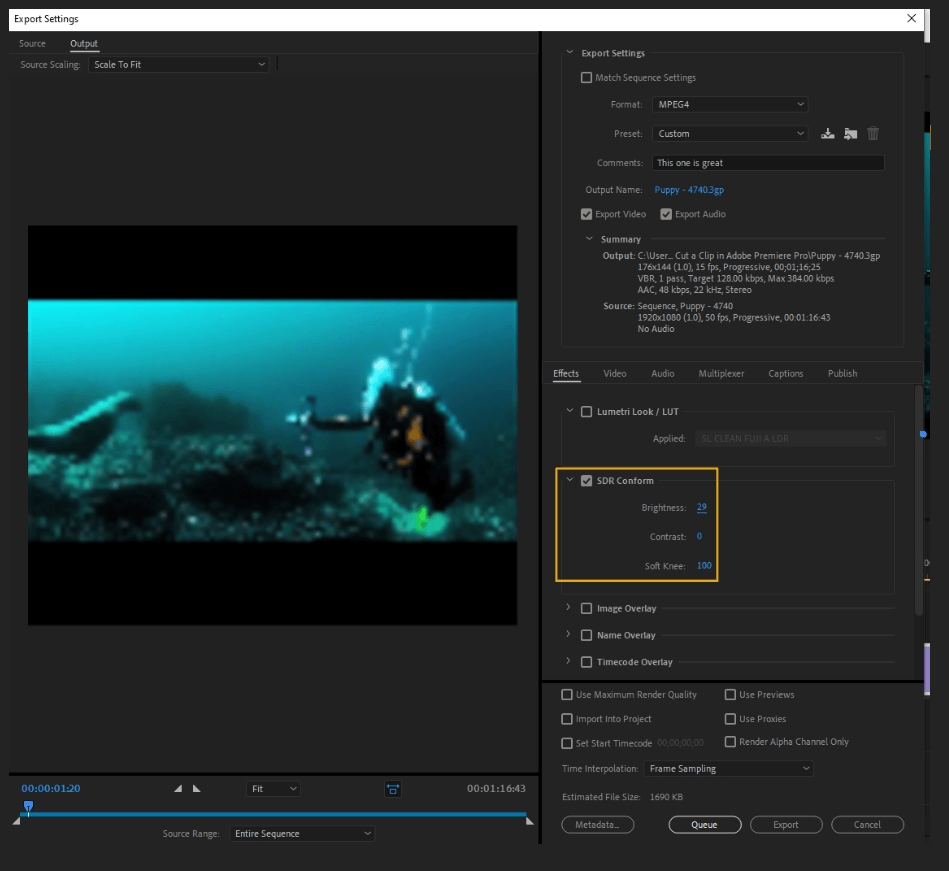
- SDR Conform: Use this effect to convert HDR video (High Dynamic Range) to SDR (Standard Dynamic Range). Converting your video allows it to be shown on non-HDR devices.
You can control the brightness, contrast, and soft knee of the video. (Soft knee, a lesser-known term, is the transition to full compression mode.) Controlling this transition avoids hard clipping, lessening distortion for your final image.
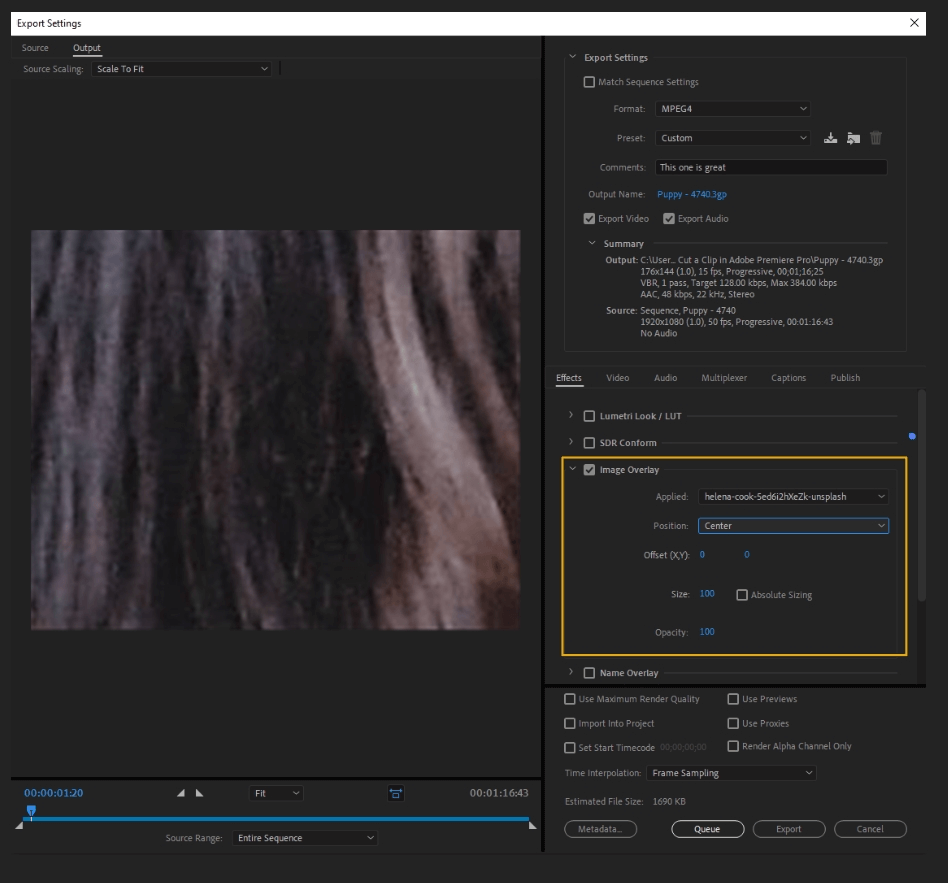
- Image Overlay: Use this function to overlay an image over your video.
- Applied: Browse and choose the image you want to overlay. You can also clear the image out and start fresh.
- Position: Position the image to where you want. You can choose center, top center, etc.
- Offset: Moves the image’s position along the X/Y axis, allowing you to nudge it precisely.
- Size: Affects the scale of the image.
- Absolute Sizing: If this box is checked, this means that the image will scale to its native resolution.
- Opacity: Adjusts the opacity of the image.
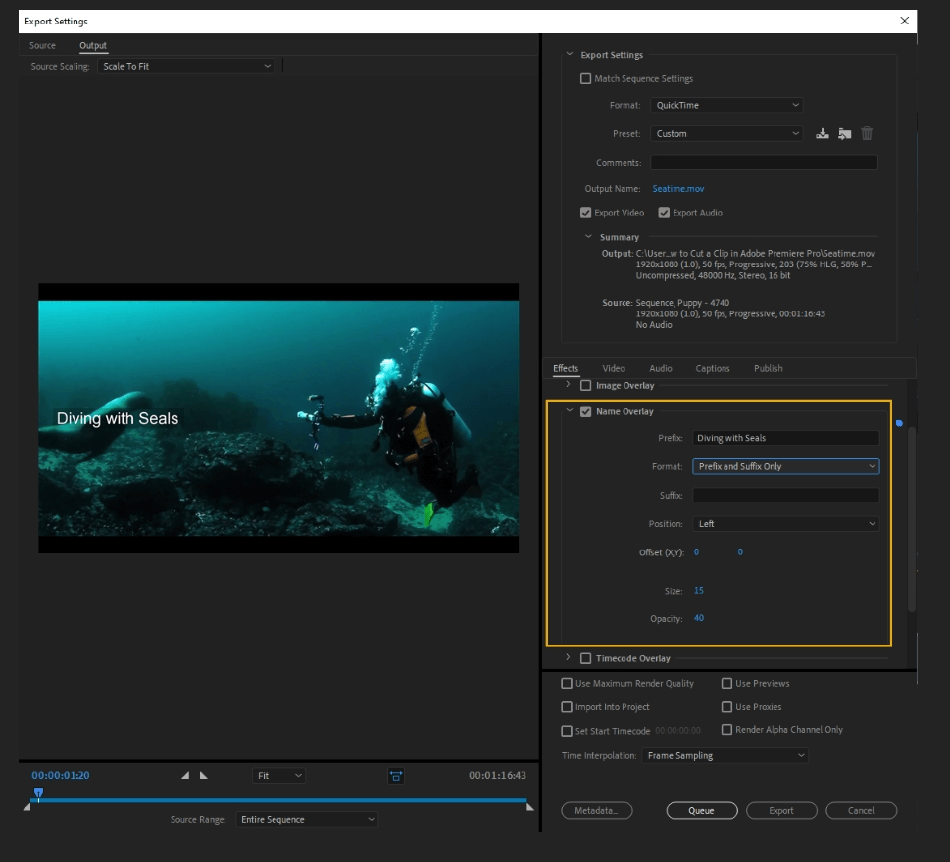
- Name Overlay: This feature lets you add text to your video. You can add a prefix, suffix, do both, use the source file name, and more. You can change the position, size, and opacity of the text as well.
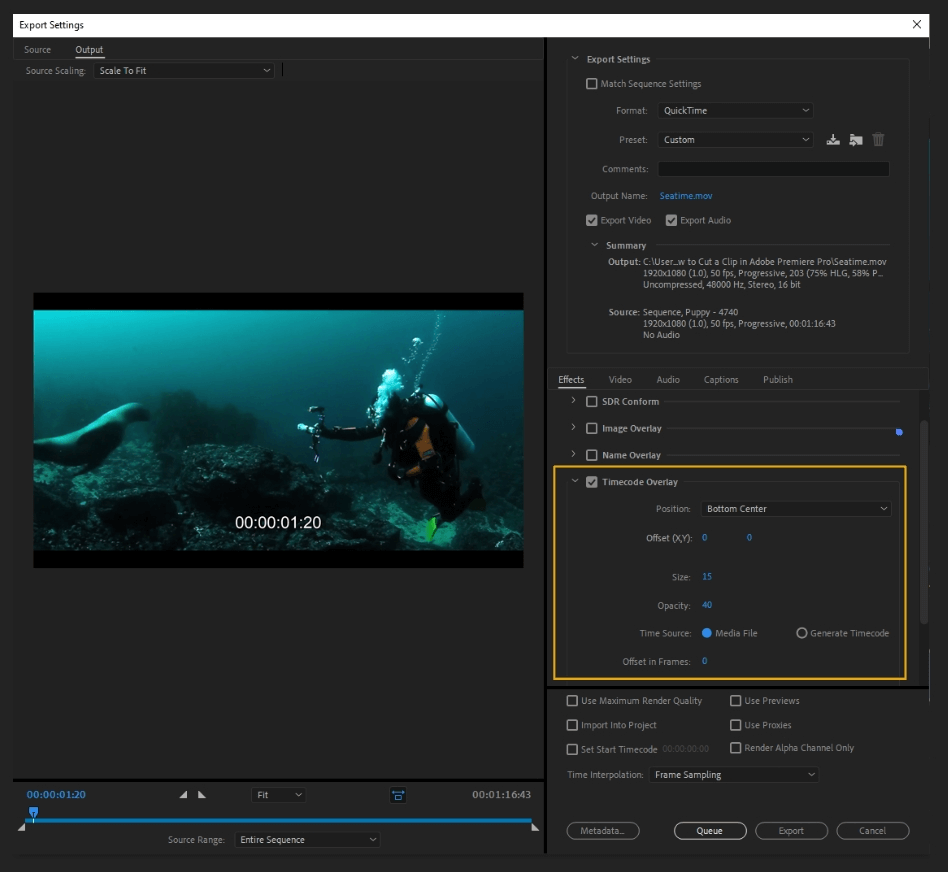
- Timecode Overlay: Adds a timecode overlay to the video. You can set the position, opacity, size, and timecode source. The source will specify how the time code is generated, whether read from the source media or created custom.
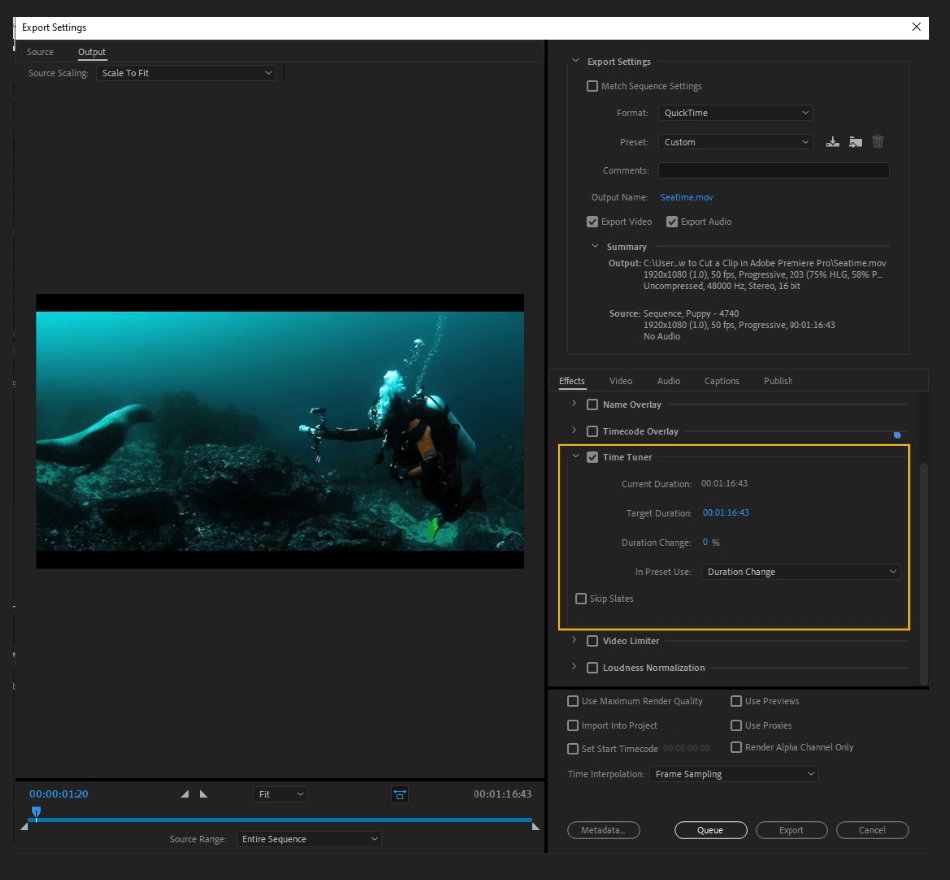
- Time Tuner: Use this feature to reduce or lengthen the duration of a video. The tool will automatically duplicate or remove frames imperceptibly, allowing you to change the sequence without reediting.
- Current Duration: Current time duration of the video.
- Target Duration: Time duration that you want to achieve.
- Duration Change: Percentage of duration change in the video.
- In Preset Use: Allows you to switch between using the duration change percentage and the target duration option.
- Skip Slates: This will skip still images longer than 10 seconds.
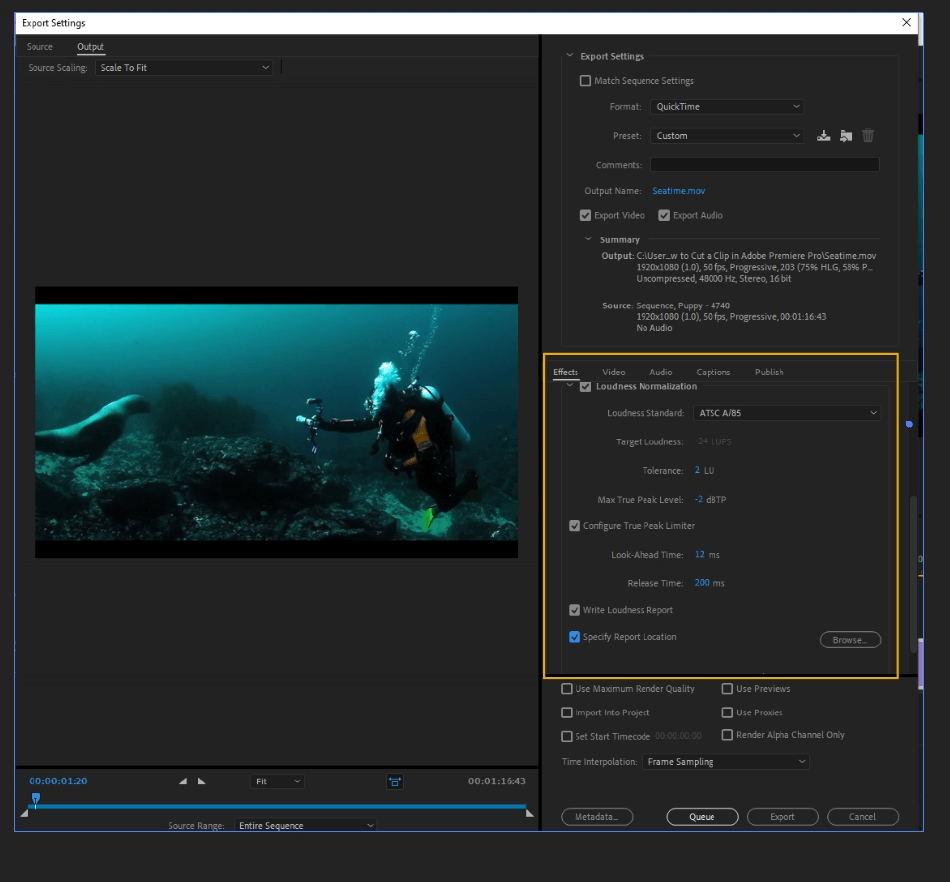
- Loudness Standard: Presets for the audio levels.
- Target Loudness: This sets the targeted loudness goal. This option is disabled for presets that have this standard already defined.
- Tolerance: Modifies the loudness when it falls outside of the tolerance range.
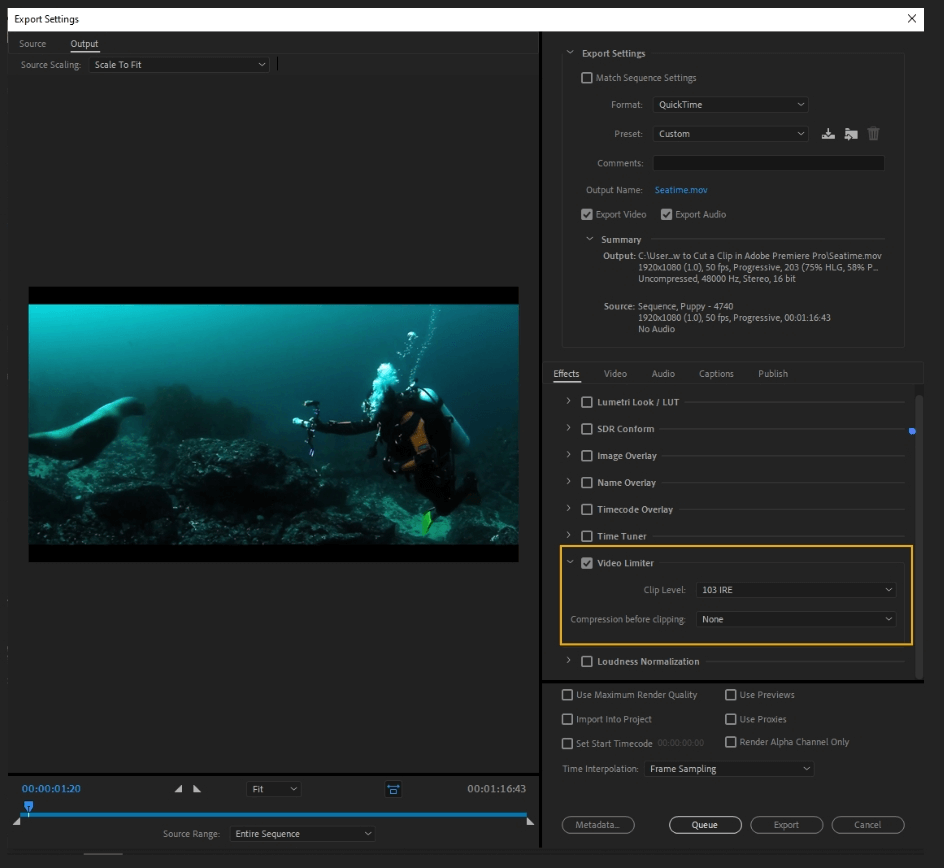
- Max True Peak Level: Sets a limiter for the maximum true peak level.
- Configure True Peak Limiter: Customize True Peak Limiter.
- Write Loudness Report and Specify Report Location: Writes a loudness report and allows you to pick the document’s location.
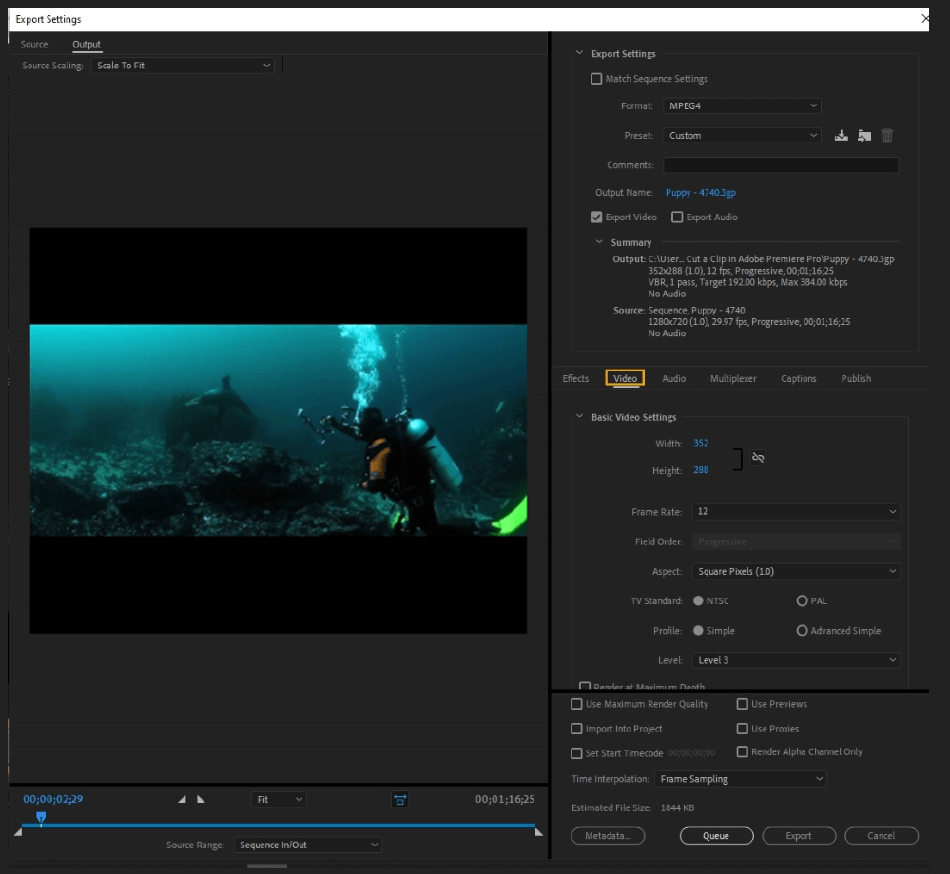
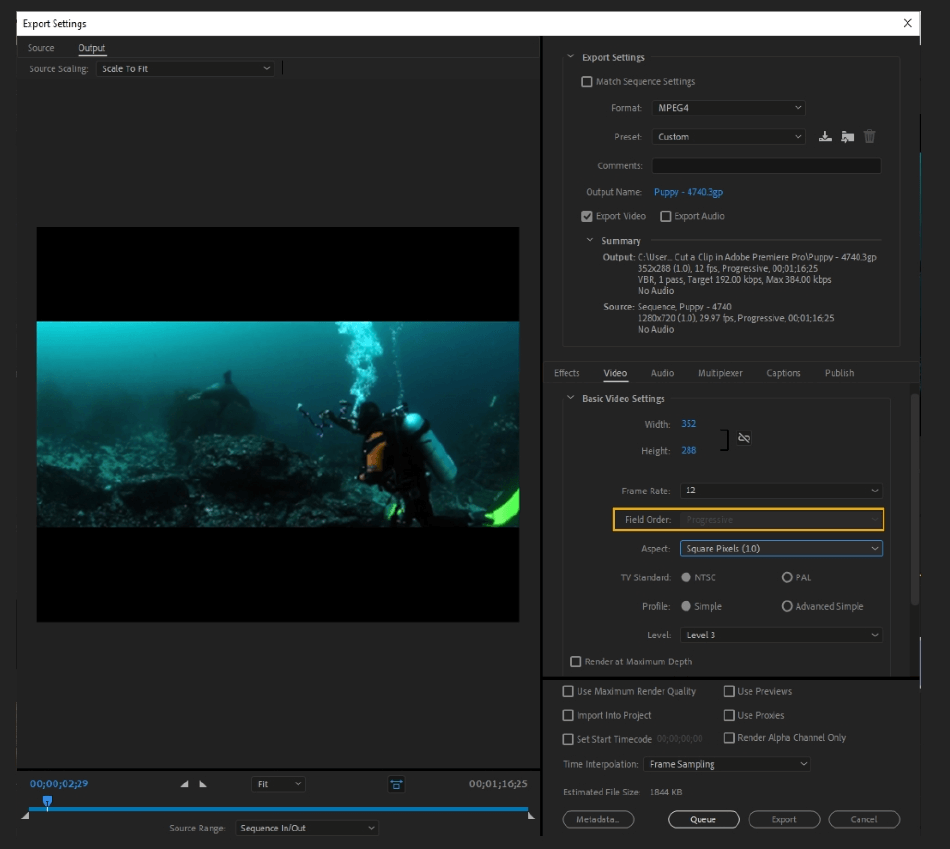
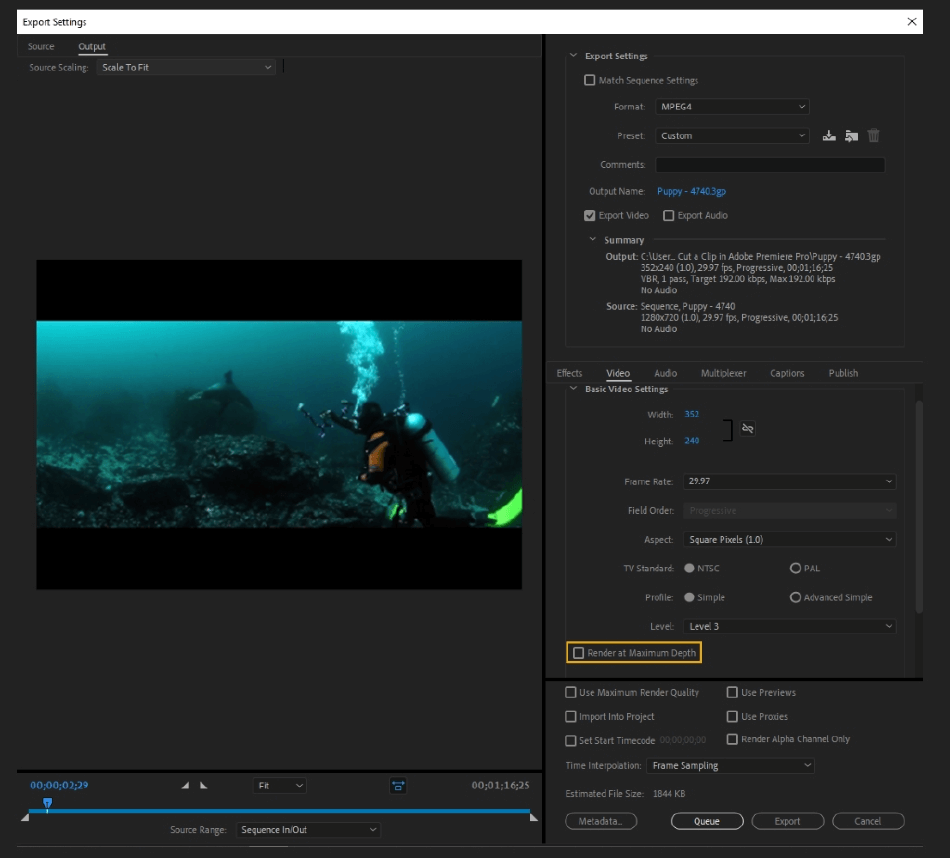
- Frame Size: Adjust the video’s frame size, either locking in the aspect ratio or not.
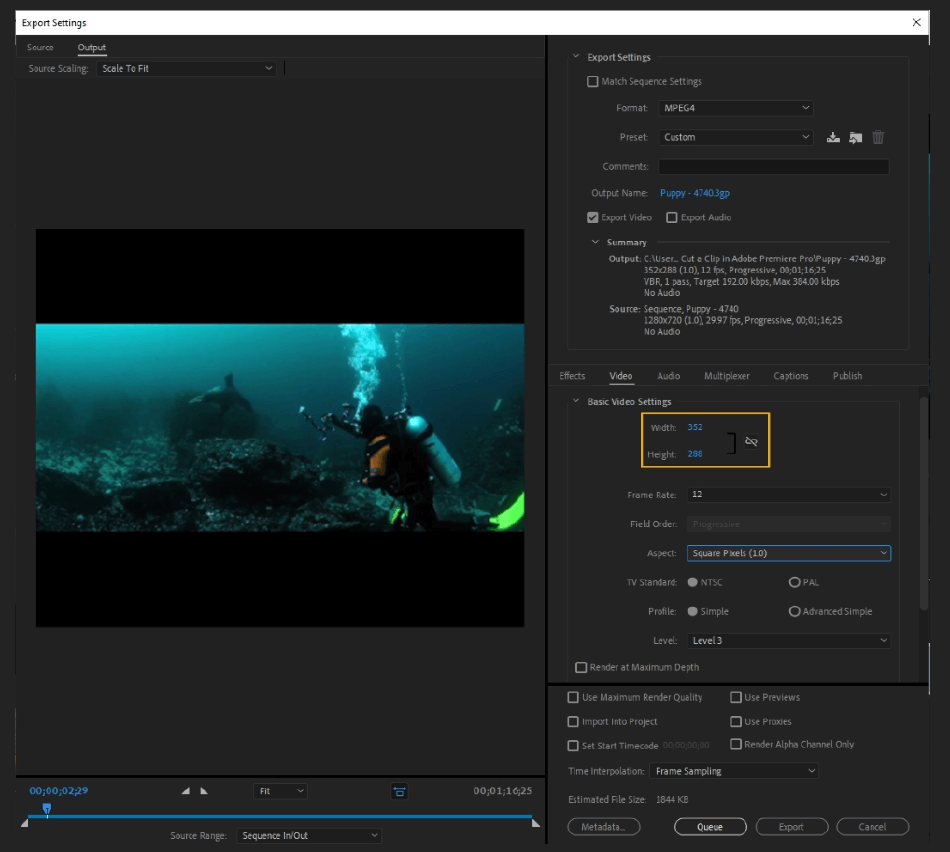
- Frame Rate: Change the frame rate of the video.

- Field Order: Change the order in which each pair of video fields is recorded. Upper First or Lower First will set the display order of interlaced fields. You would use this for interlaced formats such as PAL or NTSC; progressive is the standard for film and online media.
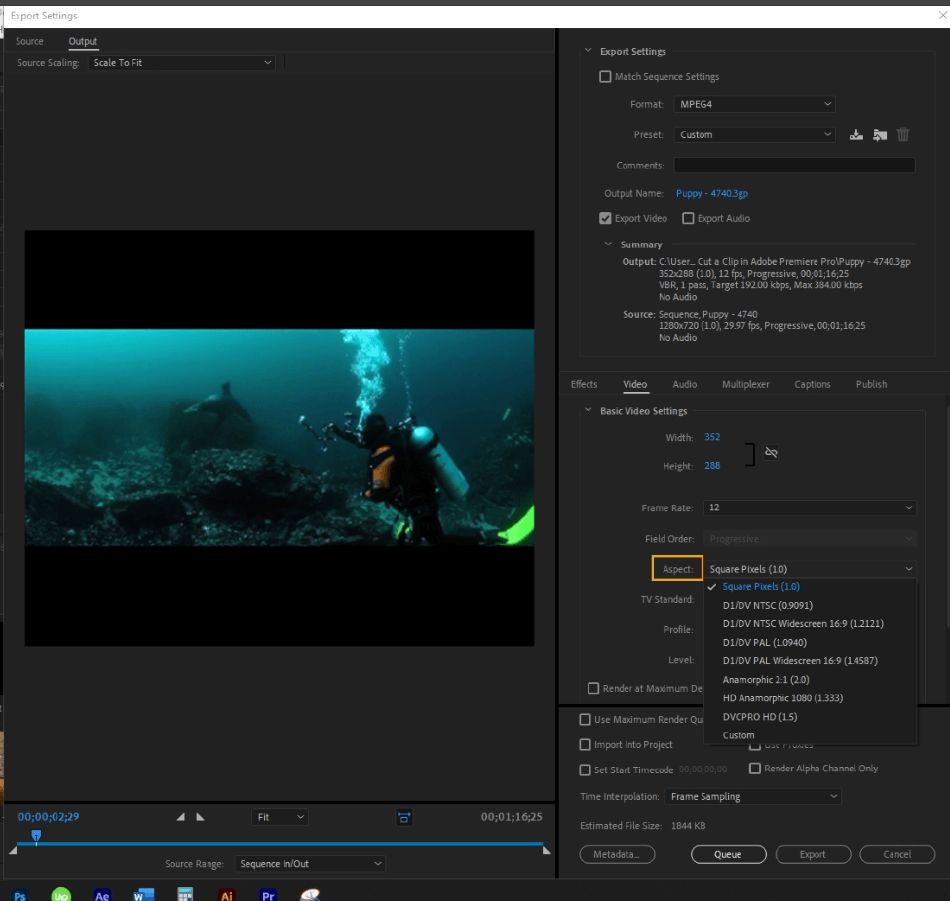
- Aspect: The aspect ratio of the film. You can choose between presets or set a custom ratio.
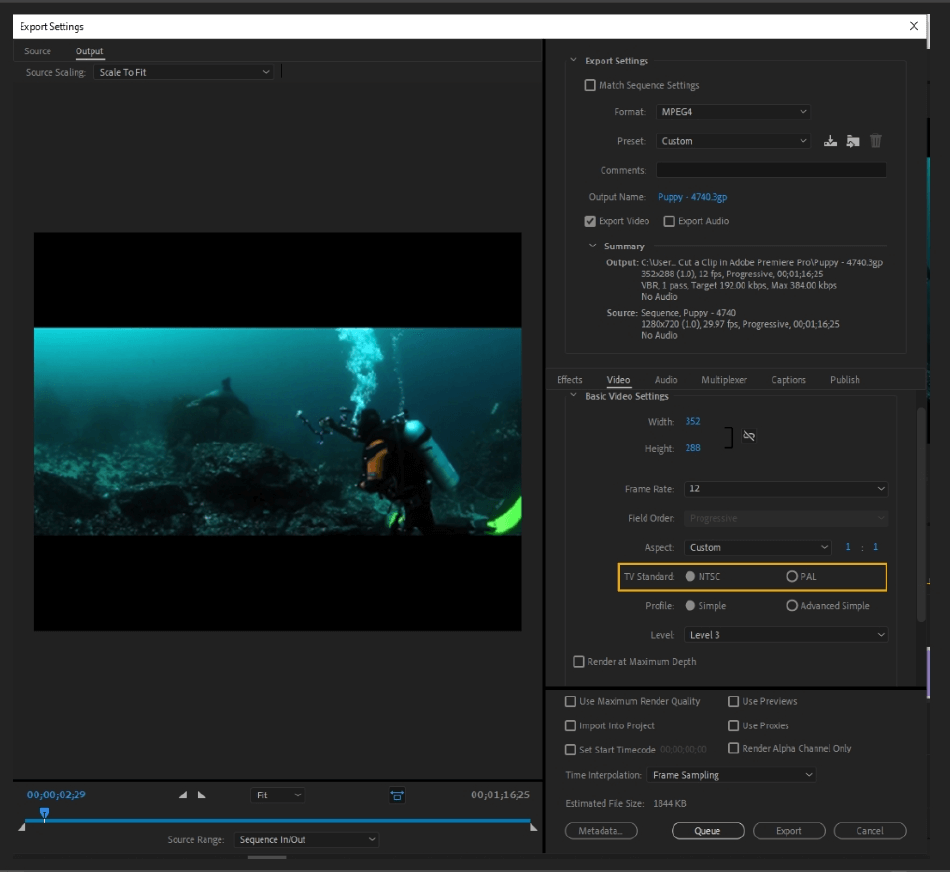
- TV Standard: Your choices are between NTSC and PAL, standing for National Television Standards Committee and Phase Alternate Line, respectively. If Match Source rate is enabled, the standard will be set based on the source properties.
- Profile: You can choose between Simple and Advanced Simple. Controls properties such as chroma format and the compression algorithm. Profile also constrains the bitrate range.
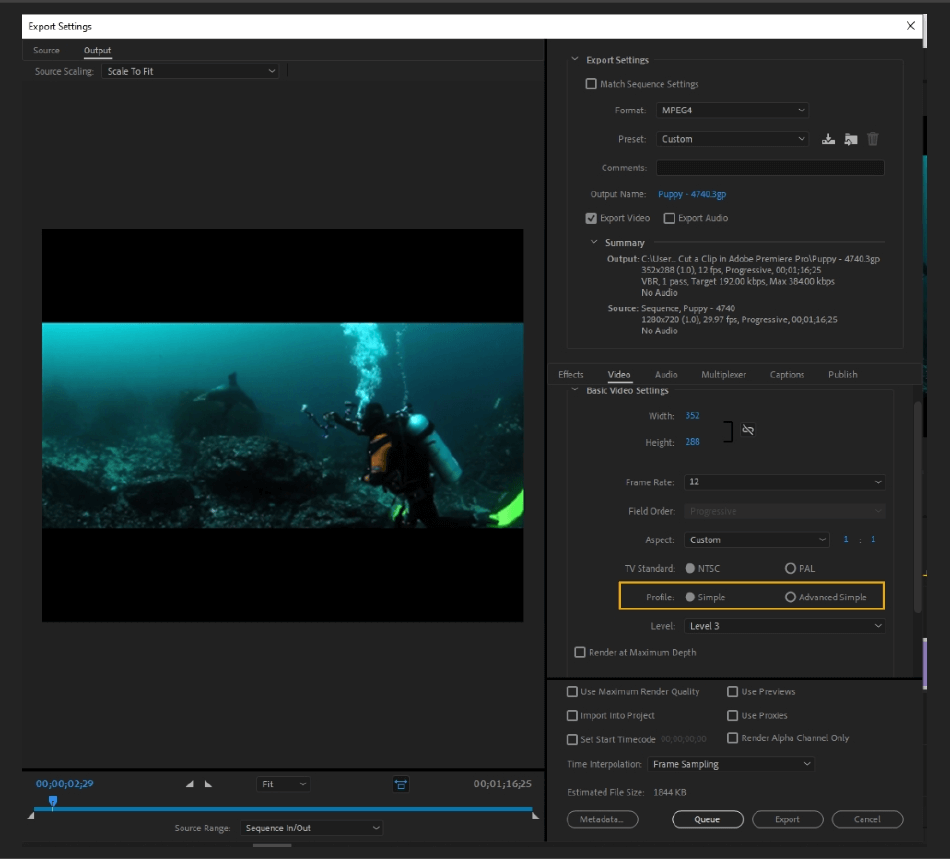
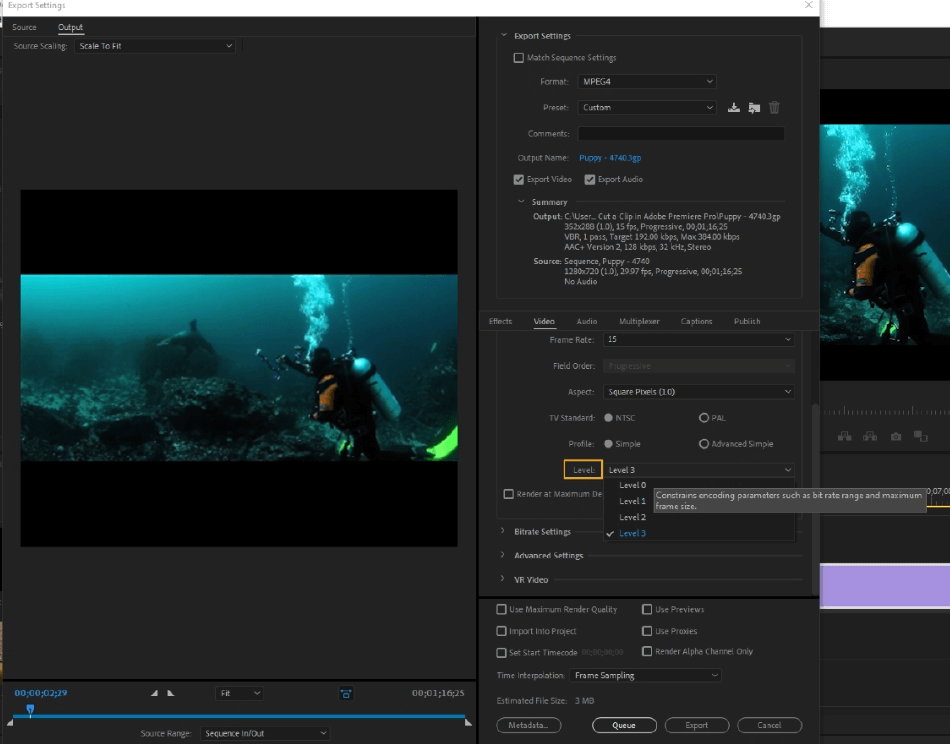
- Level: Select the level between 0-3. Limits the number of frame rate choices, field order, frame size, bit rate, aspect, chroma, and other compression settings for your video.
(If you don’t know what level or profile to use, enable match source. Enabling this will choose the best settings based on the source media.)
- Render at Maximum Depth: This will render the video at 32-bit color depth.
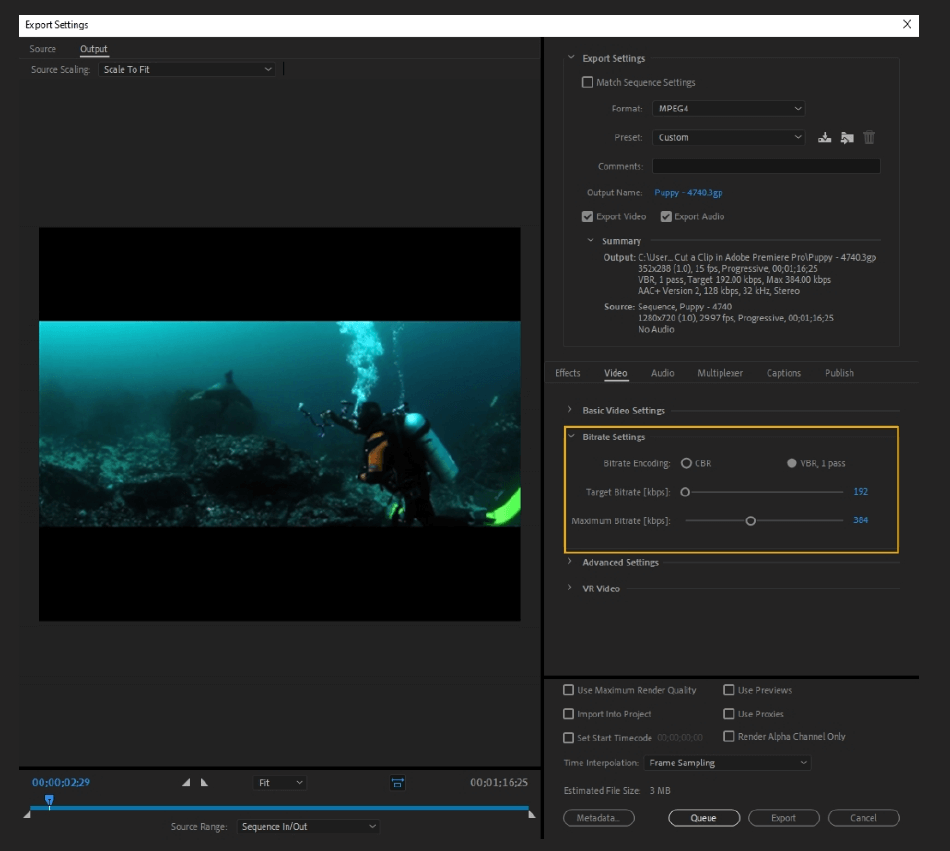
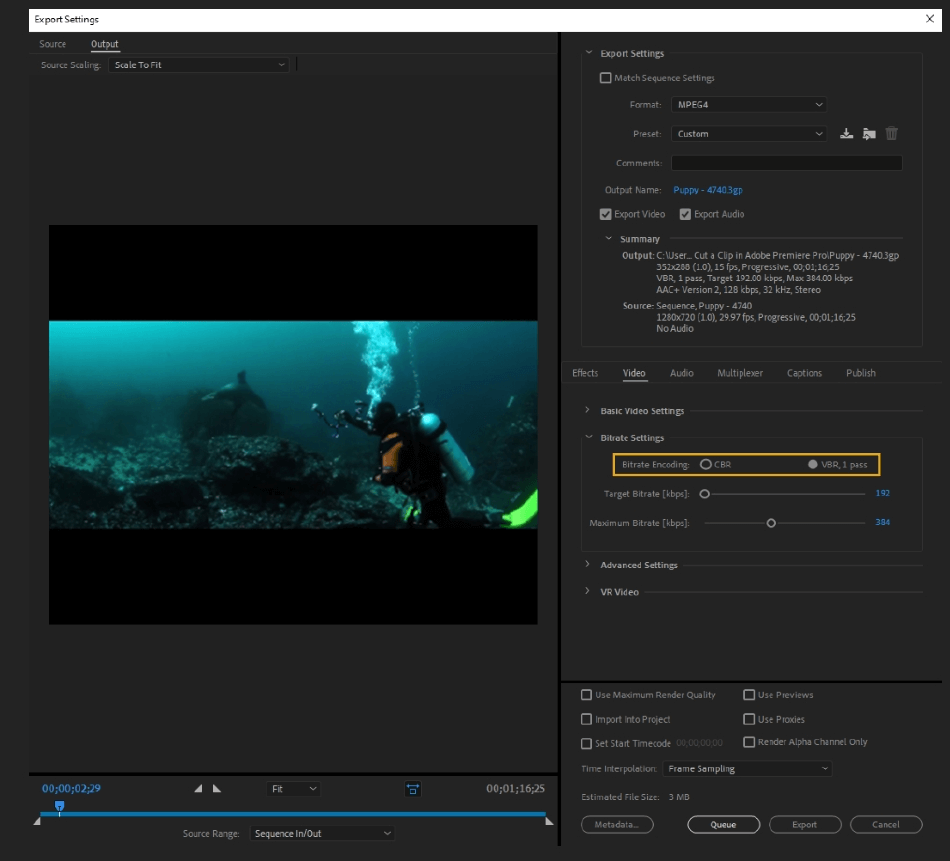
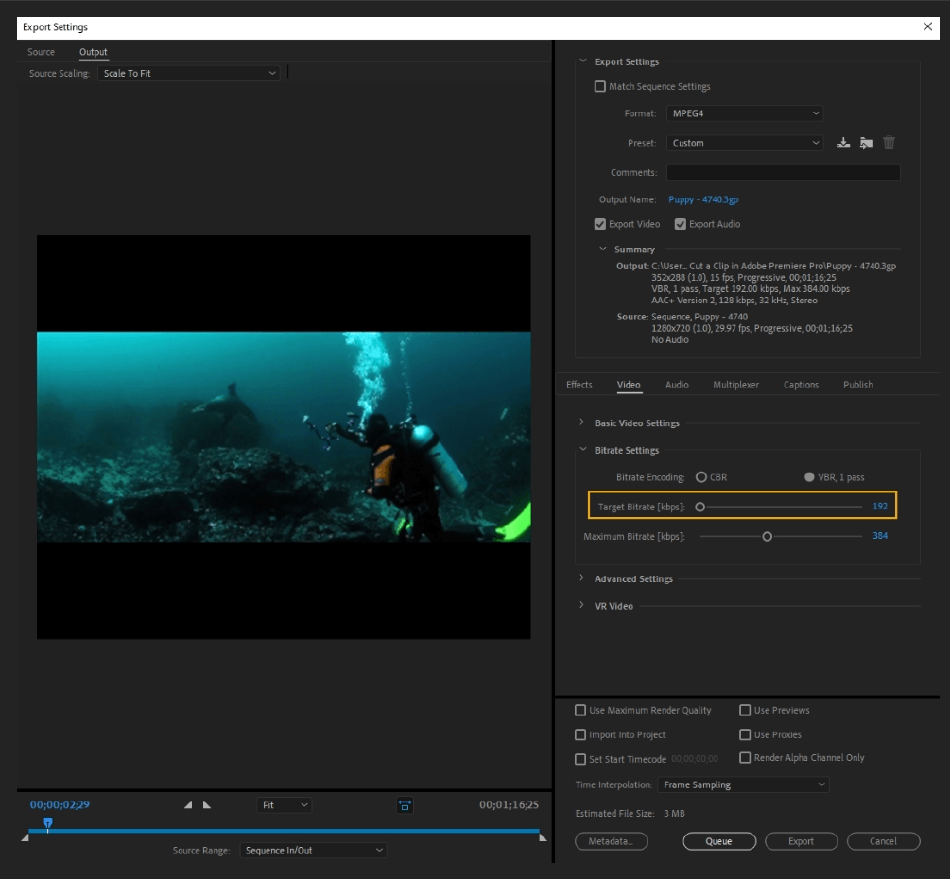
- Bitrate Encoding: You have the choice between CBR (Constant Bit Rate) And VBR (Variable Bit Rate). CBR sets a constant data rate, making export times faster but lessening the quality of the video.
VBR adjusts the data rate to match the video’s complexity, resulting in a higher final result. You can either choose between 1 or 2 Pass VBR.
- Target Bitrate: During encoding, this value sets the overall bitrate.
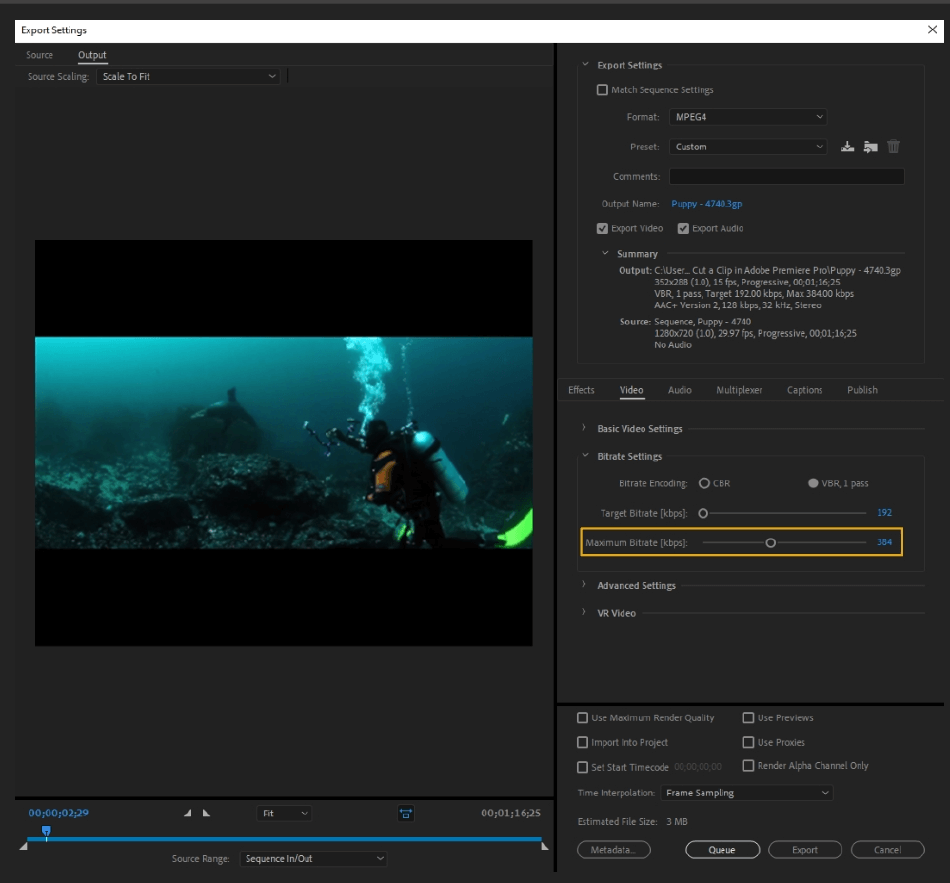
- Maximum Bitrate: During VBR encoding, sets the maximum values allowed.

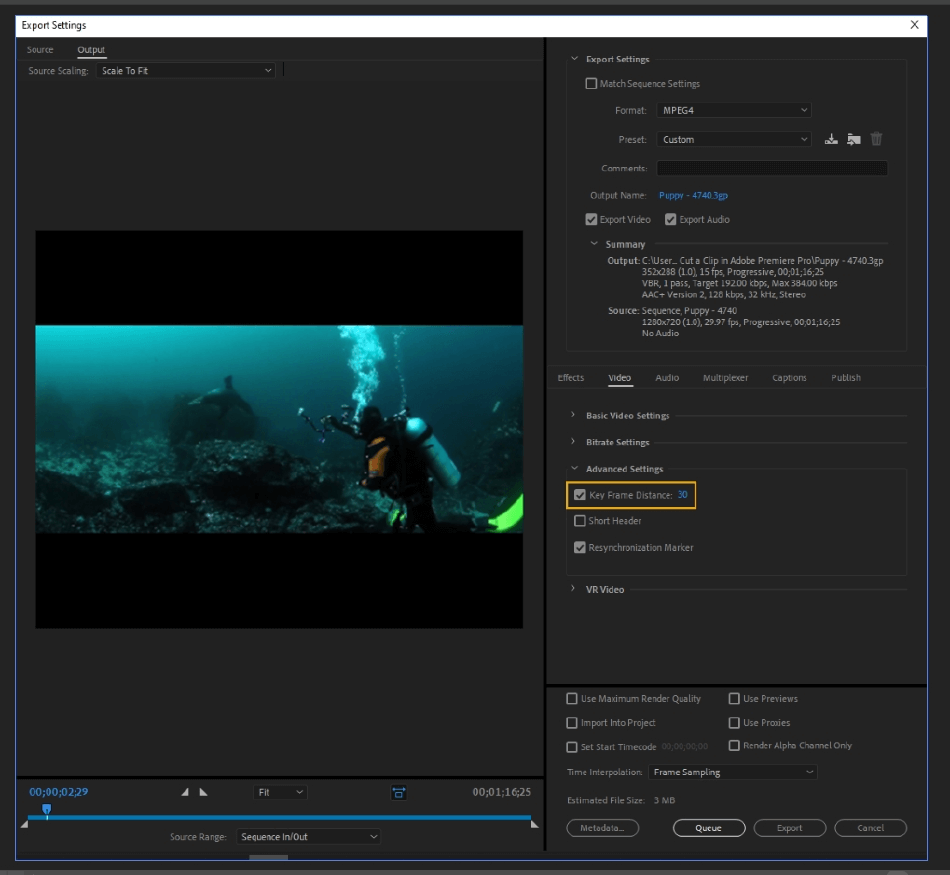
- Key Frame Distance: If unchecked, the system will choose a keyframe distance based on frame rate and export format. If enabled, you will specify how often keyframes are inserted into the video.
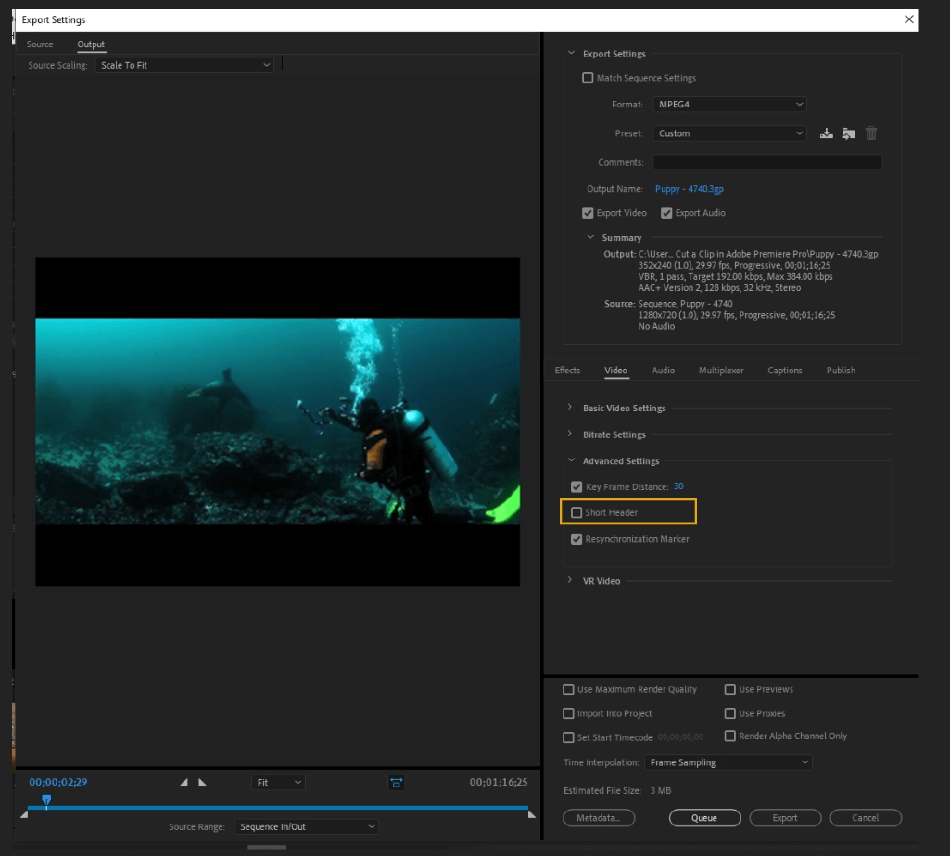
- Short Header: This feature creates a square shape with the header, perfect for uploading videos to Instagram. The header will either expand or crop to create the square shape.
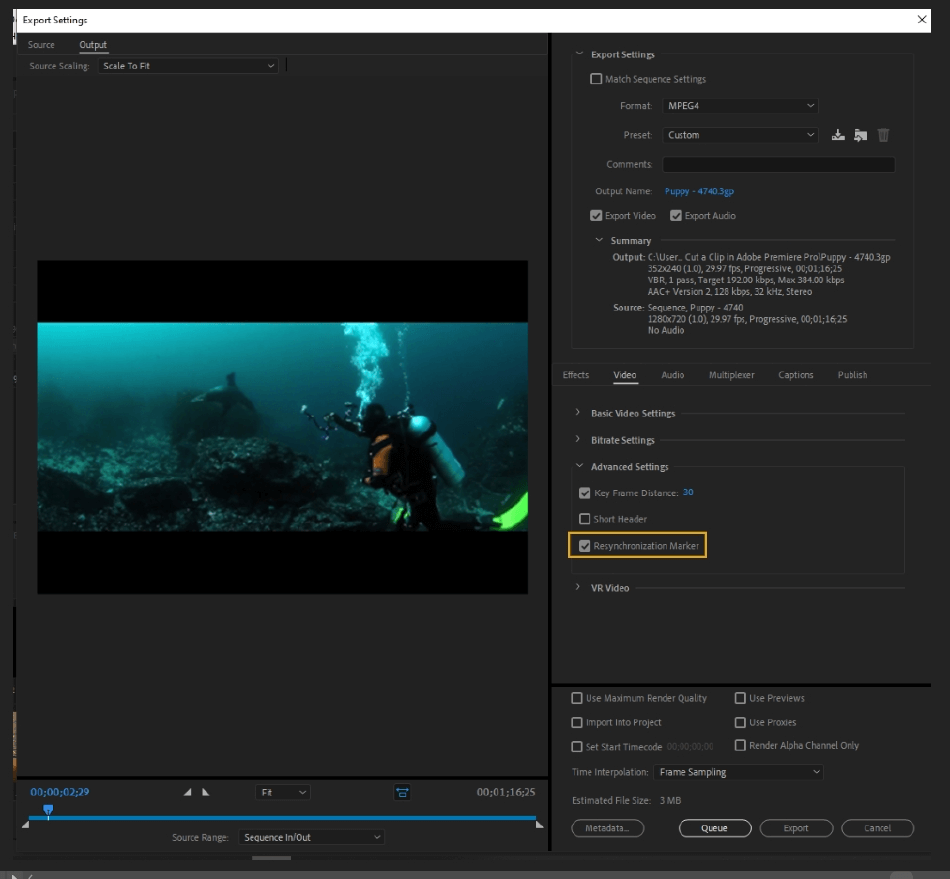
- Resynchronization Marker: Resynchronization markers are markers used to reestablish the synchronization between the bitstream and the decoder after an error has been detected. You can enable/disable this function for encoding.
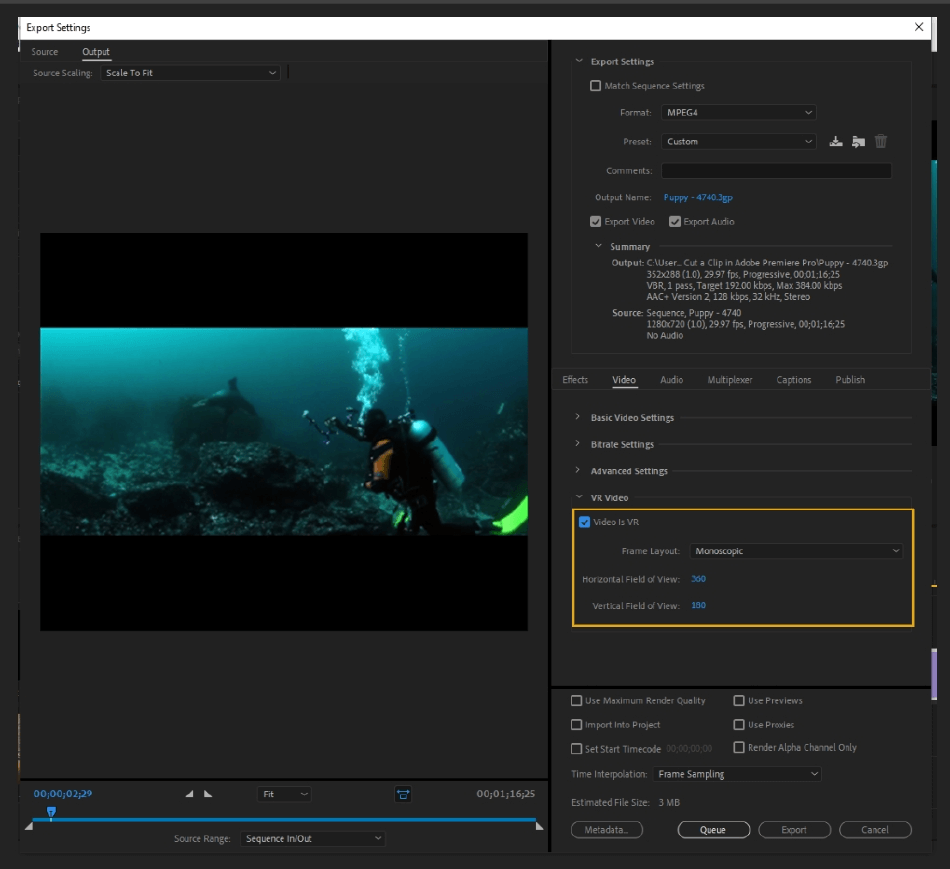
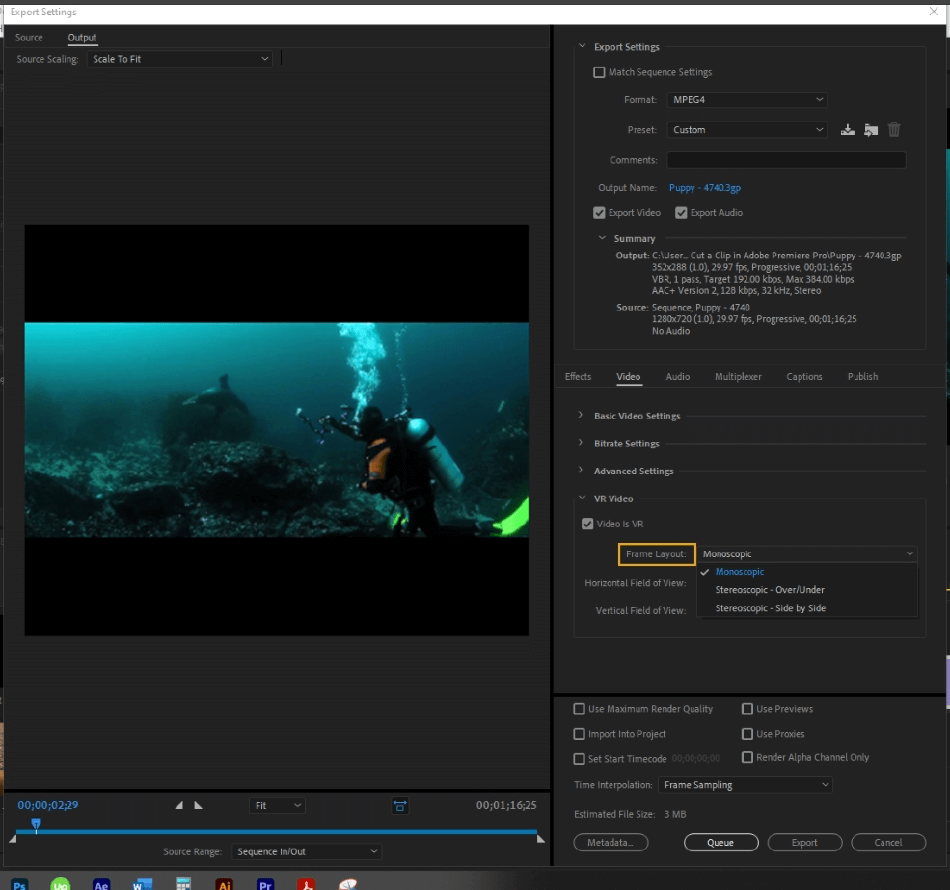
- Frame Layout: Choose between Monoscopic, Stereoscopic – Over/Under, or Stereoscopic – Side by Side.
Monoscopic means viewed with one eye at a time. Stereoscopic uses two lenses (both eyes) to create the image, viewing the scene from two different angles. While both can be viewed with a headset, only monoscopic can be viewed without a headset.
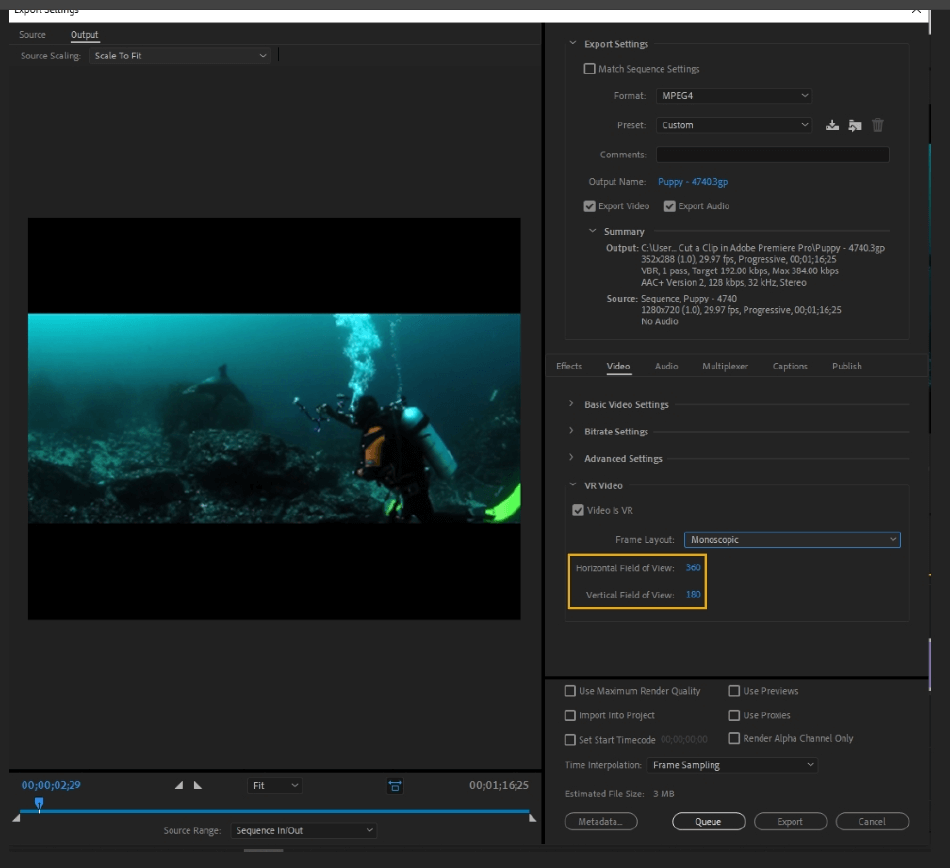
- Horizontal/Vertical Field of View: Controls the height and width of the view size, measured in degrees.

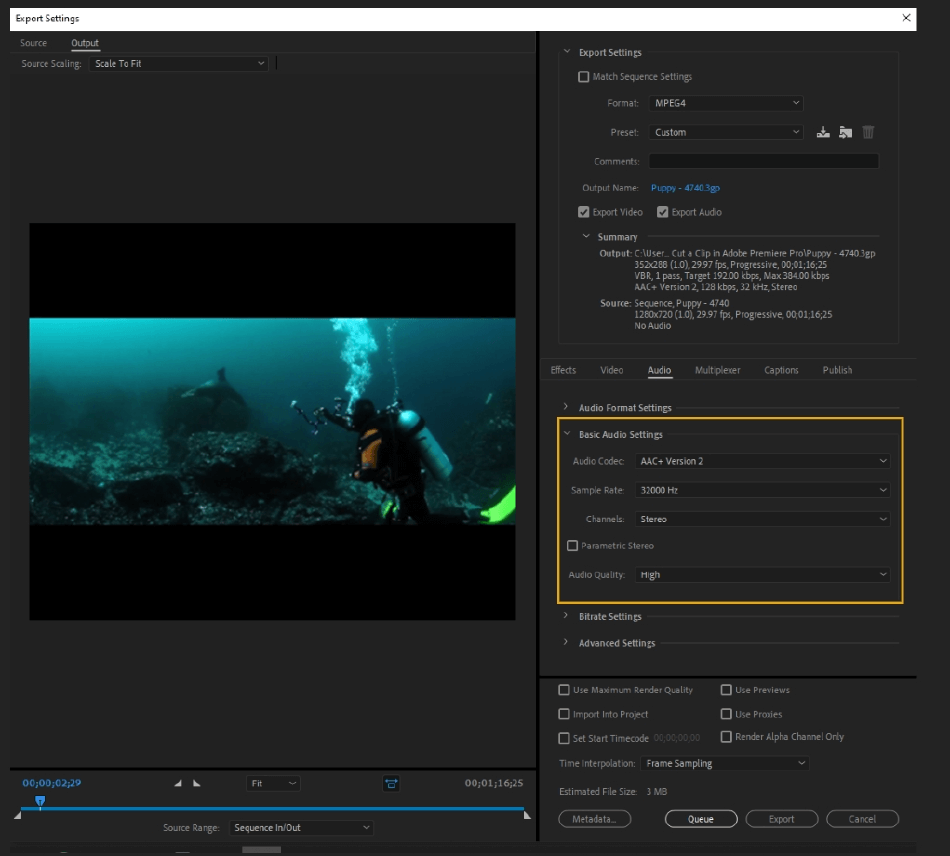
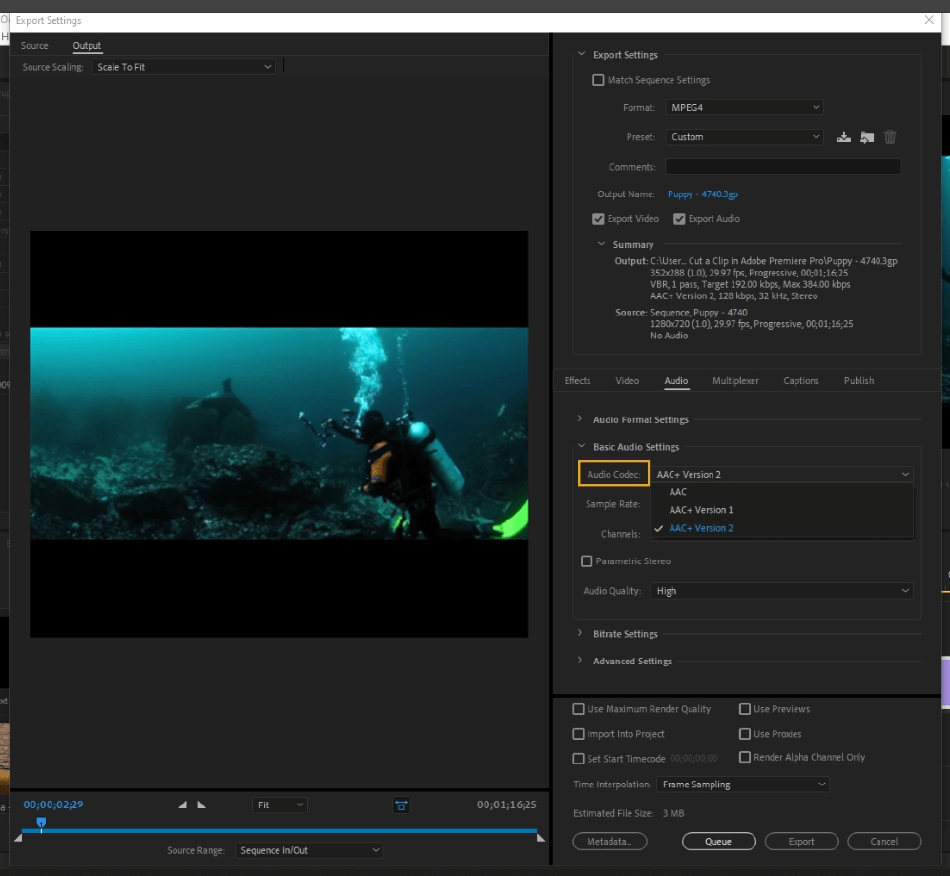
- Audio Codec: Choose the codec that will be used to encode the audio stream.
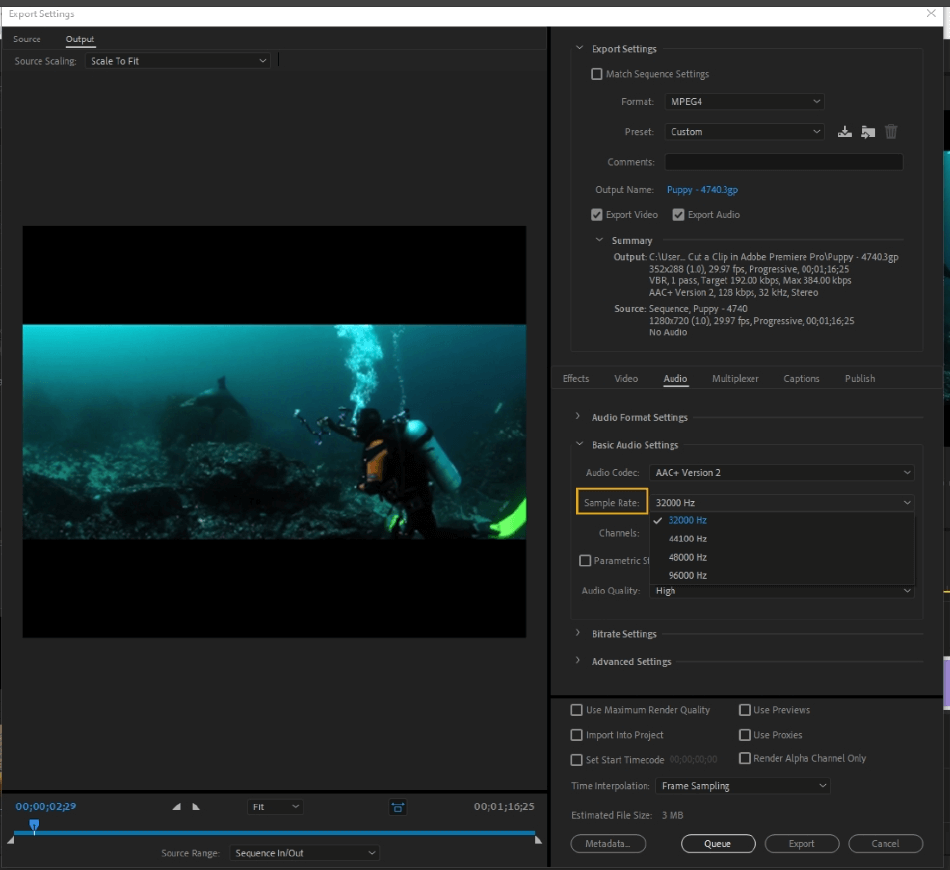
- Sample Rate: The sample rate is the number of samples of audio carried per second, measured in kHz or Hz. Audio recorded at higher sample rates have higher quality.
You should export audio at the same sample rate that it was recorded at and don’t increase the sample rate. Increasing the sample rate from the original rate will not increase the quality of the sound.
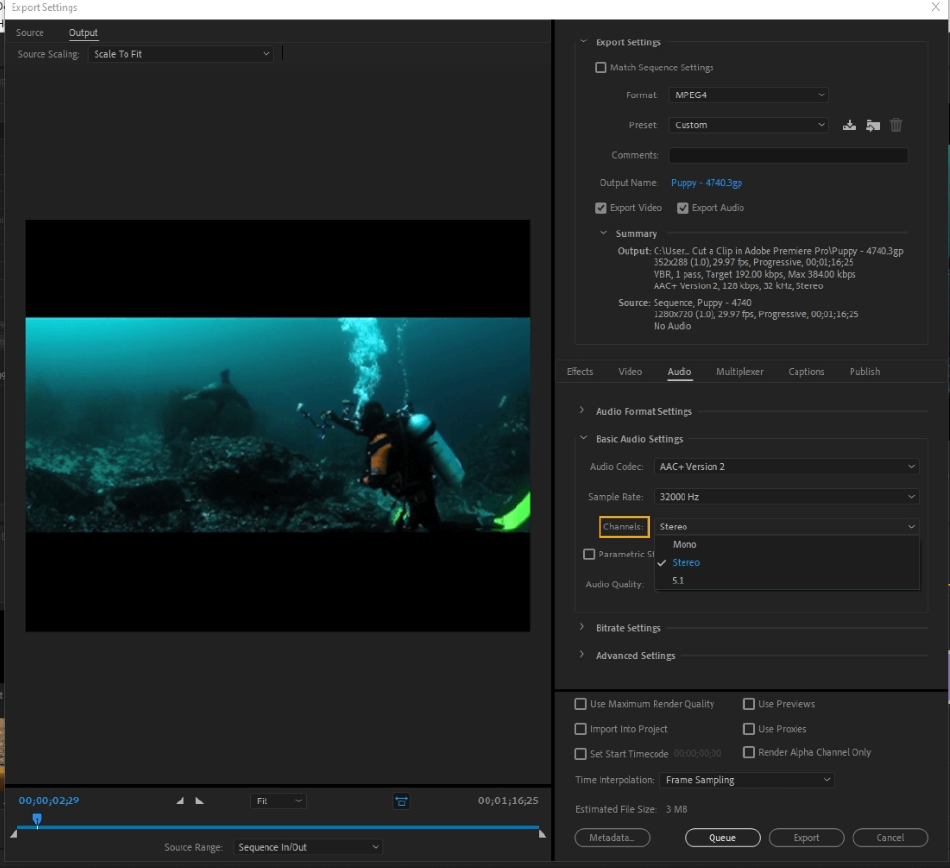
- Channels: Channels are the number of channels in the final output audio. Here, you can choose between Mono, Stereo, and 5.1.
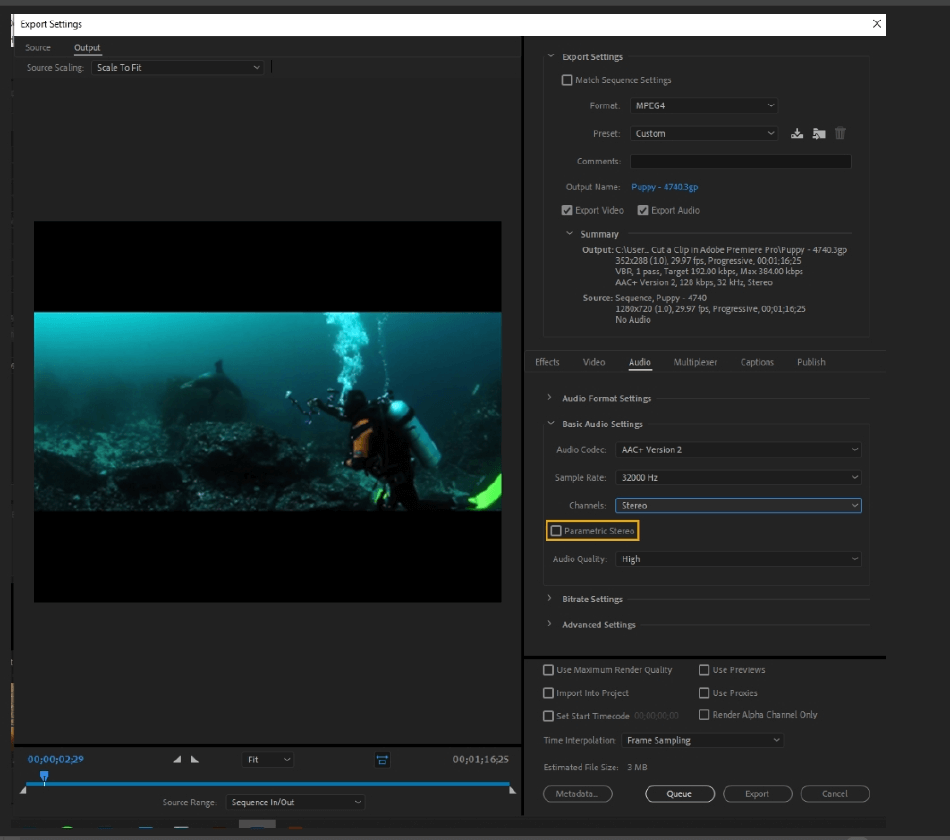
- Parametric Stereo: Premiere recommends enabling this feature when the audio bitrate is below 40 kbps.
- Audio Quality: Choose your audio quality, your choices being high, medium, or low.


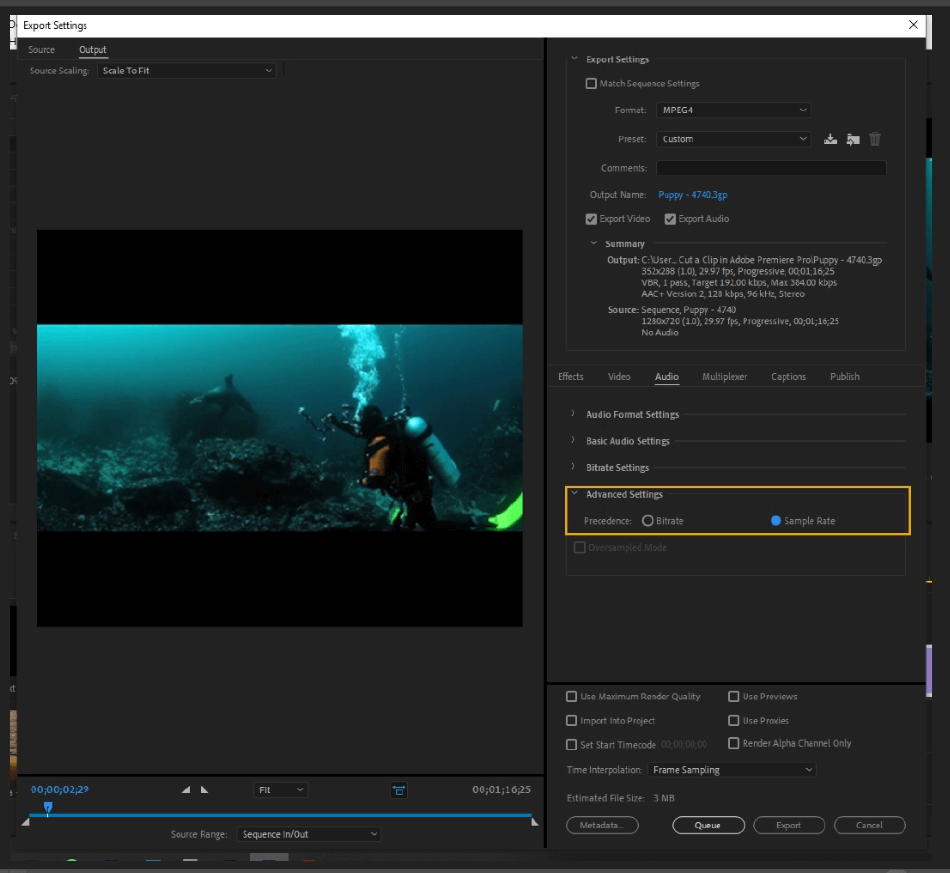
- Precedence: You have two options, Bitrate or Sample Rate. Bitrate will constrain the sample rate based on the chosen audio bitrate for the project. Choosing Sample Rate will constrain bitrate values for a given sample rate.
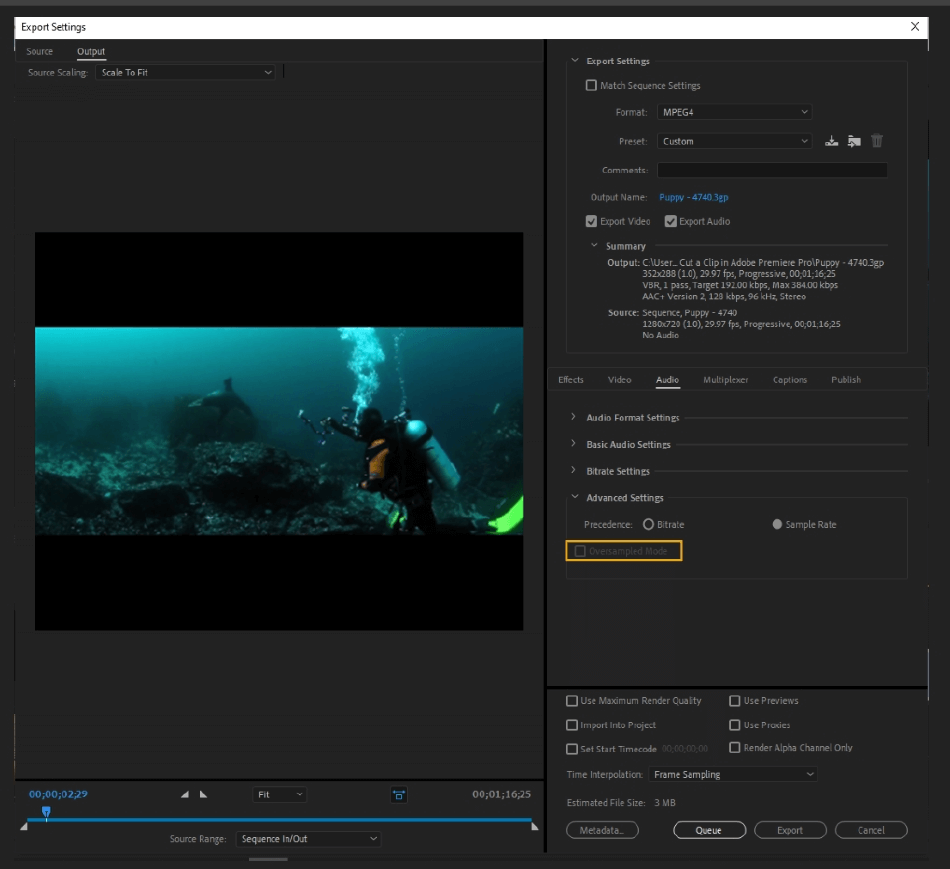
- Oversampled Mode: Enabling oversampled mode will give you the highest possible audio quality for your project.
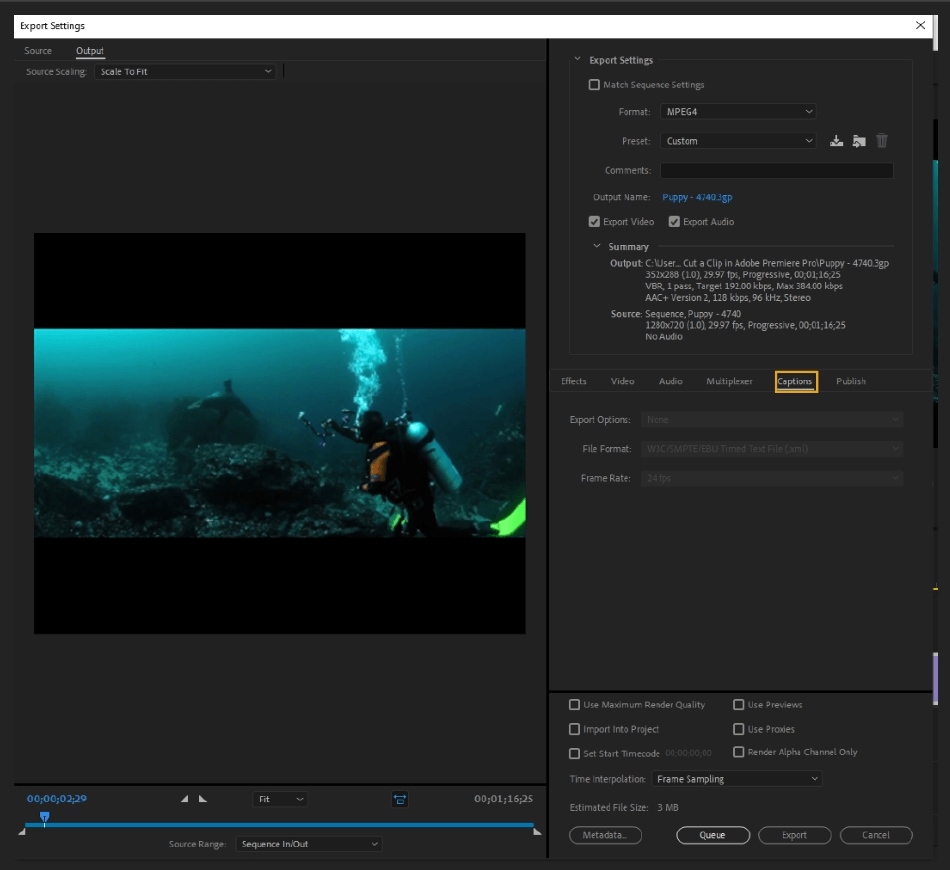
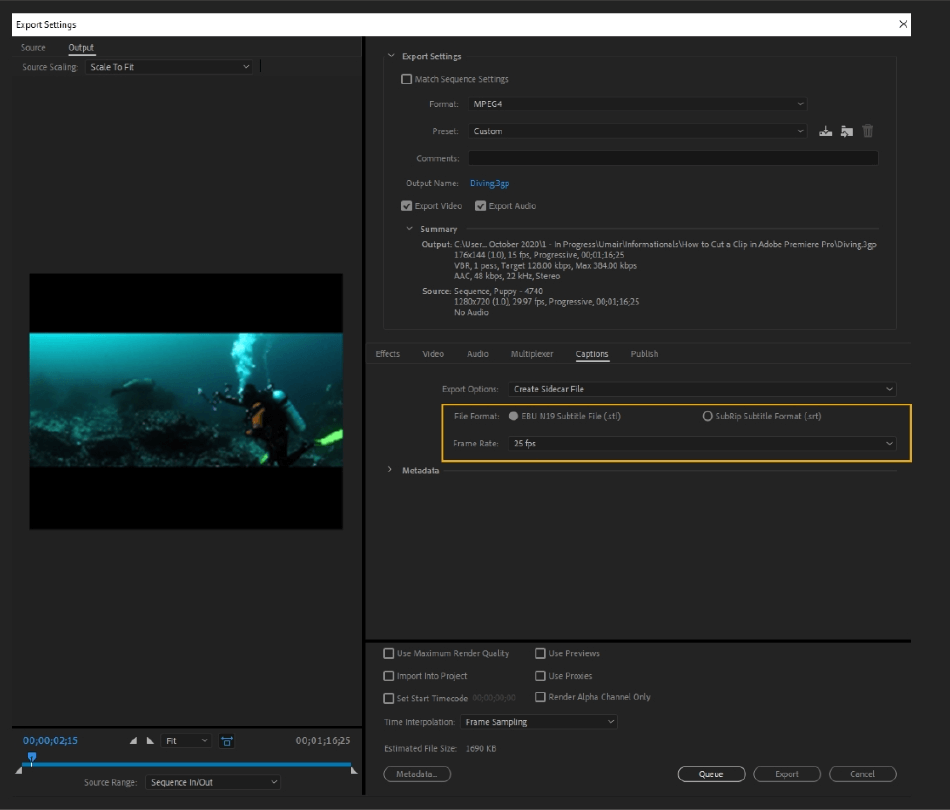
- Export Options: You can either not export captions, export them as a separate file from the video, or burn them into the video. It is noted that when you burn the captions into the video, they become part of the video file and cannot be separated in the exported video.

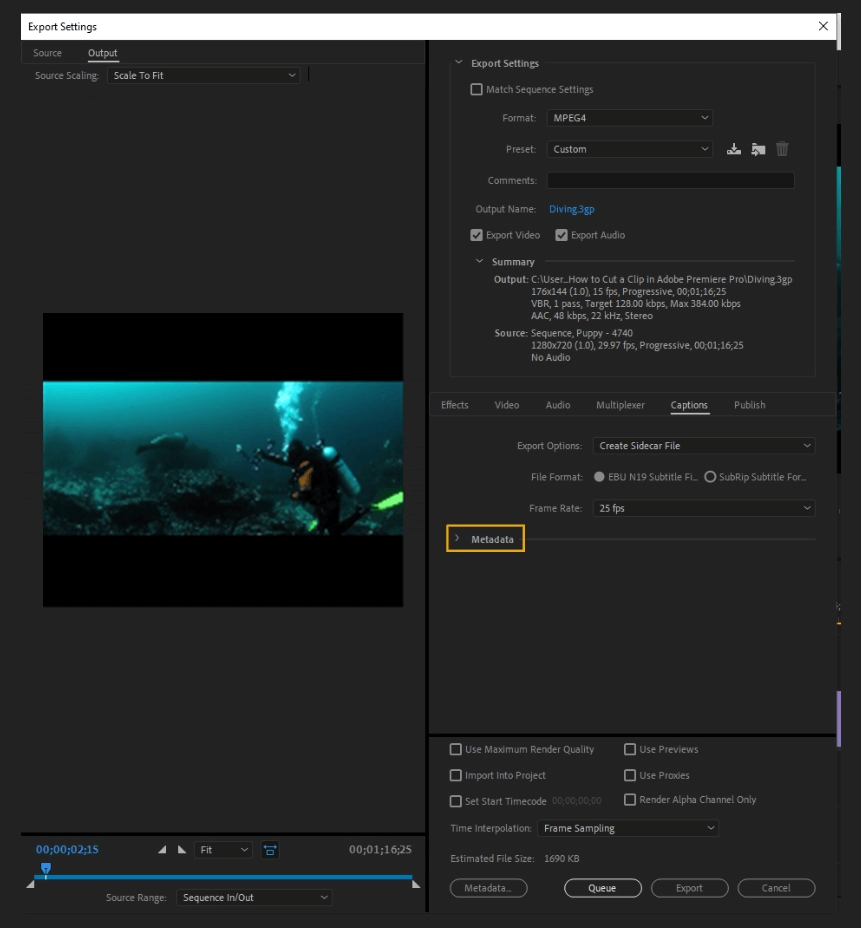
- File Format/Frame Rate: You can choose the caption’s file format, choosing between EBU N19 Subtitle file or SubRip Subtitle format. You can also pick the final frame rate for the captions.
- Metadata: This tab will precisely edit all of the metadata for the captions.
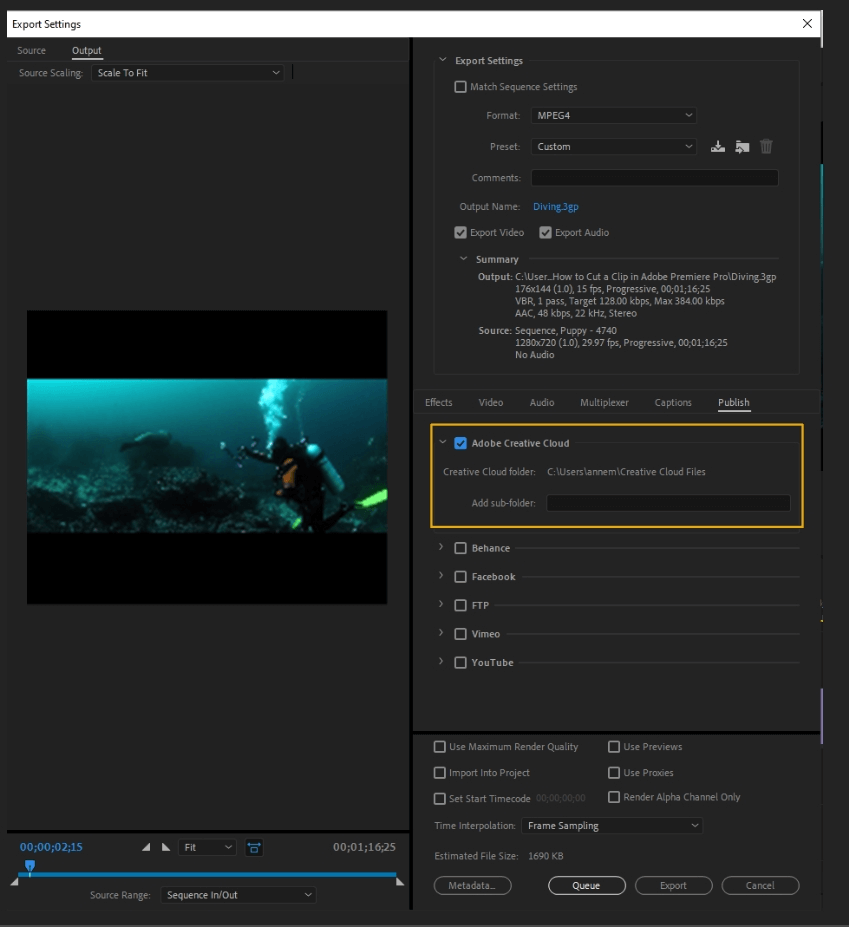
- Adobe Creative Cloud: This option will publish your file to Adobe Creative Cloud, the cloud server where Adobe can store your files to access across Adobe applications. Here, the panel shows you the Creative Cloud file destination and gives you the option to add a sub-folder.
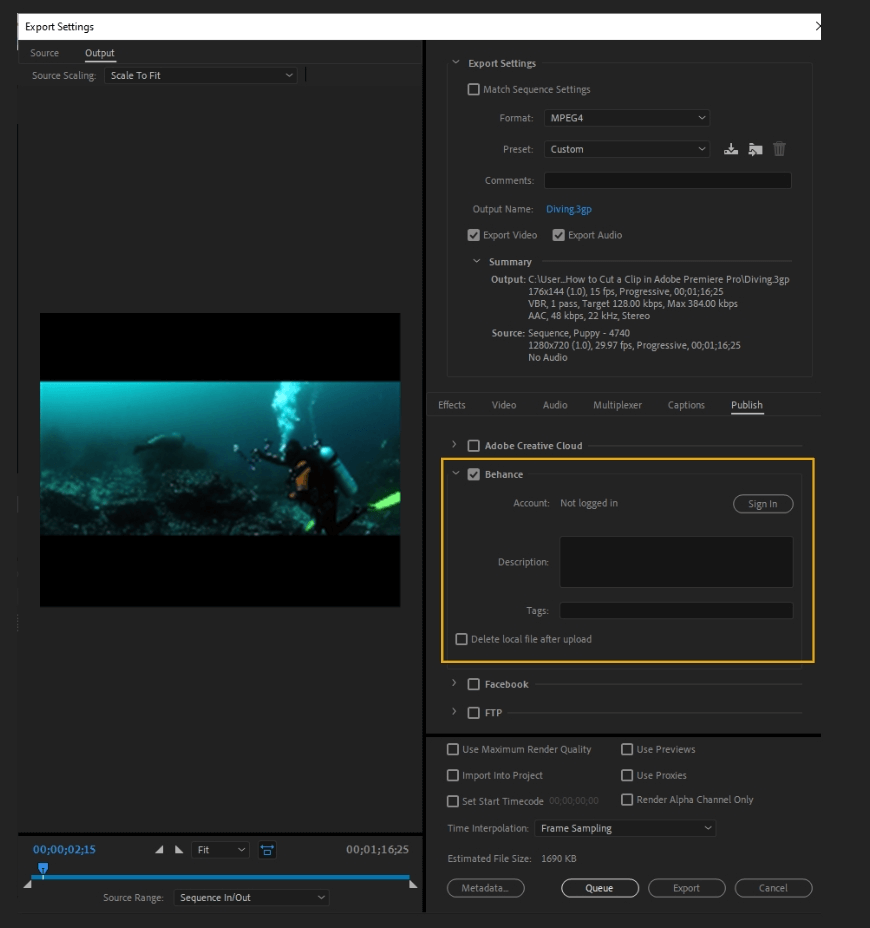
- Behance: Adobe’s social networking site and showcase, Behance is great for artists looking to collaborate with other professionals and show off their work. Here, you log in to your account, create descriptions and tags, and then have the option to delete the local file after upload.
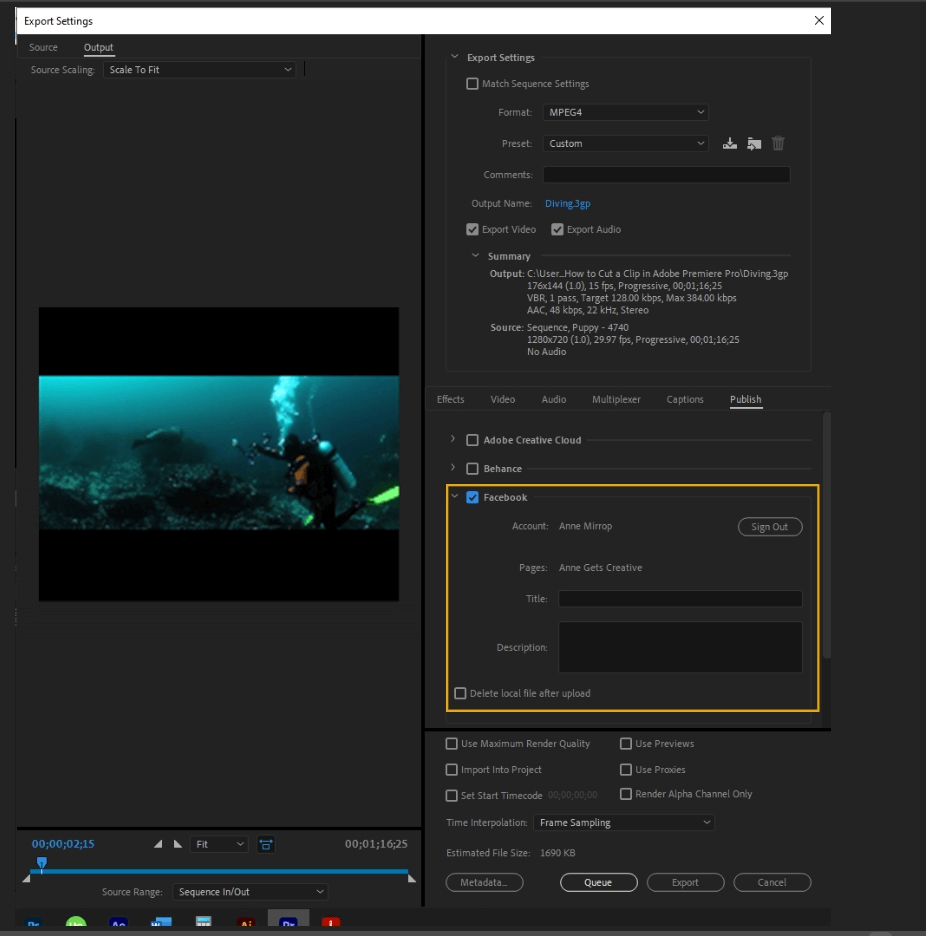
- Facebook: This option lets you directly publish to your Facebook Feed. Once logged in with Media Encoder permissions allowed, you can choose the page, add a title and description, and delete the local file once you are done uploading. A clean, easy process.
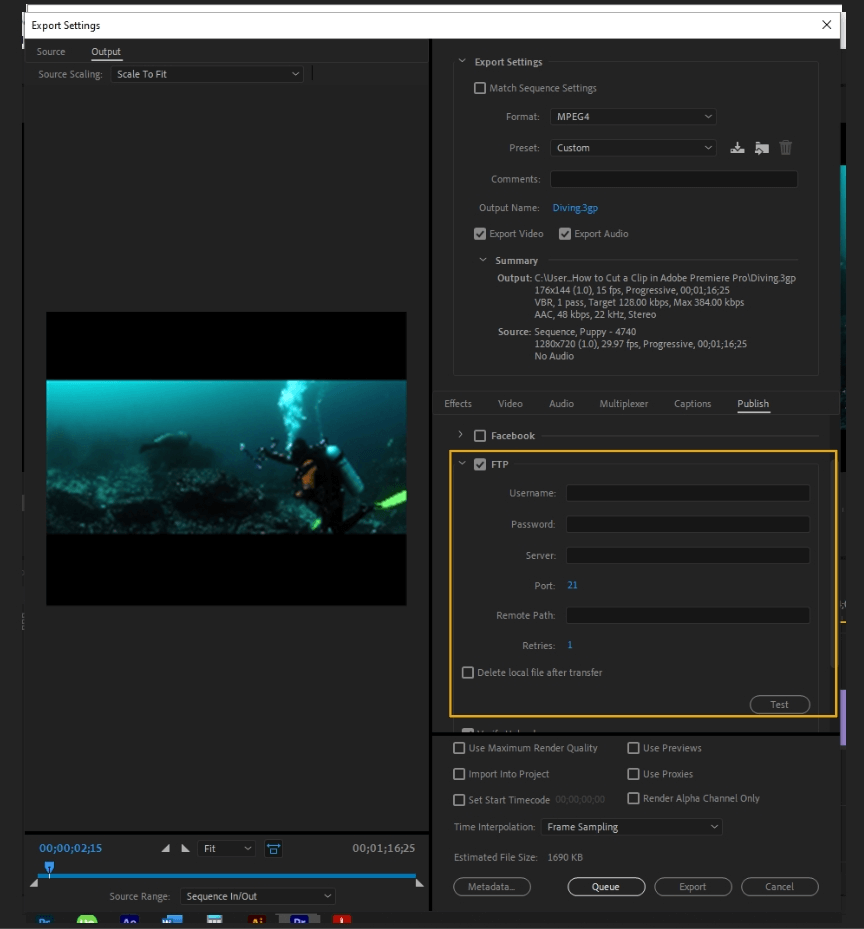
- FTP: File Transfer Protocol is used to transfer files over a network. Here, you log in to your server, enter the server port, enter the access location of the FTP in the Remote path, the number of attempts to contact the server in Retries, and the option to delete the local file after publishing.
Test lets you verify the connection with the FTP server. Verify upload will verify with you that the upload process was successful.
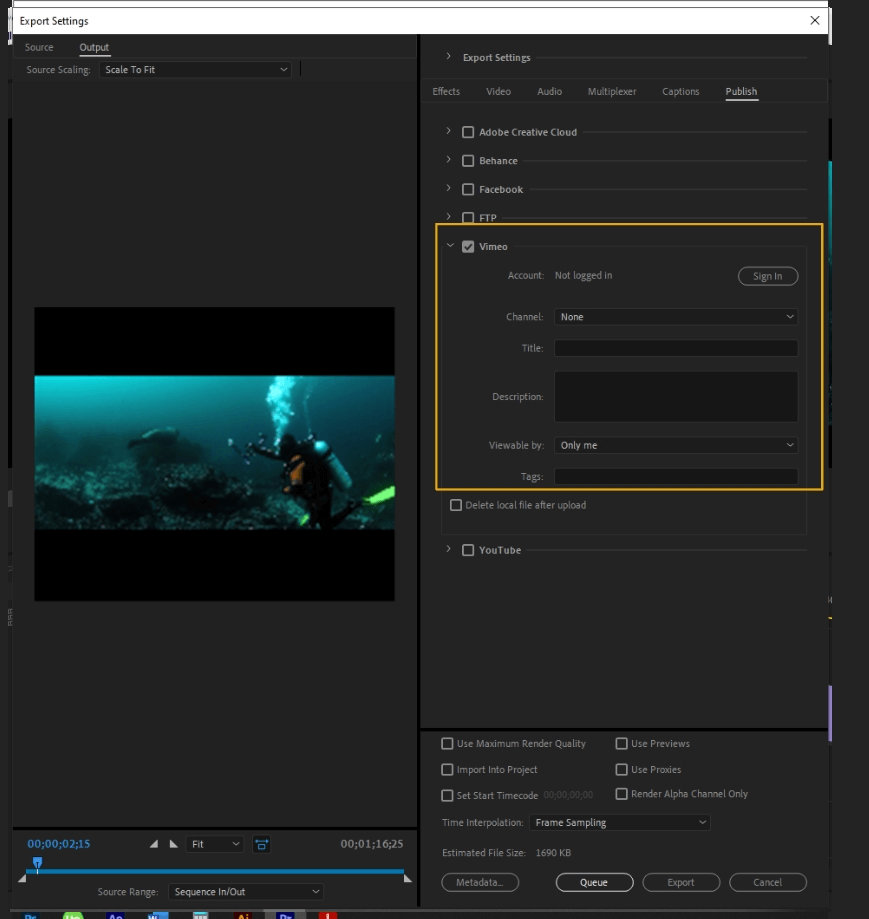
- Vimeo: Vimeo is a video sharing platform. Many film professionals use it to display their videos. A notable feature of Vimeo is that it allows you to upload 4K video. Here, after logging in, you can select the channel to upload to, add a title and description, make it public or private, add tags, and delete the local file after upload.
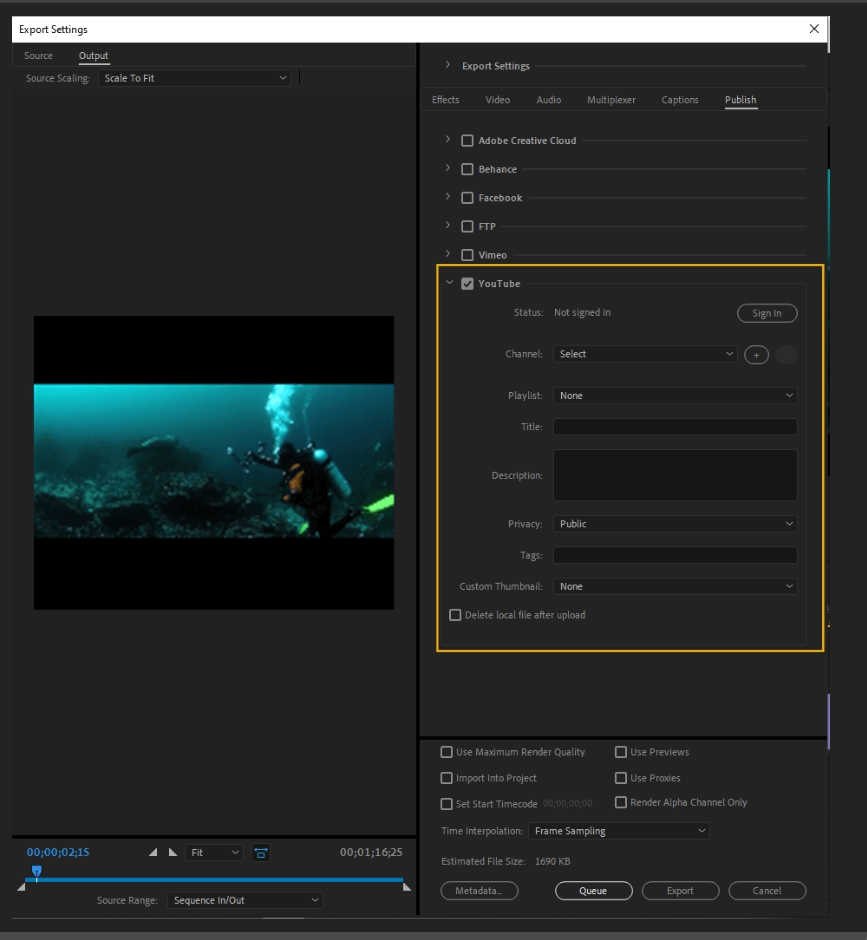
- YouTube: YouTube is one of the best ways to get your content to a massive audience. After signing in, you can select the channel, playlist, title, description, privacy, tags, custom thumbnail, and delete the local file after uploading.
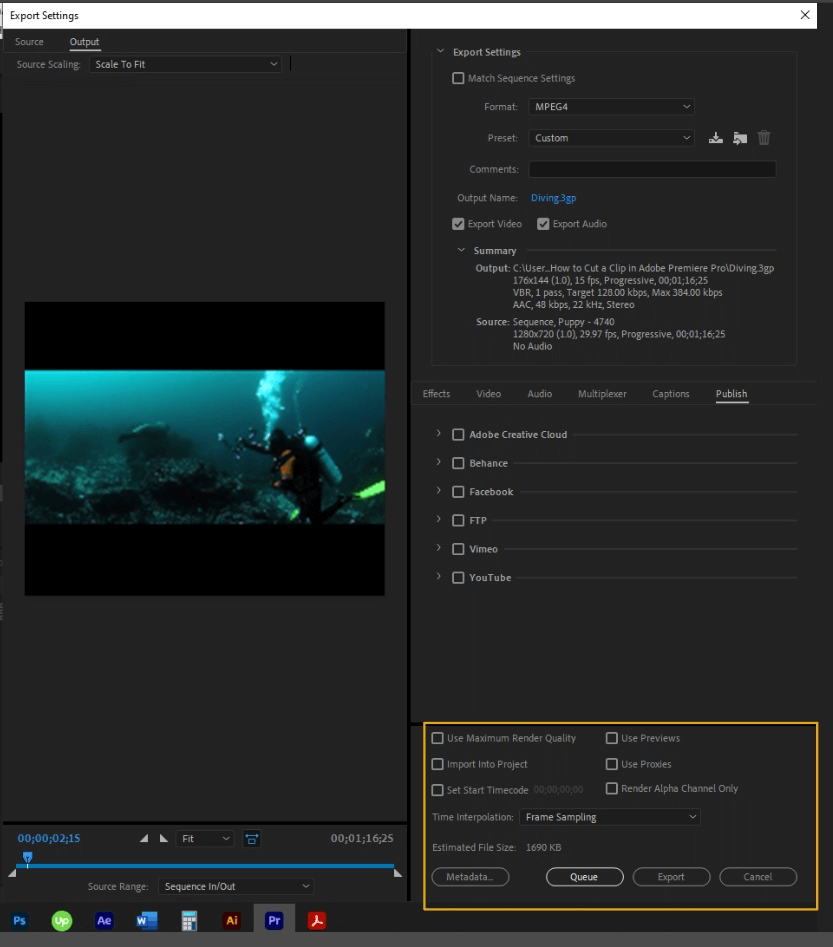
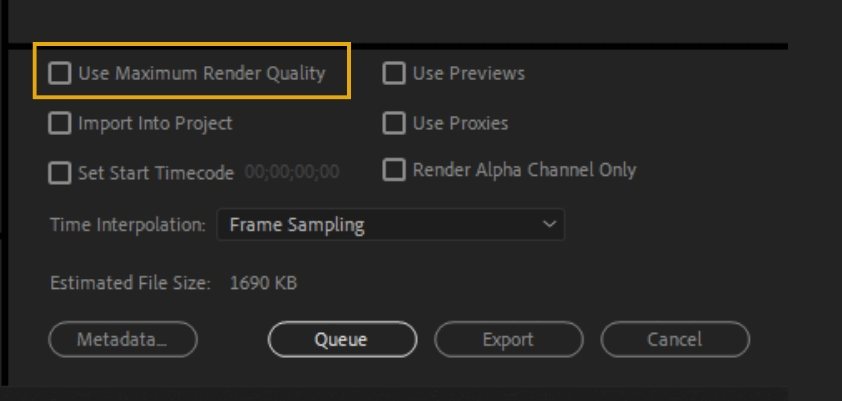
- Use Maximum Render Quality: This feature will increase the quality scaling. Overall, it will increase encoding time. This option will preserve more details and avoid aliasing when scaling to a different frame size from the source material.
- Import Into Project: This will import the exported video directly into your project in Premiere Pro.

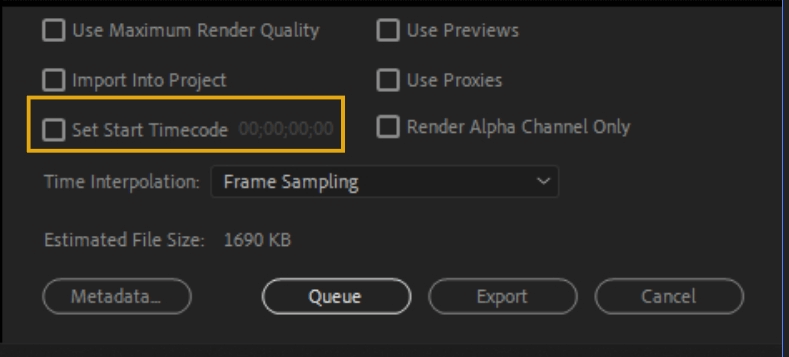
- Set Start Timecode: This will set your starting timecode at a custom time rather than the source’s timecode.
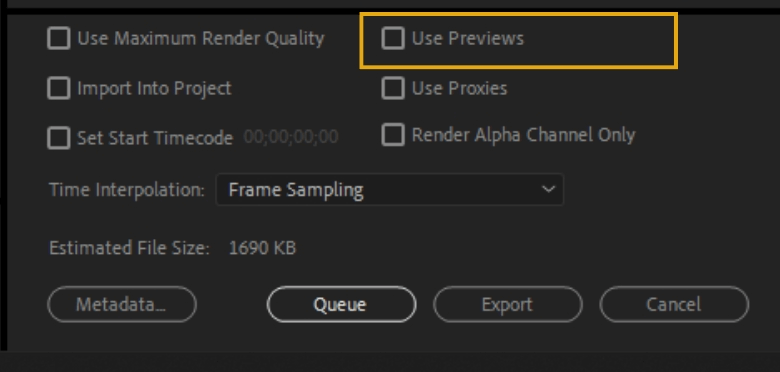
- Use Previews: This option will use the preview files that have already been generated. Using preview files speeds up the exporting process.
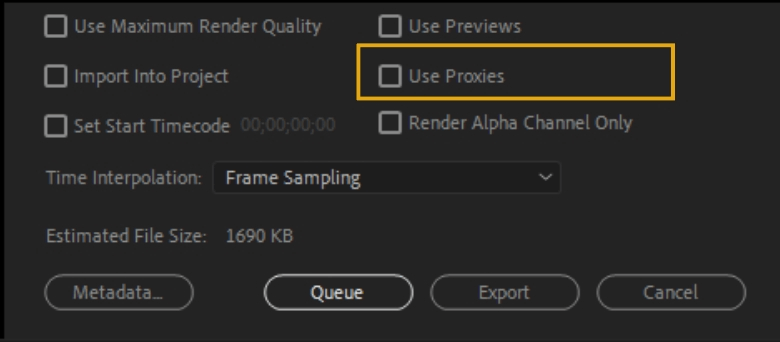
- Use Proxies: Proxies are low-quality copies of your high-quality footage. If you need a quick export and don’t need to see the final video in a high-quality resolution, enable the proxy function.
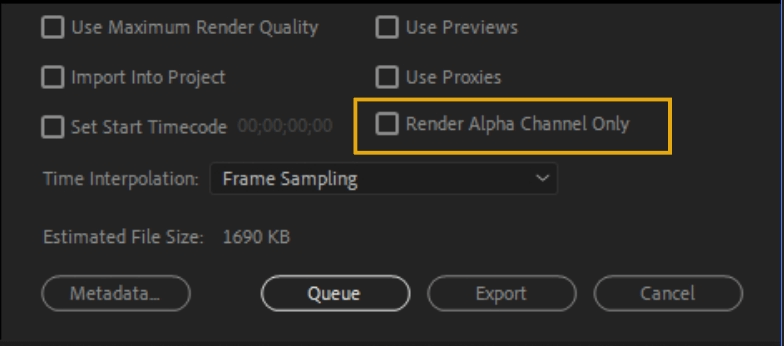
- Render Alpha Channel Only: This will only render the alpha channel of the video.
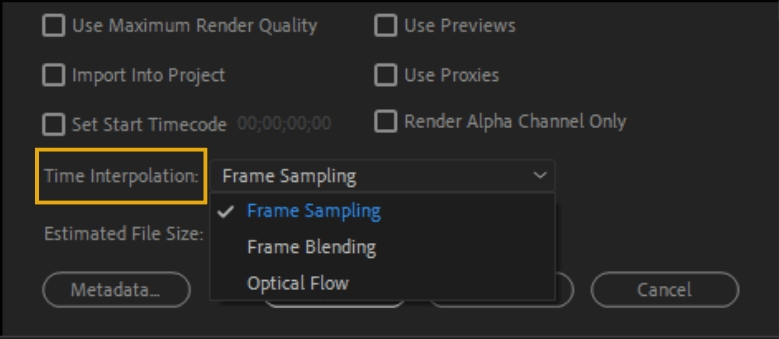
- Time Interpolation: You can choose between Frame Sampling, Frame Blending, or Optical Flow. You use this feature when the frame rate of the final video is different than the source.
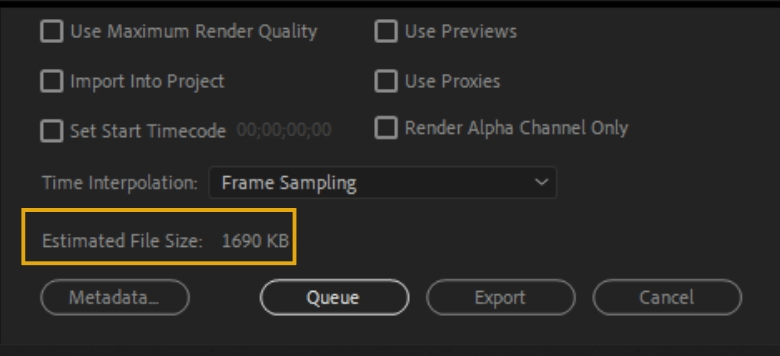
- Estimated File Size: This is the video’s estimated file size, useful information if you make a video with a limited upload size.
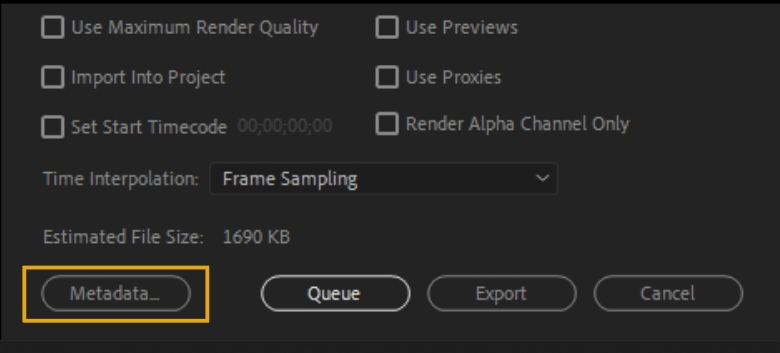
- Metadata: This tab opens up to provide all the metadata details of the project.
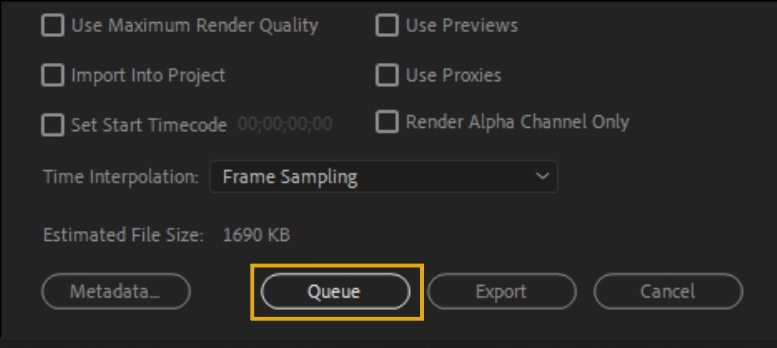
- Queue: This will send your video to Media Encoder. Why use Media Encoder and not export right in Premiere Pro? Rendering to Media Encoder allows you to continue working in Premiere Pro as the file renders out and/or pauses the rendering process to render later.
An example of editing workflow would be to set a bunch of projects to export in the Media Encoder, sleep, then wake up to finished projects in the morning. This workflow maximizes work time.
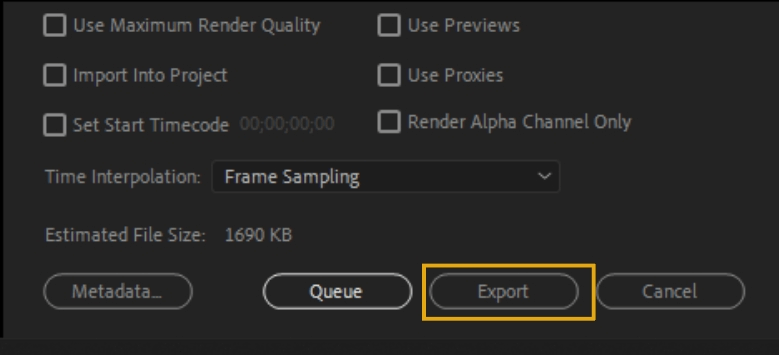
- Export: This will export the video directly in Premiere Pro.
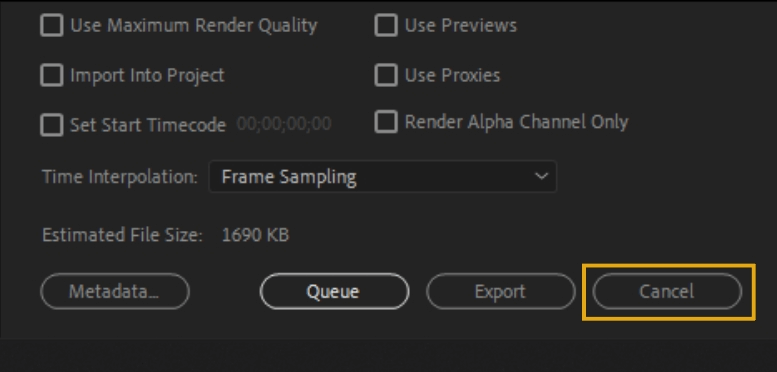
- Cancel: Exit out of exporting.
And that is the many details of Adobe Premiere Pro! If you have any additional questions, go to support.adobe.com. Here, you will find experts and fellow editors alike who can help you work through the many features of Adobe Premiere Pro.

Anne is a filmmaker and writer with a passion to bring stories to life. She has created several short films, specializing in stop-motion animation. Anne has over eight years of filmmaking experience, and she is always ready to share her knowledge with other creators. She started her company Anne Gets Creative in 2020.
Anne is extremely familiar with many Adobe programs: Photoshop, Illustrator, InDesign, After Effects, Premiere, and Audition, to name a few. She has also worked with other programs such as Procreate, Canva, iMovie, and Final Cut Pro. She always strives to give the best software reviews, researching diligently so her readers don’t have to.