(Last updated on February 8th, 2023)
The images brought into Photoshop can be edited beyond the common altercations of color and contrast. Your image resolution can also be edited to be more high quality. In this article, we’ll cover how to use Photoshop’s image resolution tools to make your images look more prominent and crisper.
Enhancing Images
In the 1982 film Blade Runner, there’s a scene where the detective uses his futuristic image viewer device to zoom in and enhance an image. From simple photos found in a dresser drawer, the device cannot only zoom in but improve and rotate the image. Photoshop can come reasonably close to replicating this future tech.
Photoshop has advanced innovative technology features for upscaling your images to give them more details. This goes beyond the standard sharpening tools you can find in most post-production photo software. Let’s go through the various features Photoshop offers to improve your photos’ resolution to make them higher quality.
Preserving Details
To improve blown-up pictures, we’ll use a process called Preserve Details 2.0 Upscale. Here’s a step-by-step guide on how to use this technique.
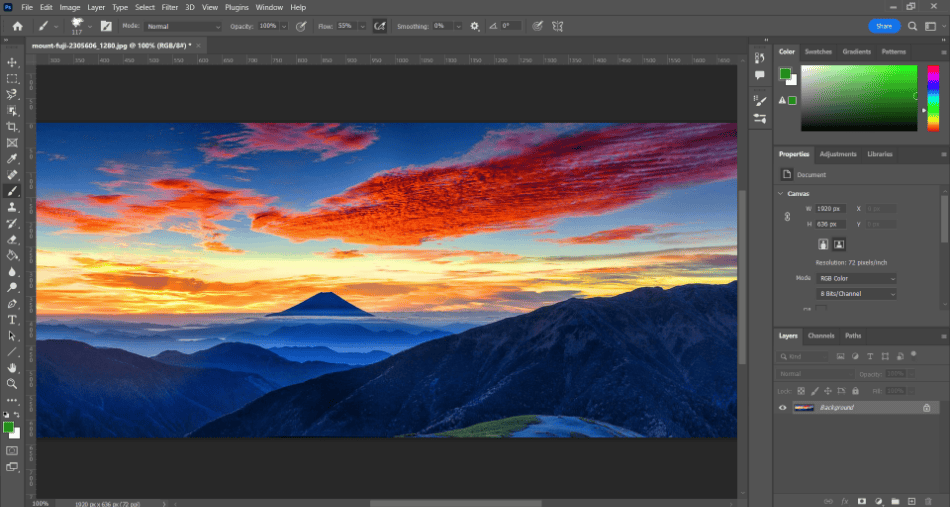
- Import your image into Photoshop.
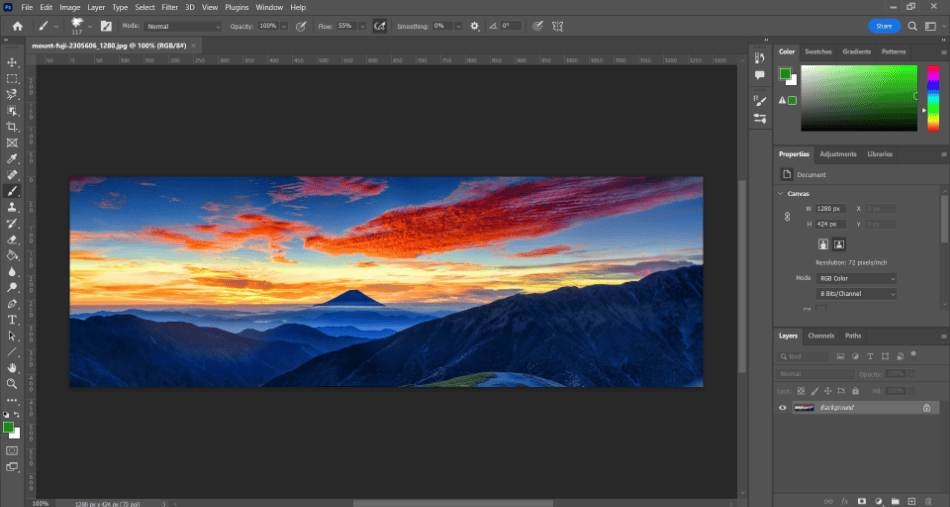
credit: Mark McPherson.
- Hit Command + K (Mac) or Control + K (PC) to open the Preferences menu. Look on the sidebar for Technology Previews. Ensure the “Enable Preserve Details 2.0 Upscale” checkbox is turned on. Click Ok to close the window.
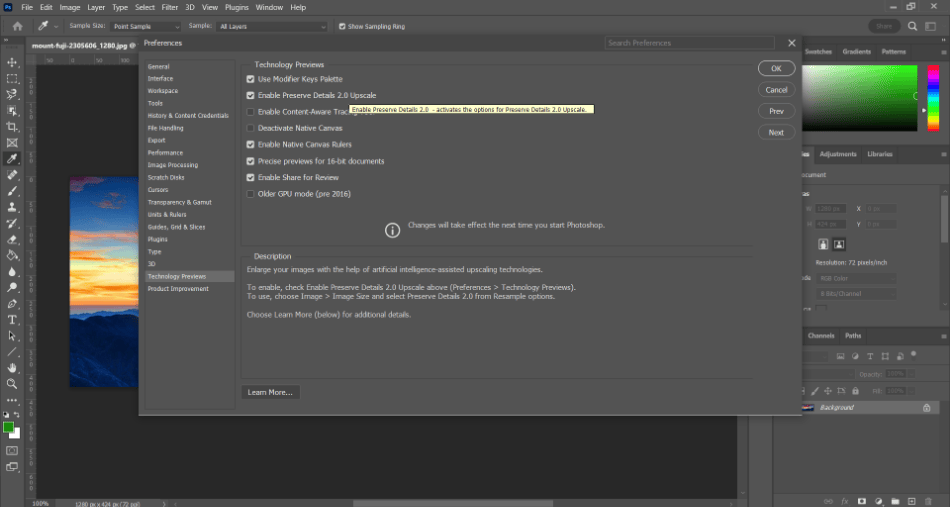
credit: Mark McPherson.
- We can now resample our image when resizing. Navigate to Image > Image Size. In the open mini window, set the new size you want for your image. Make sure the option for Resample is turned on. Next to Resample, there should be a dropdown menu that says automatically. Click on it to open the selection and choose “Preserve Details 2.0.”
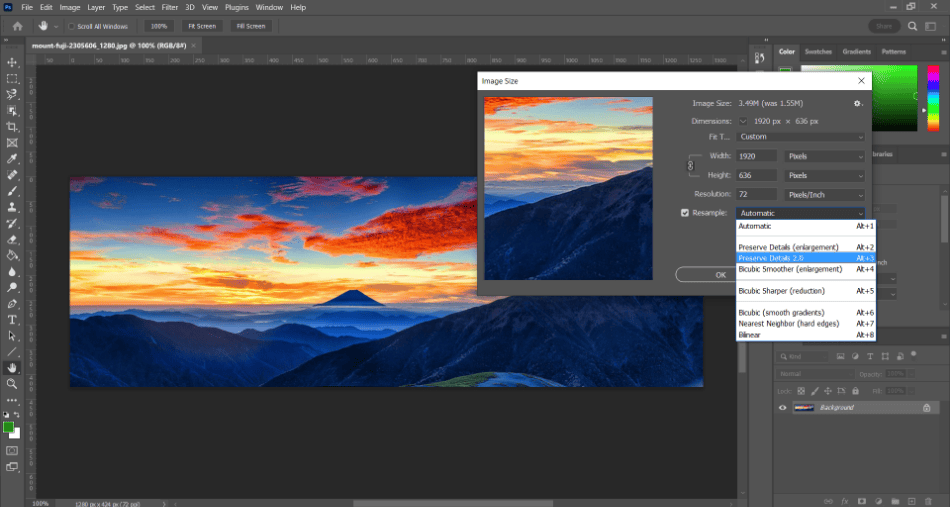
- When enabling Preserve Details 2.0, you should see a slider for Reduce Noise. Use the slider to turn it high enough to retain the most detail carefully. If it’s too high, the noise reduction can make the image too smooth and give it a weird cream effect. The right amount depends on the image, so experiment with different values.
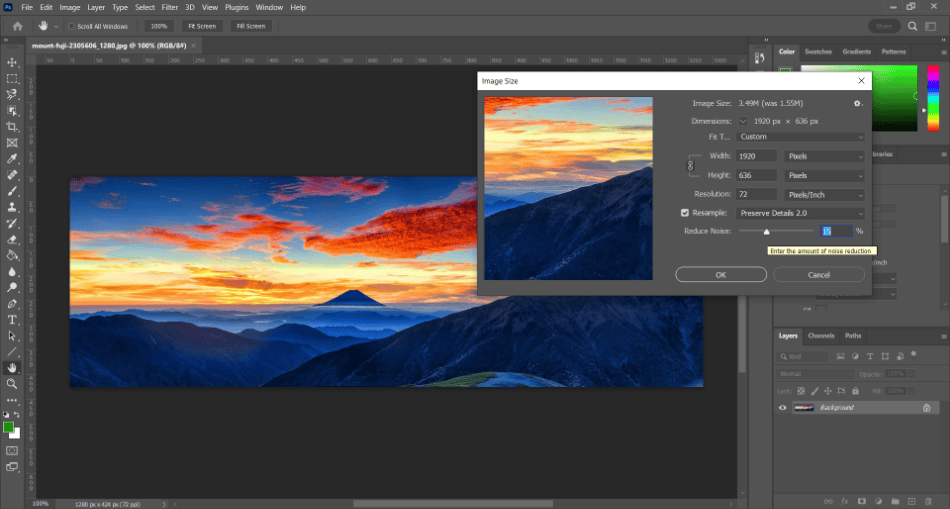
- Click Ok to enable the size change with preserved details.
You should perform this image resizing a few times before you get the right level of preserved detail. If it doesn’t look right, undo the change and try a different noise reduction level.
Other Resampling Effects
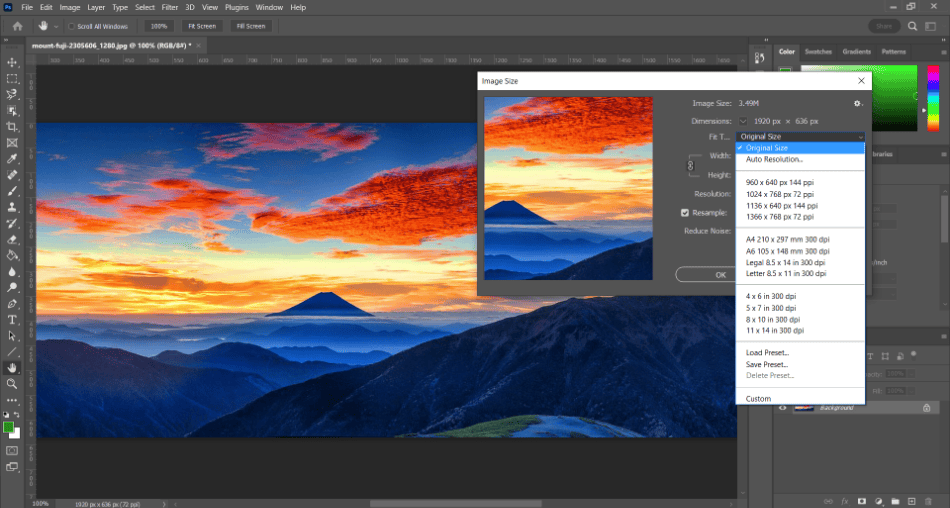
You may have noticed other options to consider when resampling from the dropdown menu in the Image Size mini window. One of these options might be better suited for your image than Preserve Details 2.0. Here are what the other options can do.
- Automatic: This option will resample primarily based on the type of image.
- Nearest Neighbor: This is an ideal option for illustrations with sharp edges where you don’t have to worry about anti-aliasing.
- Bilinear: This method adds more pixels by detecting and replicating the surrounding pixels to generate more detail.
- Bicubic: This resampling is similar to bilinear but creates smoother transitions between colors with more gradation.
- Bicubic Smoother: The method is much smoother than the standard bicubic resampling and ideal for larger images.
- Bicubic Sharper: While bicubic smoother is suitable for large images, this method is best suited for reducing the size of an image.
In terms of which method works best, Preserve Detail has proven to be the most effective when blowing up pictures with little loss in detail. It works exceptionally well for line art, considering how easily quality can be maintained. Of course, the right choice will ultimately depend on what size you’re going for.
Ideal Image Sizes
When resizing images, it’s essential to remember the exact dimensions of what you’re resizing for. Keeping the correct sizes in mind can ensure you don’t render the wrong size or engage in noise reduction when you might not need as much. Here are the different types of sizes to render for.
- HD Monitors: 1920×1080 pixels. This is common for images intended to be placed in videos, television, and film.
- 4K Monitors: 3840 x 2160 pixels. This is a common size for video games, high-quality videos, and movies.
- Printed Photography: 6720 x 4480 pixels. This is a standard size related to the Canon 5d Mk4 camera settings.
- Web Icons: 50×50 pixels. This is the size most commonly used for online icons that can be used as app buttons and website icons presented in the favicon format.
These are some of the most common sizes for various Photoshop projects. The ultimate choice in size depends on the project. You may develop these images for monitors of different sizes or prints with different dimensions. Always remember where your images will be going when resizing.
What About Resolution?
You may have noticed the other option in the image size window regards the resolution. The resolution measures how many pixels there are per inch. The total amount is usually autogenerated in the same way that width and height remain uniform when locked.
Most photos may have a resolution of 300, depending on their size. It all depends on how the image was initially created. It’s best not to mess with this number too much, as it can either drastically reduce the quality of your image or make the file size unnecessarily large with information.
Camera RAW Filter
If you want to spruce up your images even more after the upscale, you should try Photoshop’s Camera RAW Filter. This enables a new window that can alter your image’s primary aspects of brightness, color, contrast, and more. You can find it by navigating to Filter > Camera RAW Filter.
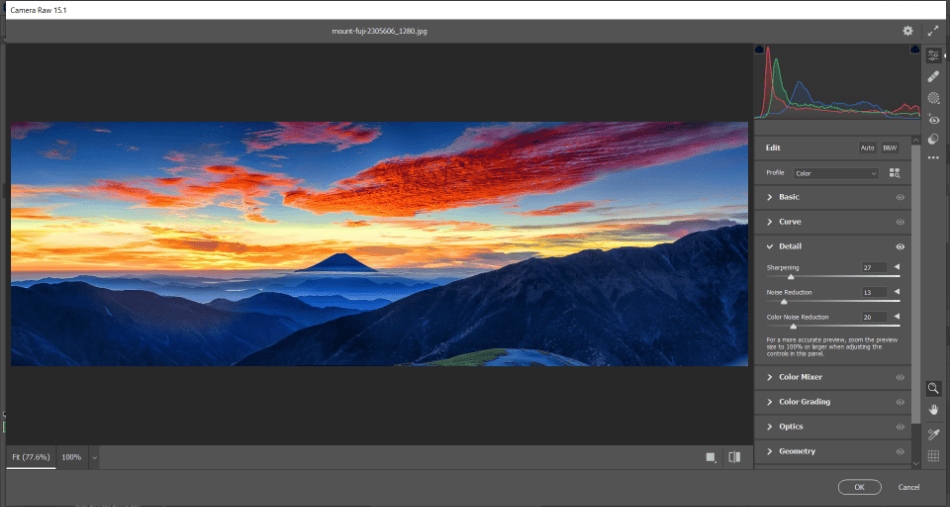
The Camera RAW Filters contains many familiar photo editing sliders and tools in Adobe Lightroom. Most notable among the tools is sharpening and noise reduction, both of which can improve the quality of the image. Play around with them if you still need to smooth out some areas that look grainy in your photo.
Tips & Tricks
- Try Lightroom: Besides Photoshop helping make photo edits, Adobe’s Lightroom can work wonders. If you have Adobe’s Photography Plan or the Complete Creative Cloud, try out Lightroom, given that the app focuses more on photography development than Photoshop. You may even use Photoshop and Lightroom in conjunction, depending on the photo edits you’re making.
- Consider the Camera: While these resampling techniques can improve your photos, you can save yourself a lot of time by making sure you shoot your pictures at the proper size. Check your camera’s settings for how it takes pictures, so you’re not spending too much time trying to resize and resample.
- Go Subtle With Smoothing: Don’t immediately slam the reduction to its limit when engaging noise reduction with the Preserve Detail feature. Start small and work your way up to find the best fit. Too much noise reduction can drastically alter your image to look too smooth.
Frequently Asked Questions
The resolution of your image will ultimately depend on the source file and the size you’re aiming for. Most images have a resolution set at 300, but it can be different depending on the dimensions of your image.
The 1920×1080 resolution is used in presenting images on HD monitors because most monitors have this as their pixel size. You can use pictures of this size can be placed in YouTube videos, television commercials, theatrical movies, and video games.
Resolution is the amount of detail contained within an image. This can be measured in either DPI (dots per inch) for print, or PPI (pixels per inch) is pixels for digital.
It’s best to keep the resolution to whatever the original image size generated. Resolutions will scale upward depending on the size you set. In terms of maintaining the quality of the image, you’ll need to engage in resampling for the best results.
To increase the quality of an image, you can use the Camera RAW Filter to make edits to improve the quality. If you want the image quality to grow when it comes to pushing up the image size, you’ll have to enable resampling using the Preserve Detail feature in the Image Size options.

Mark McPherson has been working as a video editor and content writer for over ten years. His background started in animation and video editing before shifting into the realm of web development. He also branched out into content writing for various online publications. Mark is an expert in video editing, content writing, and 2D/3D animation.