(Last updated on March 9th, 2023)
Making a photo collage is fun but takes time to compose. Maybe too much time. Thankfully, Photoshop has some handy techniques to make it easier so you’re not pulling your hair out over collages. I’ll show you how to make a collage in Photoshop with a step-by-step process that can make these projects simple and fun.
- Step 1: Finding the Right Photos
- Step 2: Getting the Images in Photoshop
- Step 3: Making the Collage File
- Step 4: Placing the Images
- Step 5: Assembly of the Collage
- Step 6: Spacing the Photos
- Step 7: Merge The Layers
- Step 8: Crop and Resize
- Step 9: Save and Export
- Tips & Tricks
- Conclusion
- Frequently Asked Questions
Step 1: Finding the Right Photos
The first step of assembling a sound photo collage is ensuring you have the right photos for the project. The last thing you want is a collage with a photo that doesn’t look like it fits the rest.
Mark McPherson
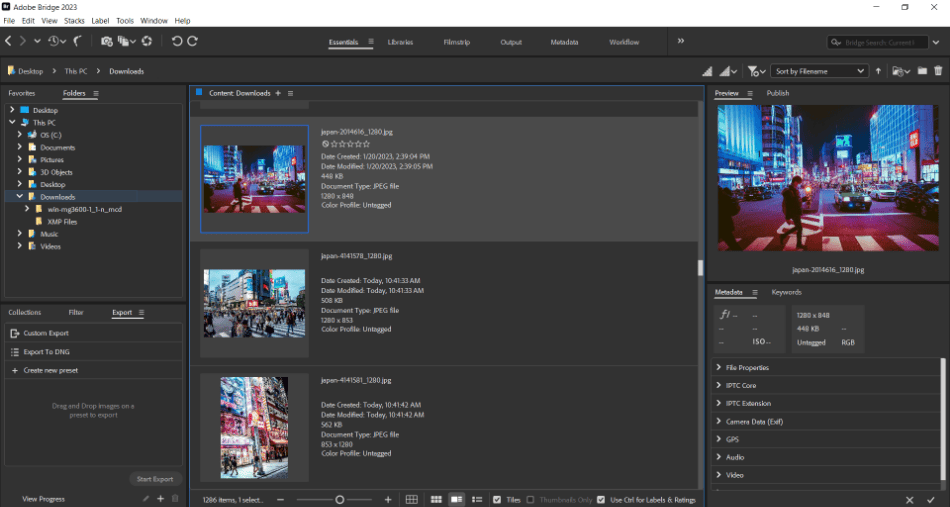
Open Adobe Bridge as an easy way of sorting through which photos you want. Adobe Bridge will sort through your files and present them in an readable gallery view. This app can also make quick edits by opening up the Camera RAW filter in this program.
Step 2: Getting the Images in Photoshop
Bring your photos into Photoshop as separate tabs when you’ve selected them. This can be accomplished by opening Photoshop and then selecting File > Open. From the open window, select all the images you want for your collage.
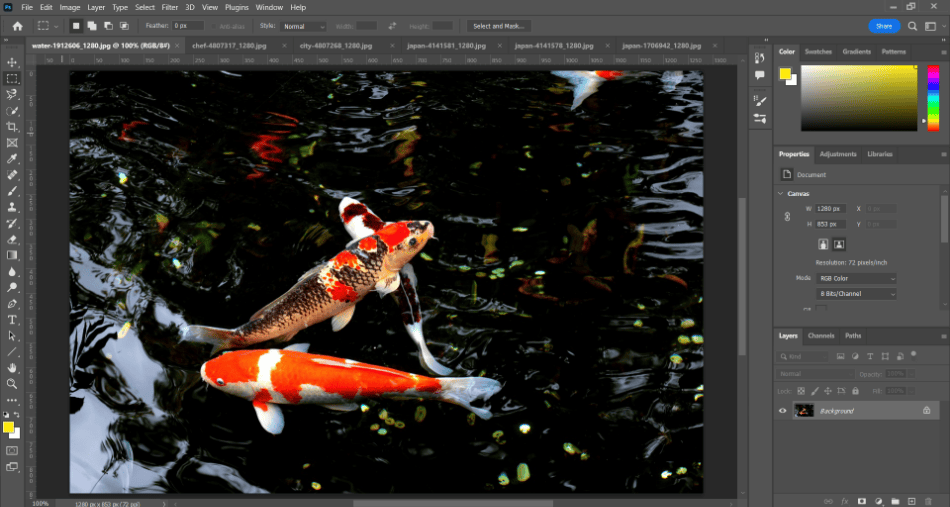
After clicking OK, multiple tabs should be created in Photoshop, with each one given the name attached to the photo. The photos have been brought in this way, so I have them on hand for making the collage. At this point, you can also work on removing any blur from your photos.
Step 3: Making the Collage File
I’ll now make a new document where these photos will be placed.
You can do it too by navigating to File > New to open the new document window. In the new document window, write in the dimension size for the collage.
If you want to retain the size and resolution of your photos, you’ll want to choose a large size.
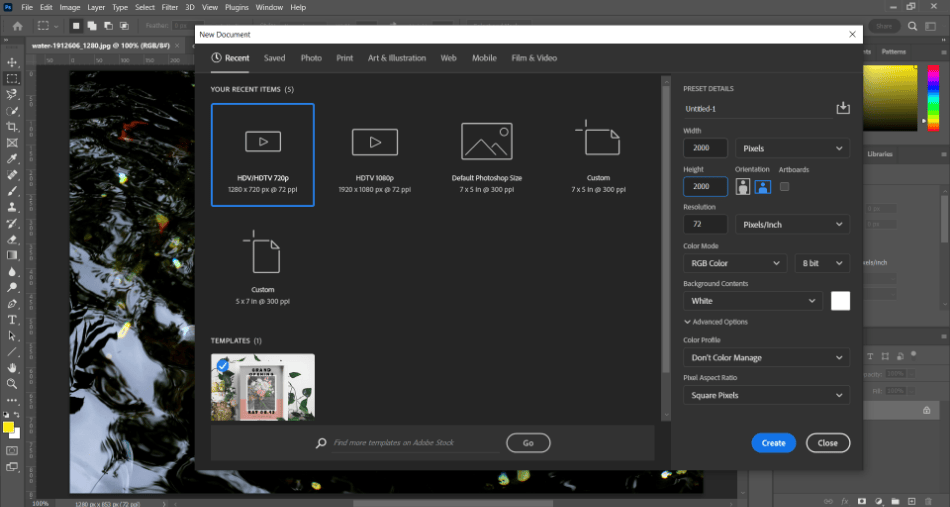
In this example, I’ll make a collage that is 2000 x 2000. This collage would be ideal for posting on a webpage or creating a social media post. It never hurts to make the size bigger since it’s much easier to scale it down later.
Name this new file a collage, and click OK to create it. I now have a blank canvas for creating the collage.
Step 4: Placing the Images
With the collage document created, I’ll start by clicking on one of the photo tabs and then selecting the entire area with the marquee tool. Choose the marquee tool and press Control or Command + A to select the whole picture.
I can now copy the photo by navigating to Edit > Copy.
Next, I’ll go back to the collage tab and paste the picture using Edit > Paste. The image should now be added to its layer.
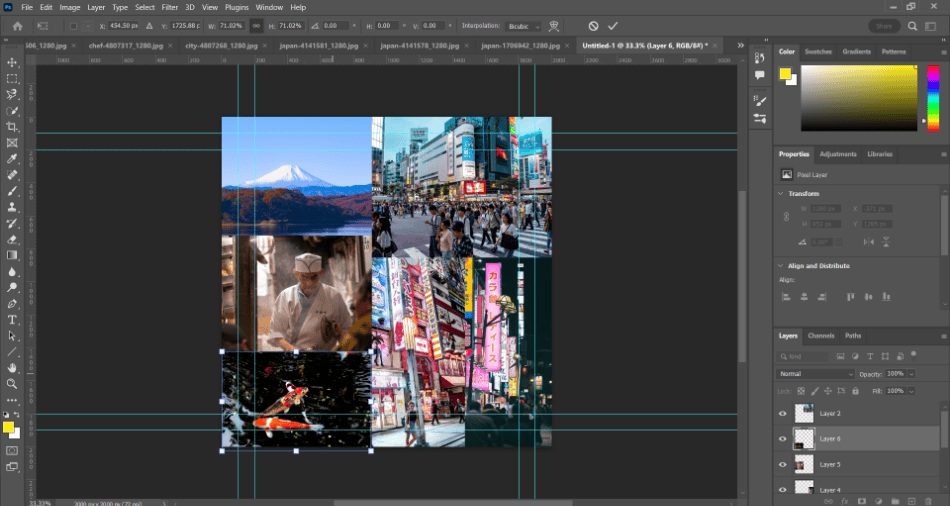
I can now edit the size of the photo by using the transform tools. I’ll navigate to Edit > Free Transform with the photo layer selected.
The image can now be resized by clicking and dragging the anchor points around the border.
Once this photo is placed at the perfect size for adding more pictures to the canvas, I’ll repeat the process for the other images. I can now begin assembling my collage when they’re all brought in and sized accordingly. You can also try mirroring images simultaneously.
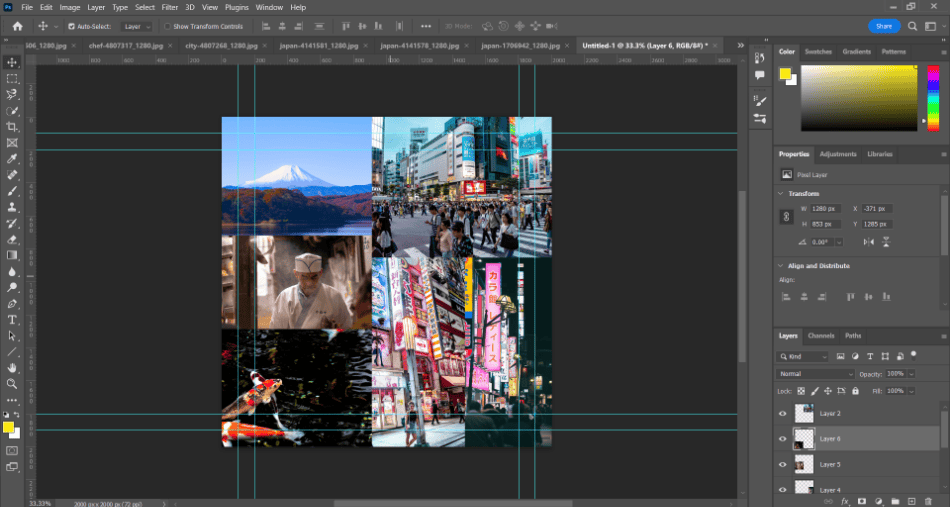
Step 5: Assembly of the Collage
This is the part where you’ll have to get creative. Select the Move tool in the toolbar to move around the photos.
Ps. I can also turn back on Free Transform for further resizing if I can get ideas while moving the pictures.
For this project, I’ve placed the images close together symmetrically.
Step 6: Spacing the Photos
To place white space between the images, I can resize them using free transform. However, there’s an easier way to create these borders.
I’ll add a Stroke to the images to give the photos the desired white space.
I can apply a Stroke by right-clicking on a photo layer in the layers panel and selecting Blending Options.
In the window that opens, I’ll click the Stroke checkbox to open up the Stroke properties. I’ll turn the stroke size up a few pixels, change the position to Inside, and make the stroke color white.
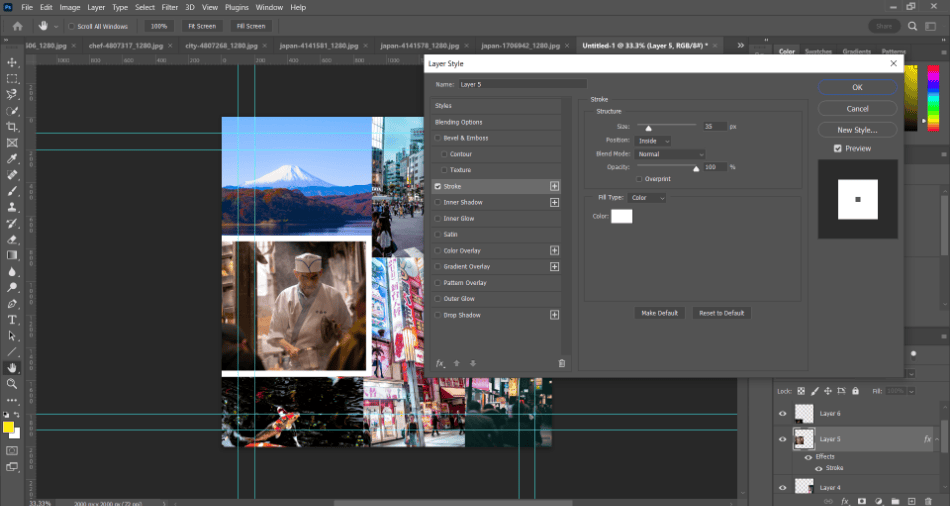
Mark McPherson
My photo should now have a border inside that doesn’t interfere with the other pictures. I’ll then repeat this process for all the images to ensure uniformity.
Step 7: Merge The Layers
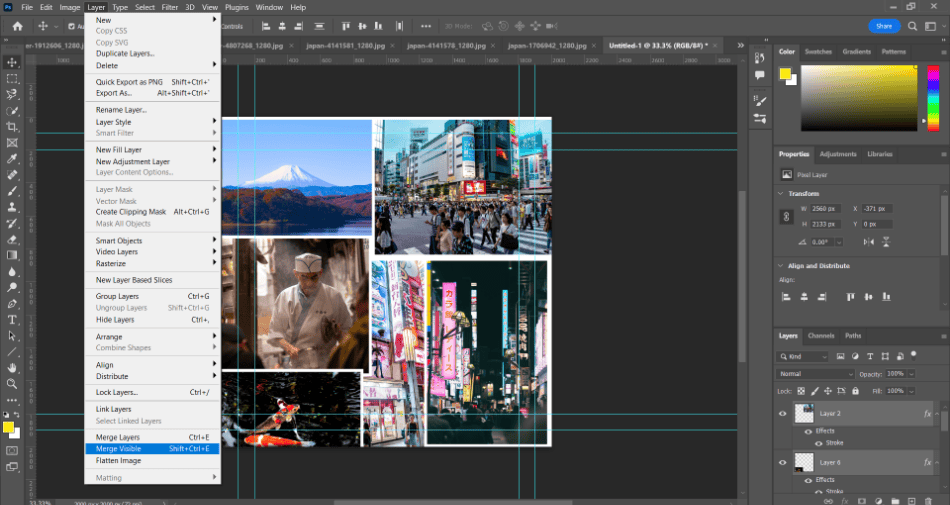
I can finalize the look.
As a last touch, let’s merge the layers. This can be done by selecting all the layers and navigating to Layer > Merge Visible. Combining all the layers will make the final collage easier to alter.
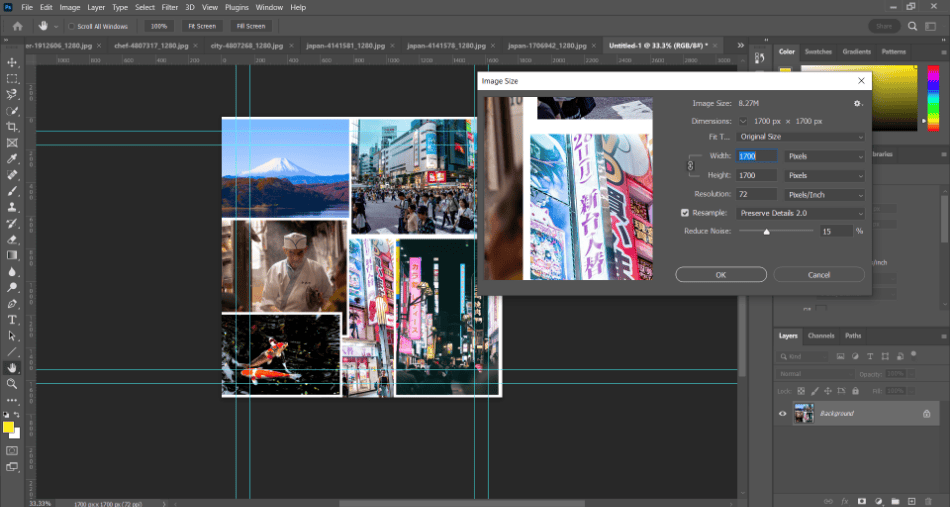
Step 8: Crop and Resize
For the final touches, the collage is now easy to retool for cropping and resizing. Use the crop tool to trim off any extra edges that need removal. Then use the Image > Image Size to change the overall size of the collage if it needs to be smaller.
This is why it’s better to make your photo project big enough to be scaled down later.
Step 9: Save and Export
I can now export the final product with the collage finished in Photoshop. I’ll navigate to File > Save As and then save it as a JPEG, though you can save it as any file type you wish.
After giving the image a name and clicking OK, I can fine-tune the image quality.
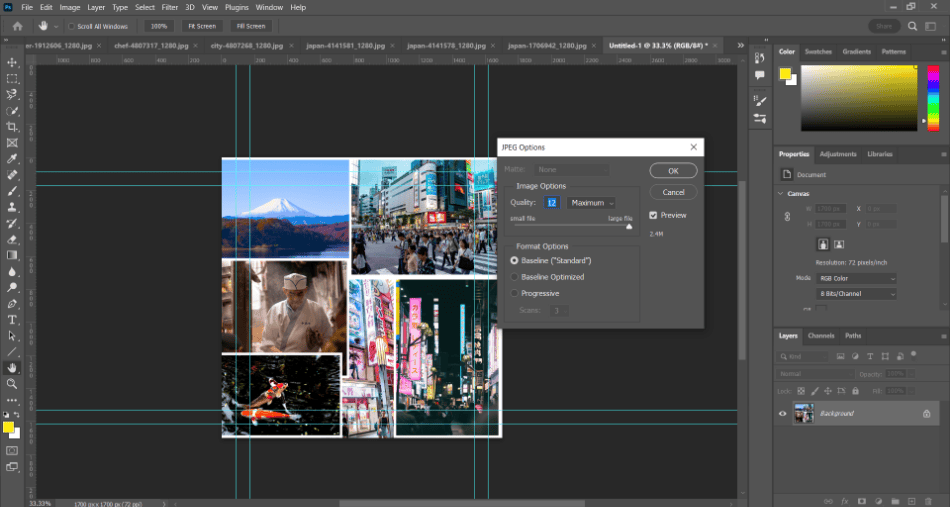
After approving the quality, the image collage will render the final look.
I have a photo collage ready for online posting, emailing, or printing greeting cards.
Tips & Tricks
Consider Templates
If you sign up for Adobe Stock, you can access various Photoshop templates. Some of those templates are ideal for creating collages. If you want to make your collages faster, consider using these templates. You can view which templates are available through Stock by looking at them in the New Document window under the Templates area. Adobe Stock does cost extra, so be willing to spend a little extra for the automation.
Organize Your Photos
Before even opening Photoshop, ensure you’ve got a rough idea of the photos you want to use and how you might like them to appear. Once you’ve got an idea of what you’re creating, making the collage in Photoshop will proceed much more smoothly.
Don’t Crowd the Screen
When making a collage, limit the number of photos you use. Too many photos crammed into a collage can make the image hard to read and even lose the theme.
Edit Your Photos Before Collaging
When you bring your photos into Photoshop, consider using the Camera RAW filter on each one before placing them on the collage canvas. The filter will let you edit the picture for color, contrast, brightness, and color. This is a great way to ensure your photos look good and that they all fit a consistent tone in terms of how they look.
Conclusion
Photoshop can give you the most control when making a collage. There are more features to consider, but these essential features can aid in creating quick and easy picture collections. These are just the basics, so feel free to experiment more with Photoshop’s many functions.
It should be noted that these collage techniques only apply to Photoshop CS. To see how Photoshop CS compares to the version available on iPad.
Frequently Asked Questions
A: Yes, Adobe does offer templates for collages within Photoshop through Adobe Stock. When creating a new document, there should be a template area. Click on it to search through several collage templates and find the one that looks best for your project.
A: The fastest way to make a collage in Photoshop is to bring your photos into a collage template available through Adobe Stock. Additionally, you can quickly make a collage by placing all your pictures on a Photoshop canvas, resizing them, and applying for an inner border.
A: The grid guides can create a collage grid in Photoshop. Create various grid lines for the specific sizes you want for your photos. Add shapes to the grid to act as borders for your images. Then add your photos to this grid. Be sure to shift around the grid lines, shapes, and photos until you have it right.
A: Photoshop doesn’t have a collage tool. It has some tools for creating collages, including Free Transform and Strokes through Blending Options.
A: The best way to make a seamless collage is to organize your photos while placing them. This can be done using grid guides to specify how your images will be placed.

Mark McPherson has been working as a video editor and content writer for over ten years. His background started in animation and video editing before shifting into the realm of web development. He also branched out into content writing for various online publications. Mark is an expert in video editing, content writing, and 2D/3D animation.