(Last updated on March 9th, 2023)
By default, Adobe Illustrator creates images with a white background. This can be annoying, and some people find it difficult to work with.
Don’t worry! If you don’t like this, we look at how to make a background transparent in Illustrator in the below guide.
This is an incredibly useful trick to know, and it can help improve your workflow or allow you to visualize elements of your images properly.
Why Would a Transparent Background be Beneficial?
Before we jump into the guide, it’s important to understand why you may want to make a background transparent in Illustrator. This software has some similarities but is primarily used for creating vector graphics, unlike Photoshop. This is an invaluable technique, and the two methods I will show you have numerous uses, including:
So the Image Blends Properly
Firstly, from a visual perspective, a white background looks incredibly jarring and can completely ruin the look of things like websites and brochures.
There are instances when white backgrounds are appropriate. For example, perhaps you have a blog that has a white background for the written content. In an instance like this, transparency isn’t as important.
However, what if you have a business website with a gray header and navigation but a company logo with a solid white background? This would look terrible as the borders of the logo would be visible due to the white background against the gray header.
This logo would blend perfectly with the website header if it was transparent and the white background removed. The grays would show through, and there would be no harsh lines.
To Improve Your Design Perspective
Secondly, making the background transparent also helps from a usability and ergonomics perspective when you are using Adobe Illustrator. It can be quite difficult to visualize what you are creating – whether this is a poster, photo, or vector graphic- when a large white background is staring back at you.
I find this can detract attention from the objects I am working on. Furthermore, it makes it difficult to picture the image in a different setting, such as on a brochure or as part of a website.
With a transparent background, you have none of this interference. You can concentrate solely on the thing you are creating. Moreover, if you wanted, you could even import different temporary backgrounds to see how the graphic looks in different settings.
To Boost Readability
Tying into the first point, using a transparent background can also help readability, although you must use this with caution.
This works best if your graphic, text, or whatever you are creating uses lighter colors. These could get washed out by the white background and make the graphic unreadable. There may not be enough contrast for it to stand out.
This is particularly important for web graphics as readability is imperative to give users a positive experience when visiting your site. If they are squinting and struggle to read the text, they will soon go to a different site.
Just be careful with transparent backgrounds in terms of placement. Ideally, the transparent graphic should have enough contrast against the background it is being placed on.
For More Professional Graphics
Lastly, transparent backgrounds just look better. They allow you to create seamless graphics that blend in properly with their surroundings. Nothing is worse than an ugly website or brochure with blocky graphics that stick out and have defined edges due to their JPEG backgrounds.
Guide for a New Image
The first process I will teach you is how to make the background transparent of a new image. Please note that this is merely a visual change. By default, the background is already transparent – you can’t see this because Illustrator chooses to show a white background.
Therefore, by using this process, you are just showing the true background. If you did indeed want a colored background, you would have to add one using the fill tool.
Step 1 – Open Your File
First, we have to open your file either or create a new file. To create a new file, simply click on FIle > New. Alternatively, to open a file, simply click on File > Open.
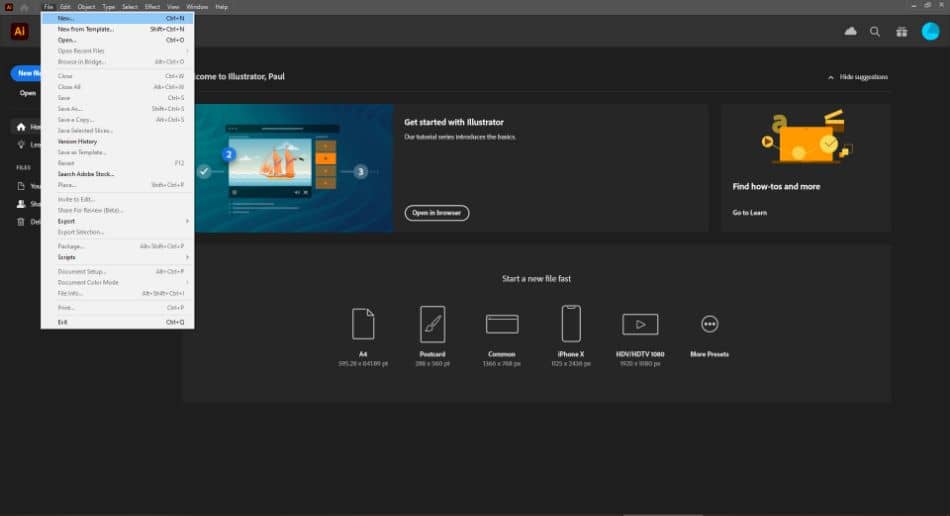
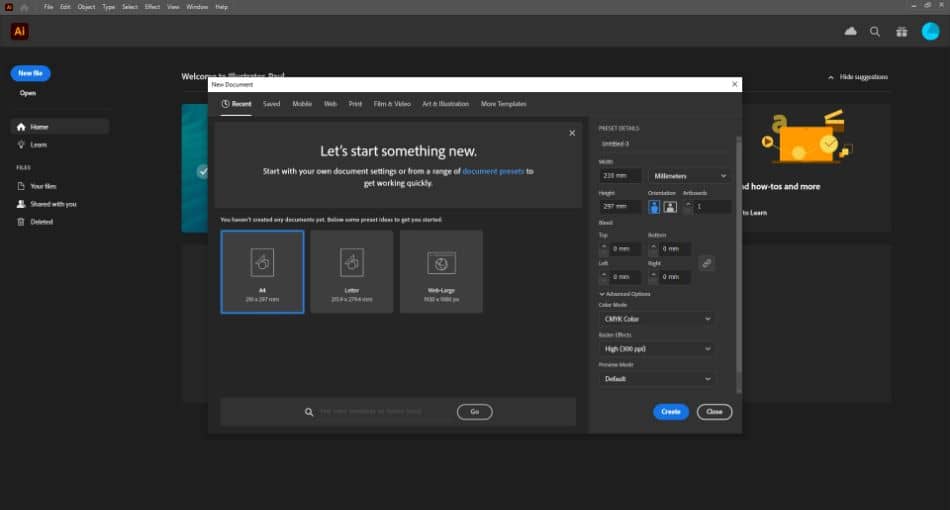
In this example, we are just going to create a new document. Once you have clicked on File > New, the new document dialogue box should open. Here, you can set different parameters such as the document size, color mode, raster effects, file name, and bleed settings. Once you have set these, click on “Create.”
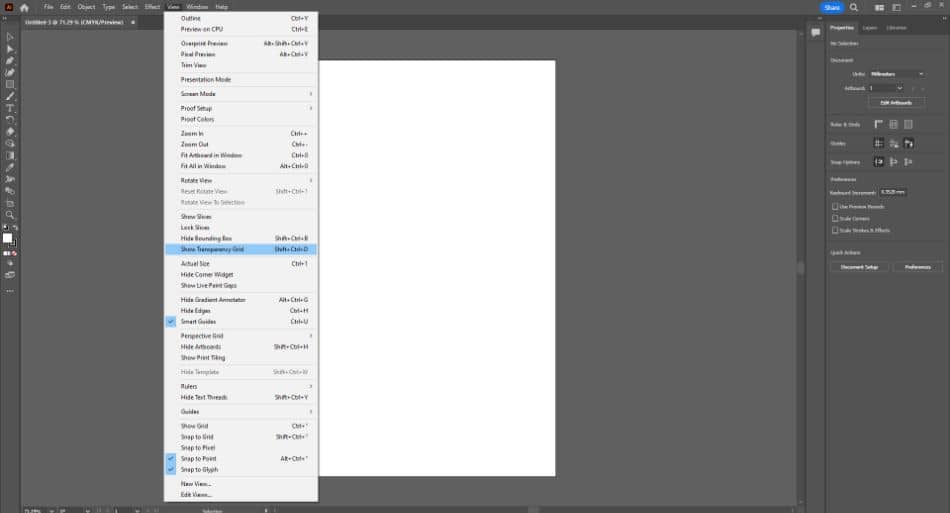
Step 2 – Enable Transparency Grid
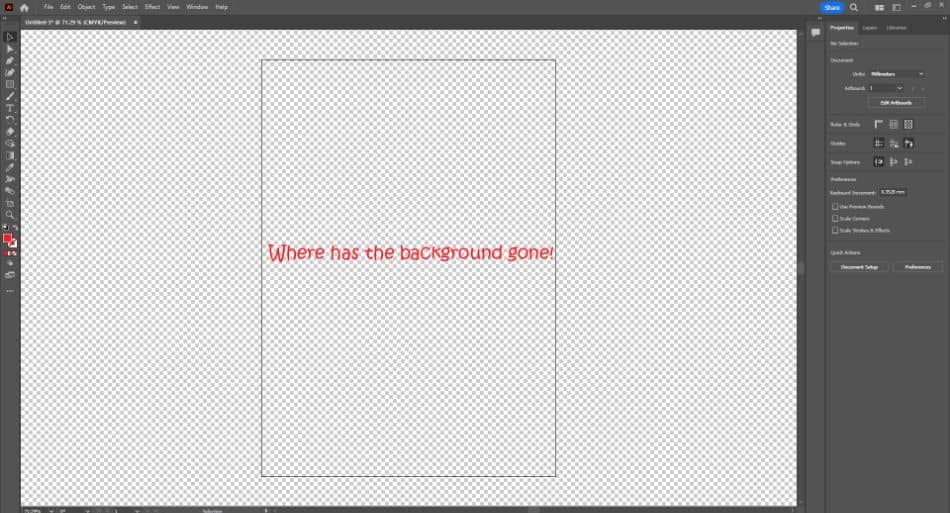
As you can see, this creates a new document with a white background. We now want to change this to a transparent background to give us better working conditions. We do this using the Transparency Grid.
View > Show Transparency Grid
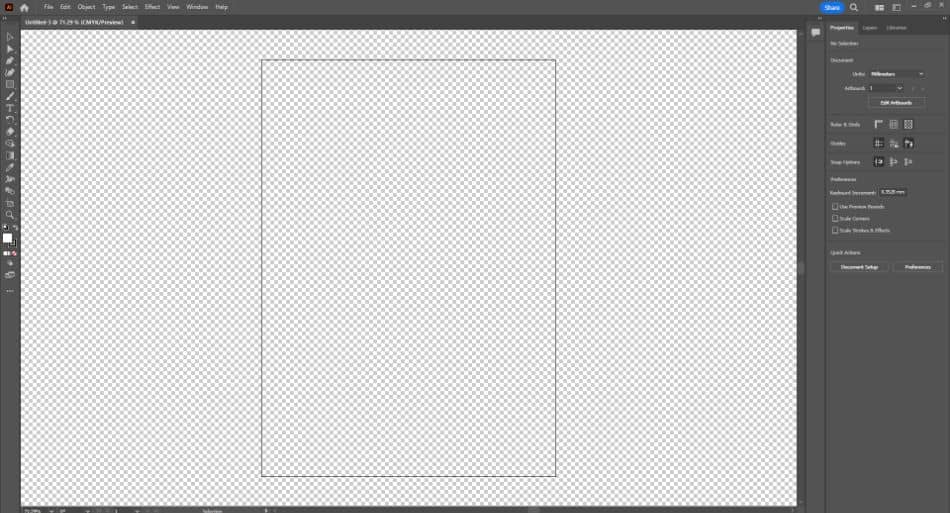
Once you have enabled this, the white background disappears. Furthermore, the surrounding gray background is removed. You should only be left with the traditional gray checkered transparent background, plus the outline of your image border, as shown below.
Step 3 – Create Your Image
That’s essentially it! You can now create your image in whatever way you see fit! This can include useful techniques like adding a drop shadow, inserting text, and creating overlapping shapes. To demonstrate this below, I just added some text to the image.
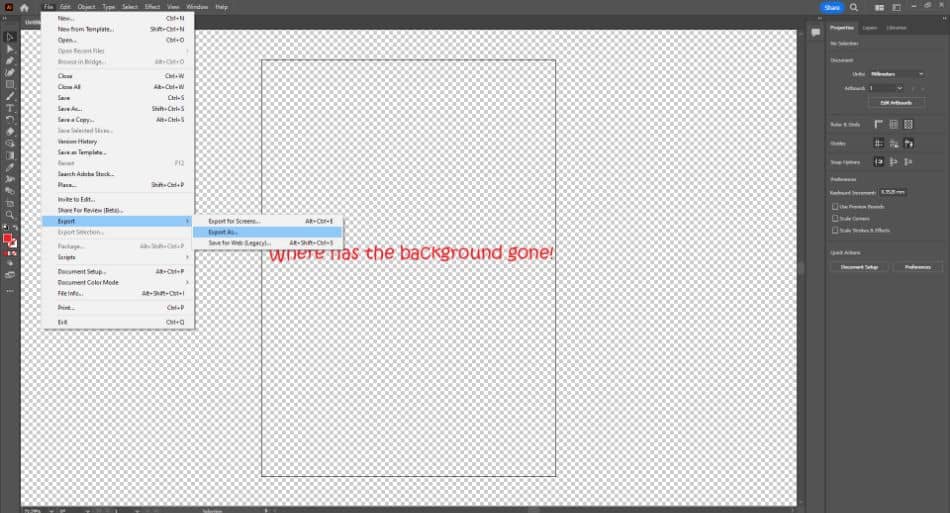
Step 4 – Export Your Image
When you have finished creating your image, it’s time to export it. Please note that to show the transparent background; you must save the file as a file type that supports transparency. These include:
- PNG
- SVG
- TIFF
PNG files are most commonly used for things like web graphics and are great when you want an element background to show through something like text or a logo.
Click on File > Export > Export As
This opens the export dialogue box. Here, you must click on the drop-down menu and choose the relative file type. You can also rename the file (make sure you keep the extension at the end though!) and change the save location. When finished, click export at the bottom right-hand corner of the box.
Guide for Images with White Background
You have now learned how to make a background transparent in Illustrator. But as mentioned, that’s just a visual aid – the background of a new image is transparent anyway.
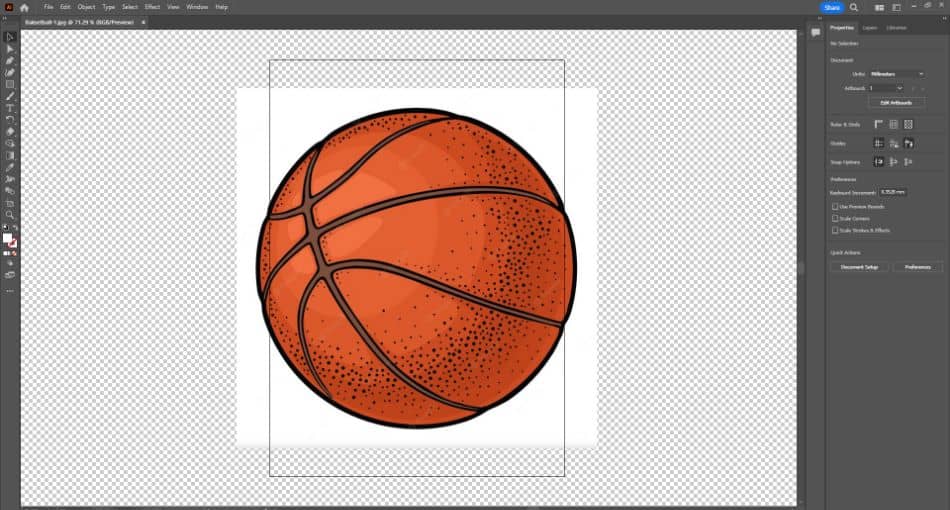
What if you have a JPEG image that has a white background, and you want to make it transparent? This is possible with Illustrator using the Image Trace tool. This incredibly powerful tool allows you to select objects without trying to hand-draw selections.
In this example, we are using a simple JPEG image of a basketball with a white background:

Step 1 – Open Your File
As before, you need to have the file open. Simply click on File > Open, navigate to the location you saved the image, and double-click it. This should open it as a new workspace in Adobe Illustrator.
Step 2 – Enable Transparency Grid
Although the background is white, we still need to enable the transparency grid. This is useful once we have removed the white background and also makes it easier to see the edges of the background.
View > Show Transparency Grid
As you can see below, this should create a transparent canvas surrounding the image, but NOT remove the white background of the image itself.
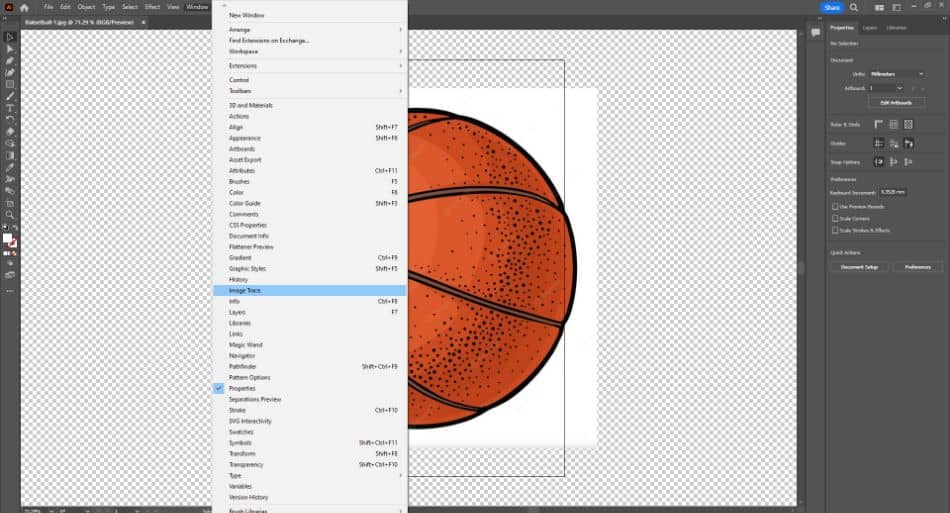
Step 3 – Open the Image Trace Tool
As mentioned above, we need to use the Image Trace tool to remove white backgrounds. This is an especially useful tool that automatically traces objects based on the parameters we select. You can manipulate this tool to remove white backgrounds. To open the Image Trace too, do the following:
View > Image Trace
Step 4 – Set the Image Trace Options
The Image Trace toolbox may have its options grayed out to start. This is because you do not have anything selected.
Therefore, click on the Selection Tool (Keyboard shortcut V) and then click your mouse somewhere on the image. This should put a blue highlight surrounding the image, as you can see below. This means that the image is active and selected – the options in the Image Trace toolbox should now be available.

We can now set the parameters to remove the white background. You must use these parameters exactly otherwise, the results could be varied:
- Mode: Color
- Ignore White: Checked
The mode option is below the preset and view drop-downs. We select color as this keeps anything with colored pixels in the selection. Next, click the arrow next to the advanced option to expand it. At the bottom, there should be an “Ignore White” checkbox. Tick it.
So, we have now told the Trace Image tool to trace anything with color but to ignore whites.
Lastly, click on the “Trace” button at the bottom of the toolbar. This will complete the process – it could take a few seconds, and you may notice a progress box appear.
Step 5 – Export Your Image
If you selected the correct settings, that should have worked perfectly, and removed the white background! As you can see from the below screenshot, I now have just the basketball with a transparent background.
To keep that transparency, this can now be exported as a PNG, TIFF, or SVG.
Simply click on File > Export > Export As, select the file type, rename your file if necessary, choose the save location, and press Export. Job done!

Changing Transparency Features in Adobe Illustrator
To finish, another useful thing to know is how to change the default transparency settings of Adobe Illustrator. This allows you to change things like the grid color of the transparent background setting.
To access the transparency features, simply click on File > Document Setup
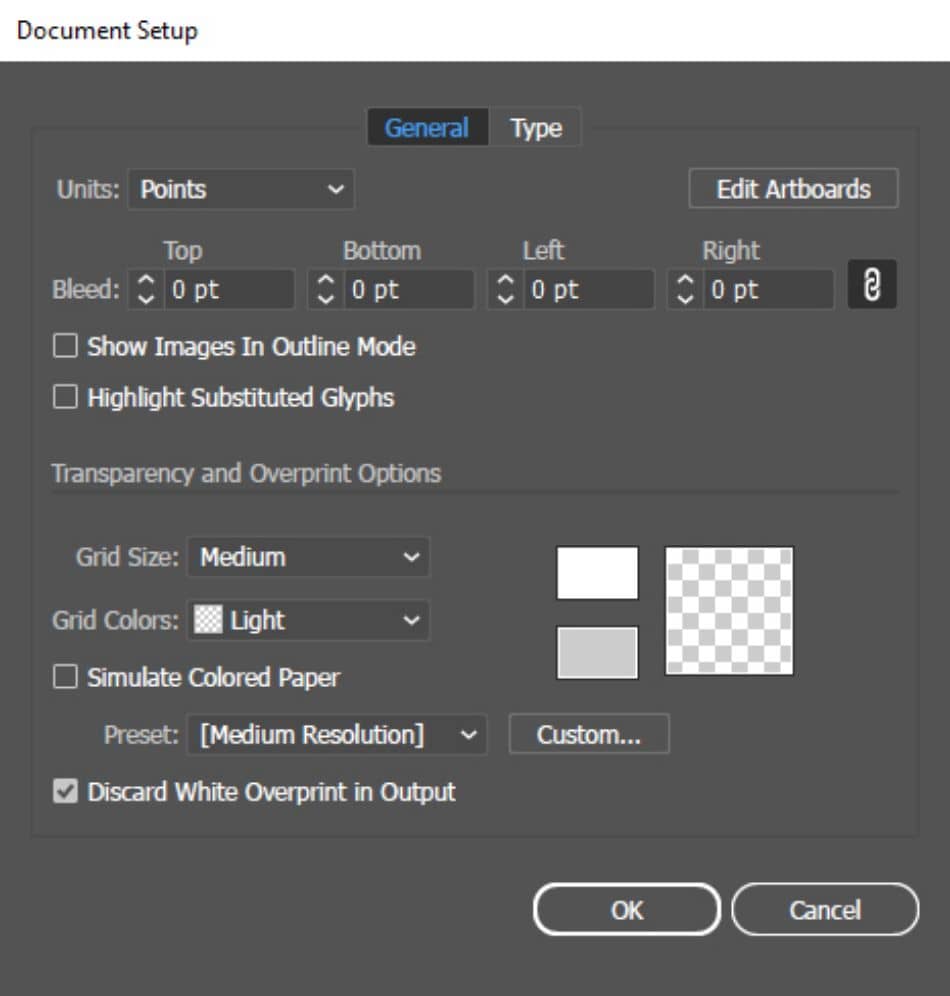
As you can see, the “Transparency and Overprint Options” section allows you to customize your transparent background. You can change the basic grid style, size, and alternating colors. When you purchase Illustrator, these settings will all be at their default values, so it could be beneficial to spend time checking the various parameters so you can get your workflow how you like it.
Improve Your Workflow with Illustrator
I hope you have found these two techniques beneficial. Being able to change your background is highly useful, and it gives you greater flexibility when working on different projects.
Additionally, having the ability to remove white backgrounds from JPEG images is invaluable. I can’t count the number of times I have downloaded a piece of clipart only to find that it has a hideous white background! If you have similar experiences, this should no longer cause a problem.
Frequently Asked Questions
By default, Adobe Illustrator gives the file a white background. This is great in most circumstances as it lets you see what you are working on and how the image will appear.
It is important to remember that not all image file types are capable of showing transparency. PNG, SVG, and TIFF files can do this. To save your Illustrator file as a PNG, simply click on File > Export > Export As. Next, in the pop-up box, select the PNG file type from the drop-down menu, rename your file if necessary, and click export.
Yes! If you want a true preview of your image and to see what it looks like without the default white background, you can do this. First, open your file. Next, click on View > Show Transparency Grid. This should remove the white background and instead show the typical gray checkered transparent background behind your file.
Many people prefer to have a transparent background when working in Illustrator, so they get a true perspective of what their image looks like. A white background can be distracting, and it might not display things like the edges of shapes and text properly.
If you have a JPEG image with a white background, you can remove it in Illustrator and then save it as a PNG file. The simplest method is to use the Erase tool (Keyboard shortcut E). With the Erase tool selected, you would then simply have to click on the white areas that you want to remove.

Paul is a lifelong photographic hobbyist and has been taking epic shots from around the world for the last decade. His travels have taken him to places like Antarctica, Thailand, and Greenland and this has given him the chance to photograph places few people have seen. As a self-professed nerd, Paul loves photo editing and his programs of choice are Lightroom Classic and Photoshop. In recent years Paul quit the standard office life and became a full-time freelance writer to share his passion for photography and tech with those wanting to learn.