(Last updated on January 9th, 2023)
Photoshop can accomplish a lot once you start rasterizing your graphics. But what is rasterization, how do you apply it, and when is it best used? We’ll explain everything you need to know about Photoshop rasterization and how it can suit your projects best.
What’s Rasterization?
A rasterized layer is composed of pixels instead of vector-based layers made out of editable data. You can spot the differences in the various tools you use in Photoshop. The paint brushes create raster graphics, while the pen and text tools create vector graphics.
The difference between the two is based on what edits you can make to these graphics. If you’ve used the pen tool before, you’ll notice you can push and pull different points on a path you’ve created. Raster graphics are not as editable, existing more the way paint would on a canvas.
While vector graphics can only be manipulated in a handful of ways, rasterized graphics have more options. You can apply filters, apply textures, mix colors, and paint over parts of the image with different brushes. Rasterization can open up many possibilities if you want to make significant changes to your image.
Here’s a handy guide on what file types are raster or vector if you plan on bringing images into Photoshop for edits.
- Raster: JPG, PNG
- Vector: SVG, AI
You may have noticed that the AI file type is for Adobe Illustrator project files. This is due to Illustrator primarily being a vector-based graphics application. These file types can be read in Photoshop, but it should be noted that Illustrator is a better app to consider if you’re primarily working with vector graphics.
These are the types of vector layers you can rasterize:
- Shapes
- Text
- Smart Objects
- Imported SVG or AI Files
How To Rasterize
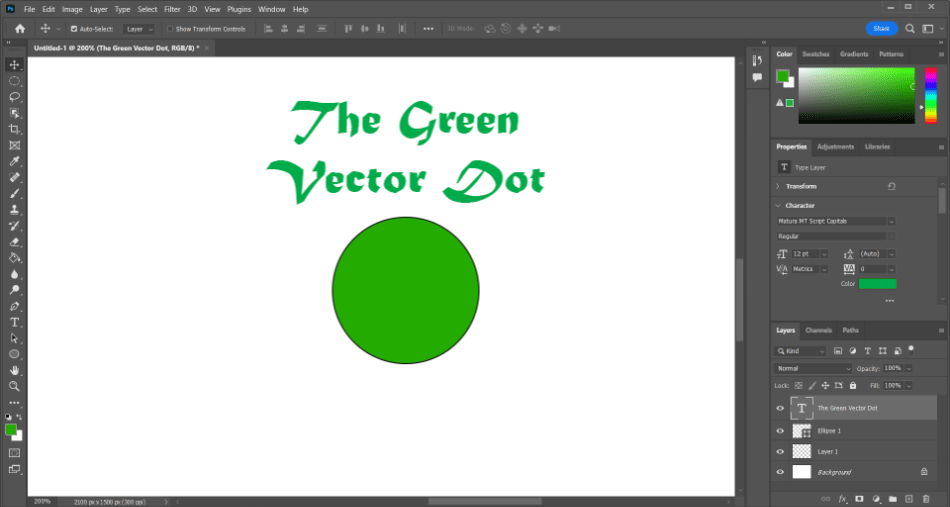
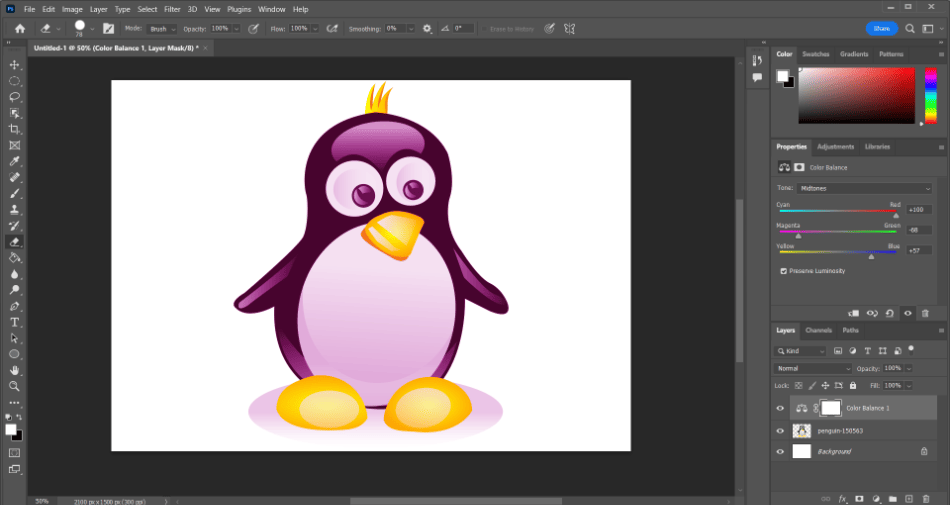
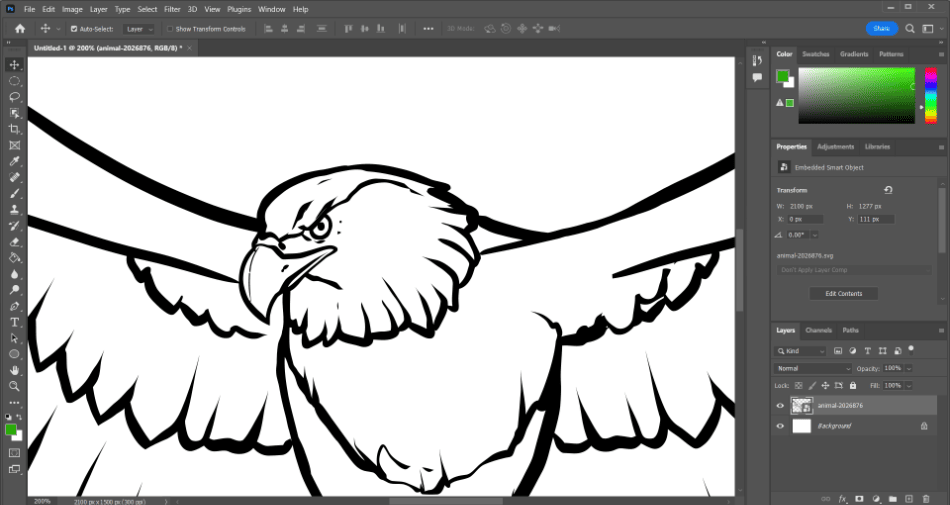
We will apply it to a vector graphic to demonstrate how effective rasterization can be. Vector graphics often look like simple shapes and need to be rasterized for further edits. You can also apply this same technique to any vector graphics you create in Photoshop.
- Bring a vector-based image or graphic into Photoshop and make sure your Layers panel is open. Suppose it’s not open; press F7 to reveal it. The panel is typically found on the bottom left-hand side of the interface.
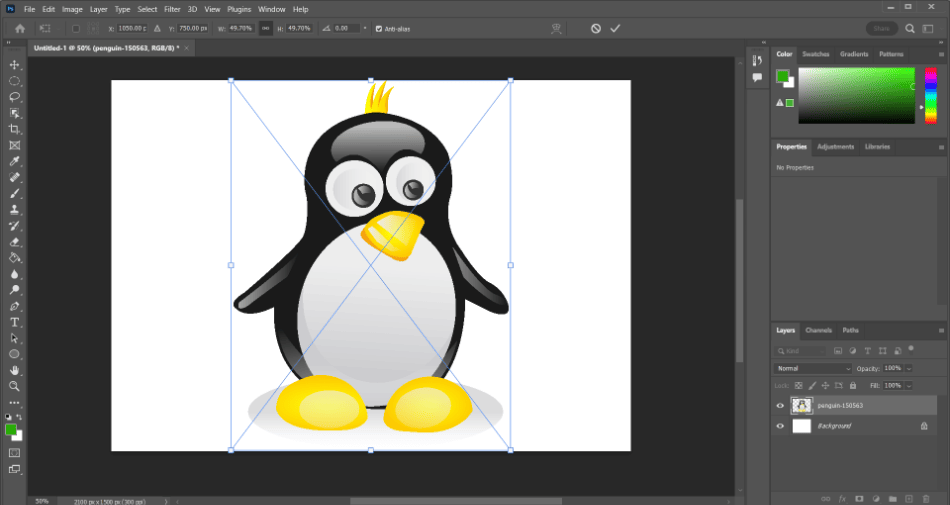
- Select the layer with the vector graphic. Now right-click on the layer and select Rasterize Layer.
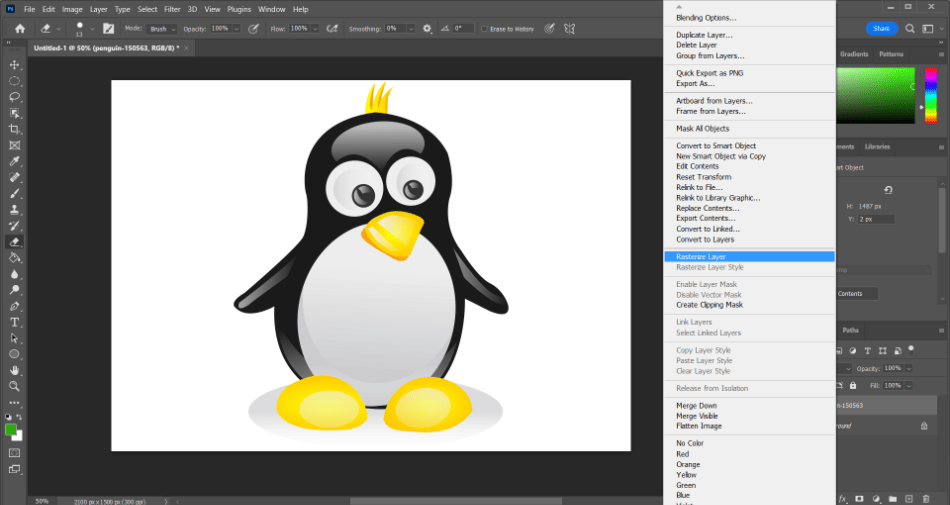
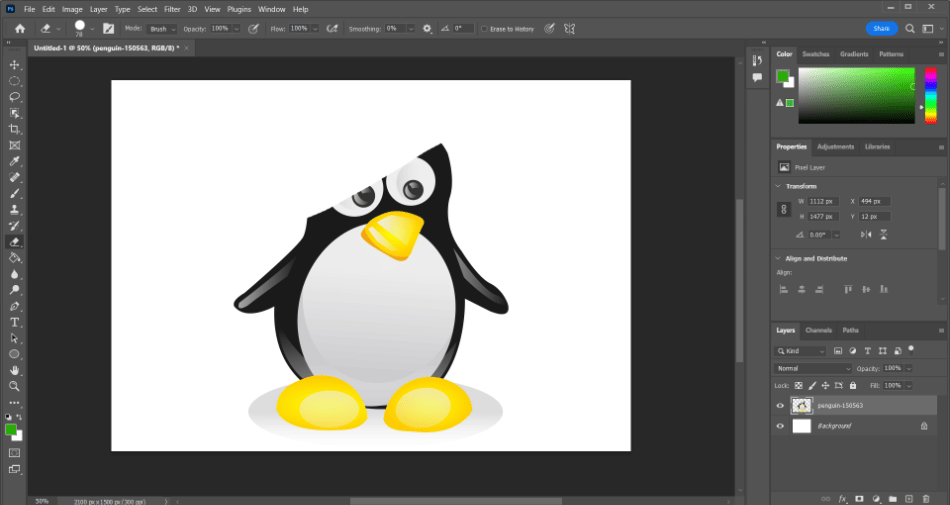
- Your layer should now be rasterized. Test it out by painting over it or erasing a portion of the layer.
Another quick method to consider is an automated response. Some vector objects will allow you to rasterize if you attempt to use raster-style tools and filters. Try painting on a vector layer and you should be given a prompt for transforming your vector graphic into a rasterized one.
You should read the warning that Photoshop gives you before going forward. Once you rasterize an image, it can’t be converted back into a vector object as quickly (unless you immediately press Undo Changes). This isn’t just a limitation of Photoshop but vector-based programs as well.
An excellent example of this is how Illustrator handles raster graphics. Raster graphics can be transformed into vector graphics within this program, which creates a lot of extra information. This can lead to heavy load times if you’re trying to turn a detailed photograph into a vector, considering how much detail needs to be stored.
It’s important to consider what needs to be changed and what can be sacrificed when going from vector to raster. But how do you know when it’s the right time to rasterize? We’ll next go over when it’s best to go for rasterization and when it’s best to keep those vector graphics preserved.
What Can You Do With a Rasterized Graphic?
Rasterization opens up a whole new toolset for your graphic layers. While vectors offer limited customizations to preserve the most information, there’s much more you can do with raster graphics. This is notably why Photoshop is regarded more as a raster-based graphics editor.
Here’s a rundown of the types of edits you can make to raster graphics that you wouldn’t be able to with vector graphics:
- Apply Adjustment Filters: Adjustment filters can help tweak the color, levels, brightness, saturation, and more of your layer. These filters can be applied to vector objects, not as editable adjustment layers, but only as converted Smart Objects.
- Paint: The paintbrush can only be used within raster layers. You’ll have to create a separate layer without changing it if you want to paint on top of a vector layer.
- Erasing: The eraser tools only work on pixels and won’t work on vector layers. You’ll have to rasterize if you want to erase some text or an area of a shape.
- Blurring: Similar to the erasing tool, the blur tool will only work with pixels.
- Gradient Tool: Vector objects can’t handle the full extent of filling the entire layer area with gradient colors since it generates pixels to fill the area. As such, it can’t recognize the edges of vector graphics.
Read more:
When and Why Should You Rasterize an Image?
While rasterization can be essential for some graphic edits, it’s important to realize when vector graphics are more critical. A perfect example of this is if you desire to change the color of a vector shape. You don’t need to rasterize that shape to make this edit.
Shapes can have their border and fill colors changed. Look through the options when selecting your shape to make these changes. This is a much easier way to change colors and will preserve your vector information, making it easier to edit later.
Text is also a vector object with various options to consider before rasterization. A good example is the desire to transform the text to appear curved. The Text Tool’s warp effect can accomplish without having to rasterize to use all the transformation effects.
Quality is one of the most important aspects to remember when it comes to rasterization. Vector graphics and objects carry a lot of information and have the highest quality. This means you can change the size of your vector-based imagery, and the quality will remain the same.
Rasterized graphics and objects have a noticeable loss in quality. If you rasterize an object and scale it upwards, you’ll notice the pixels becomes more apparent. This aspect is due to how rasterization only recognizes a certain amount of pixels on your canvas.
If you’re working with a lot of vector-based imagery, remember what can be done before rasterization. It’s best to preserve your vector graphics in case you need to make an edit to a shape’s structure or the contents of a text block. Only use rasterization if needed since you can’t precisely revert to vectors as quickly.
Pros and Cons of Rasterization
Pros
Cons
Frequently Asked Questions
Rasterization refers to transforming vector artwork into pixels. In Photoshop, you’ll need to rasterize any vector object or image if you want to make more elaborate edits to these layers.
Rasterizing allows for more editing capabilities when vectors do not bind layers. Vector-based layers for shapes and text can be rasterized and retooled to look much different.
Rasterizing allows for more editing capabilities when vectors do not bind layers. Vector-based layers for shapes and text can be rasterized and retooled to look much different.
To rasterize an image means to convert it into a graphic layer capable of more edits. Rasterized photos can be edited for more adjustments, shape manipulation, cropping, and advanced color changes.
To rasterize a PNG image, start by selecting the layer. Once it’s selected, choose to Rasterize from the Layer menu.
Vector-based layers are better for keeping images crisp and clean and file sizes down. Raster-based layers are more editable for using pixels, but they also increase file sizes to generate extra details.
The critical element of a rasterized image is the pixels. If you look close enough at the image, you should see more of a blur brought on by rasterization.

Mark McPherson has been working as a video editor and content writer for over ten years. His background started in animation and video editing before shifting into the realm of web development. He also branched out into content writing for various online publications. Mark is an expert in video editing, content writing, and 2D/3D animation.