(Last updated on March 15th, 2023)
Photoshop has amazing distortion tools. These allow you to change the geometry of things like text, objects, people, and even entire images. They are some of the most useful tools available, among which a particularly interesting one is the warp tool.
As you will see below, this tool has many uses, including warping text and retouching portraits.
It’s a brilliant feature to understand and add to your Photoshop arsenal. Therefore, read on to learn how to warp an image in Photoshop!
When Might You Use the Warp Tool in Photoshop?
The main thing to remember about the warp tool is that it is situational. I don’t use it often, but it’s incredibly useful when I do. For me, it has two main uses: warping text and objects, and retouching portraits.
Warping Text
Photoshop has an extensive text tool with hundreds of different fonts. These can be used to create amazing marketing material, web graphics, and more. The blending options enable you to add things like drop shadows too.
Using the warp tool, you can transform your text into different shapes and styles. For example, you can warp it to wrap around an object or give it an arch in the center. The preset warp selections are fantastic and allow you to get creative with your text.
Retouching Portraits
The other main use is for retouching portraits. I haven’t had much experience with this as I tend to shoot landscape photography. However, understanding the warp tool can be hugely beneficial if you regularly take portrait shots.
Using one of the marquee selection tools, like the rectangular marquee tool, you can select a specific area of a portrait or full-body shot to warp. Using Edit > Transform > Warp, with the selection active, you can then transform only that part of the image.
This is useful for changing body shapes, reducing or adding curves, and drawing less attention to unwanted features. If you use the warp tool for portraits, just be aware of how the background changes too.
Hence, it is necessary to eliminate lens distortion using the warp tool in Photoshop.

Using the Preset Warp Options
The easiest way to warp an image in Photoshop or part of it is using the preset warp options. These are common warp styles that look great on things like text and shapes. I mainly use these for text, which is not suitable for portrait retouching.
If you are not confident using the free warp tool, I recommend trying the presets first. They provide an easy introduction to warping and allow you to see what can potentially be done. Plus, you can have some fun trying out the different presets. Some pointers to remember:
- The warp presets can only be used on unlocked layers
- They work best on single objects like text and shapes
- They only warp the available pixels, which can reduce image quality
The bottom point is extremely important. The warp tool is simply moving pixels on the image – it’s not enhancing or improving the quality. Therefore, you must be careful when using it, as it can reduce the overall quality of the text or shape if you distort it too much.
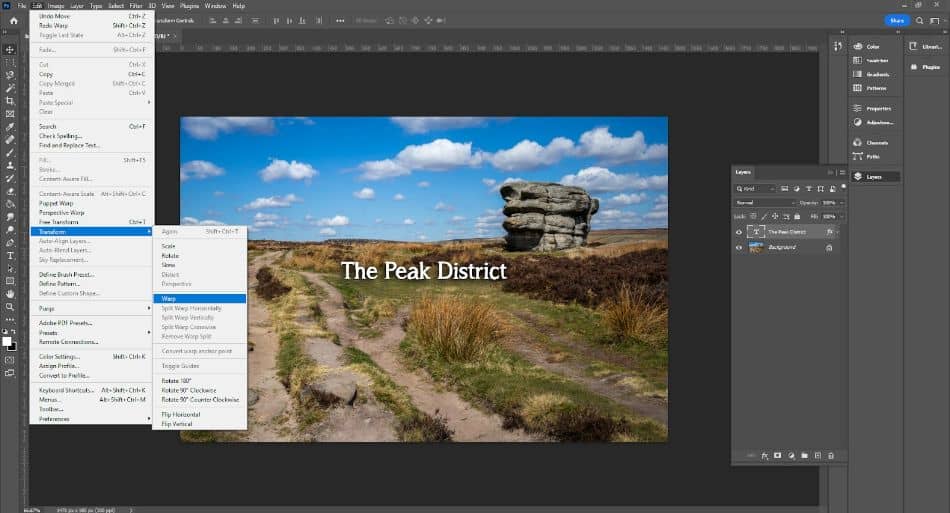
Step 1 – Access the Warp Tool
First, ensure the layer is selected in the layers toolbar. Simply click it so that it is highlighted. You can then do the following to access the warp tool:
Edit > Transform > Warp
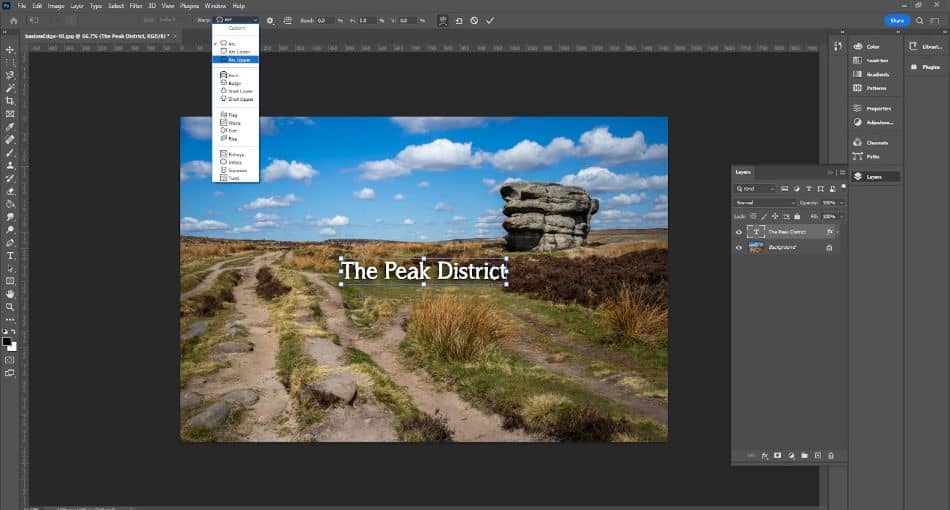
Step 2 – Use the Drop-down Menu to Select Presets
Once you have selected the warp option, a toolbar beneath the main menu should appear. This is the warp tool and contains everything you need (including the presets) to transform your text or object. The main thing we want to use is the dropdown menu where it says “Warp:”.
Simple click on this, and you should see a list of warp presets including
- Arc
- Arc Lower
- Arc Upper
- Arch
- Bulge
- Shell Lower
- Shell Upper
- Flag
- Wave
- Fish
- Rise
- Fisheye
- Inflate
- Squeeze
- Twist
Each one has a simple diagram next to it that shows what the transformation does. Just click on one of them, and it will apply to the selected object.
Once it is applied, you can change the parameters of the warp preset using the Bend, H (Horizontal), and V (Vertical) boxes. These are listed as percentages – just click on one of the boxes and type a different percentage. This will affect the parameters of the warp.
For example, if you selected the “Arc Upper” option, changing the “Bend” percentage would affect how high the arc reaches. This still gives you great control over the transformation without it being too complicated.
After changing the parameters (if needed), click the tick button on the right-hand side of the warp toolbar. As you can see, you can also undo your changes or cancel them entirely by clicking either the undo arrow or the stop sign.
Using the Free Warp Tool
The free warp tool is the best option for retouching portraits and people. It is also ideal if you want more control over the warping process. This is because it gives you multiple anchor points that you can drag individually – you can completely change the geometry of an object or use it to retouch a portrait carefully.
Some important things to remember include
- Text and preset objects must be rasterized first (explained below).
- If warping a selection in a portrait, consider how it affects the background too.
For portraits and full-body photos, it’s vital to use the warp tool conservatively. I’m sure you have seen Photoshop fails where people have attempted to retouch images, but the background behind the person is distorted – don’t be that person!
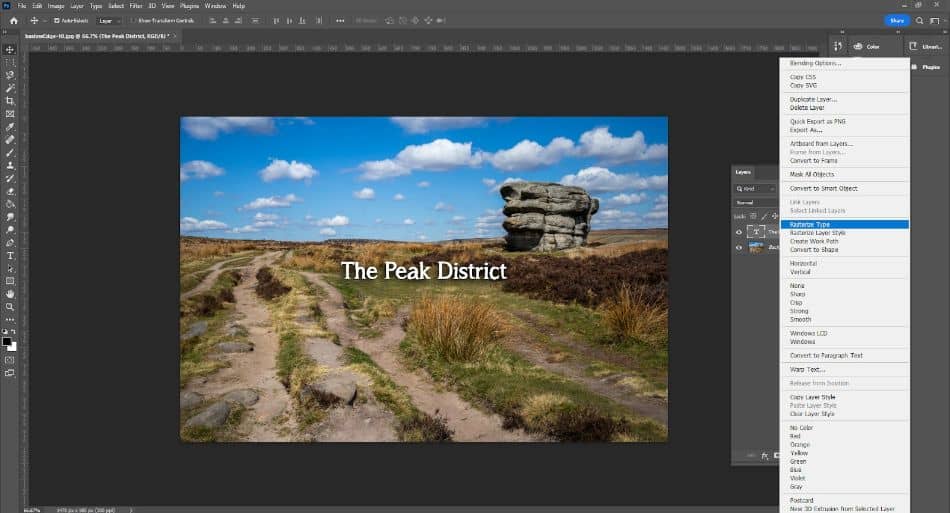
Step 1 – Rasterize the Layer if needed
Depending on the type of object you are warping, you may need to rasterize the layer. This process just turns it into a completely editable layer. Do not rasterize anything if you need to resize the image first, however as this can affect the quality.
If you want to warp the entire image, you should not need to do this. However, it is required for text and preset shapes. To rasterize the layer, simply right-click on it in the layer toolbar and click “Rasterize Type”. If it has worked, you should see a difference in the icon next to the layer name.
Step 2 – Make a Selection, or Select the Entire Layer
The next step depends on what you want to warp:
- Select the entire layer to warp an object, shape, or text.
- To warp part of an image, use a selection tool
To warp part of an image, like a person’s body, you would need to use a selection tool. The best option is the rectangular marquee tool which is available in the latest version of Photoshop.
Click on this from the left-hand toolbar and then drag a rectangle over the area you want to warp. Make sure it is as small as possible, as this will help reduce any background distortion.
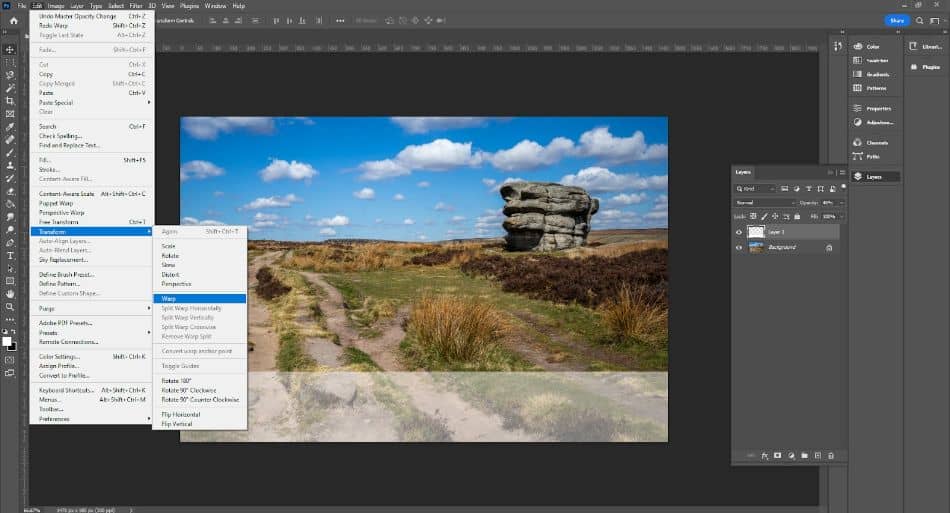
Step 3 – Access the Warp Tool
Like before, you need to activate the warp tool by clicking Edit > Transform > Warp with the active layer or selection. If you deselect your selection by accident, you can reselect it by clicking Select > Reselect.
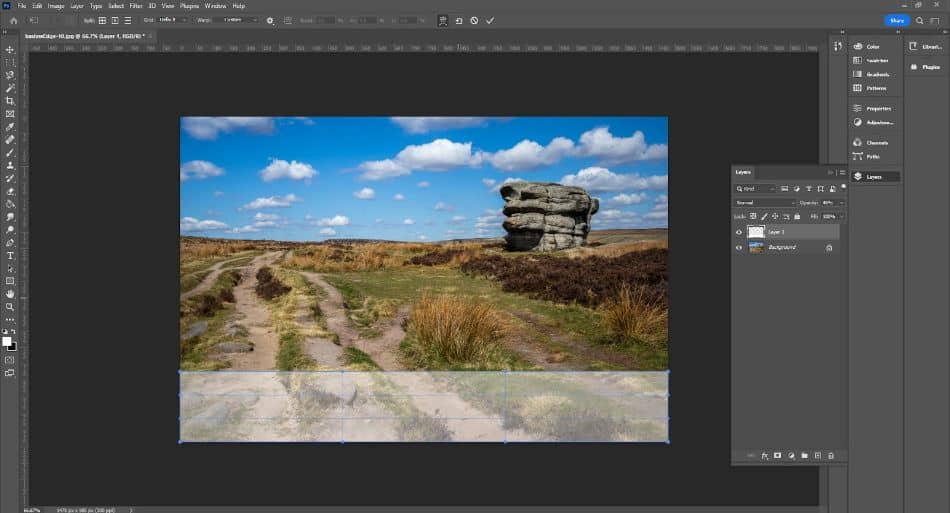
Step 4 – Use the Selectors to Distort the Object
Now comes the more complicated part! Once you have clicked the warp tool, a set of anchors and grids will appear in your layer or selection.
These are what you use to warp the selection and transform it. There are two types of anchors – points and gridlines. You can click and drag the gridlines, affecting the entire area on the same axis as the gridline.
Alternatively, dragging a point will only warp the area surrounding it. This takes a bit of practice and is tricky to explain. I advise spending some time using the warp tool and seeing how the different anchor points distort shapes. Once you have finished warping, simply click the tick as before.
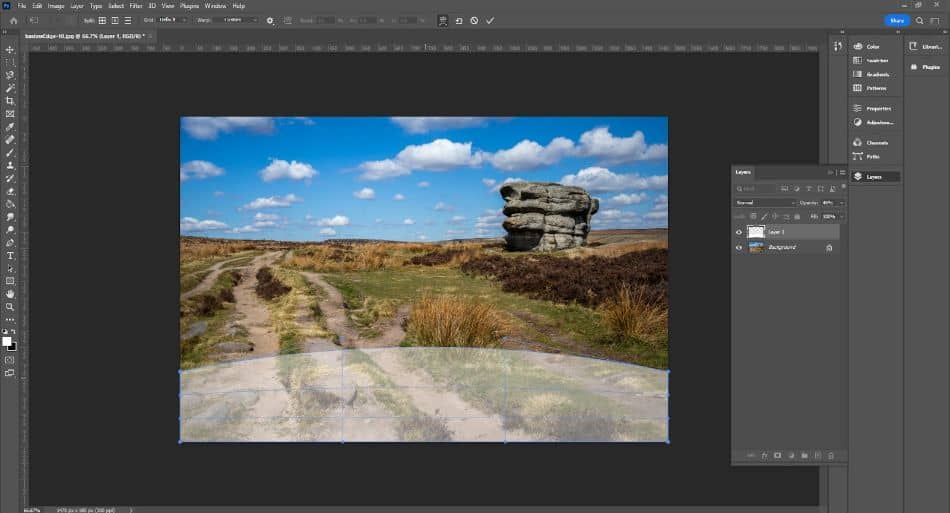
If you make a mistake, don’t worry! You can undo the last movement by Using Ctrl + Z on your keyboard or by clicking the stop sign on the warp toolbar to cancel the warp transformation completely.
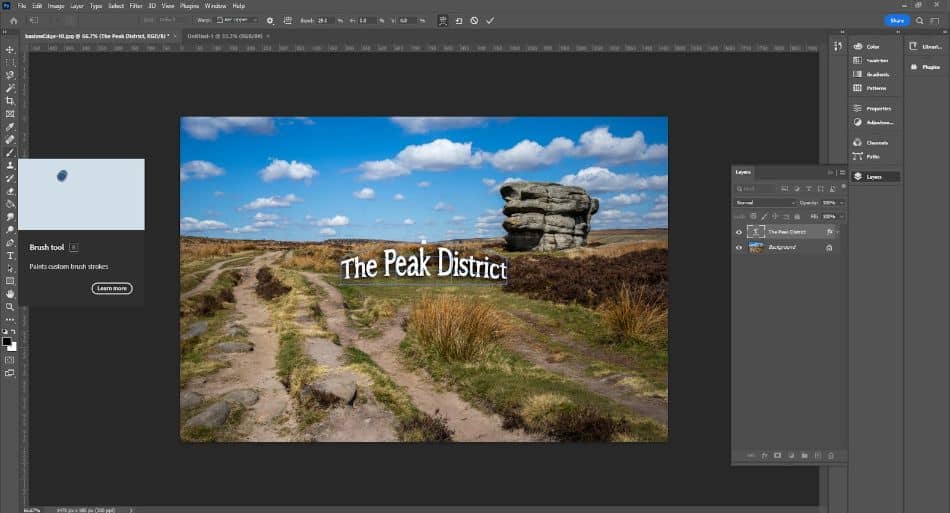
As you can see from the image below, you can use the free warp transform tool to create interesting shapes, providing much more freedom than the preset options. There are other cool techniques you can do to transform images, too, such as cutting out images.
Add a New Skill to Your Photoshop Repertoir
You may never need to use the warp tool – it is certainly one that I haven’t had much need for. Regardless, I still believe it’s a great idea to learn all the different features and tools Photoshop offers. You never know when you may need to warp an image in Photoshop, and it will also improve your general knowledge of the software.
Frequently Asked Questions
Yes! You can access it via Edit > Transform > Warp. Once the warp tool is selected, you can then distort an object or an entire image using the selectors. This allows you to adjust the positioning of the object or image and warp the overall geometry.
To distort an entire image, you would use the warp tool. Alternatively, there is also the Distort sub-menu which is accessed via Filter > Distort. This has a myriad of different tools to alter the geometry and style of your image including twirls, zig-zags, and displacement.
To warp an image with a twist in Photoshop, you would use the warp tool. Edit > Transform > Warp. You would then need to drag either the top right and bottom left selectors outwards or the top left and bottom, right selectors.
The warp tool can be used to distort an entire image. First, you must unlock the background layer by double-clicking on it in the layers toolbar. You can then select Edit > Transform > Warp. This will open the warp tool and place the transformation selectors on your image layer. Simply drag them to warp the images.
Yes! The warp tool is versatile and allows you to distort entire images, photos, or single objects in various ways.

Paul is a lifelong photographic hobbyist and has been taking epic shots from around the world for the last decade. His travels have taken him to places like Antarctica, Thailand, and Greenland and this has given him the chance to photograph places few people have seen. As a self-professed nerd, Paul loves photo editing and his programs of choice are Lightroom Classic and Photoshop. In recent years Paul quit the standard office life and became a full-time freelance writer to share his passion for photography and tech with those wanting to learn.