(Last updated on January 9th, 2023)
Do you want your motion graphics project in After Effects to have speedier clips? Maybe you’d like to slow them down to show off how cool your clip looks? In this article, we’ll go over methods of speeding up and slowing down a clip for After Effects in this easy-to-read tutorial.
After Effects has plenty of effects tools to accomplish something as simple as a change in timing. Any piece of footage can be made faster or slower without much work. You won’t have to sift through too many options to accomplish this task.
It’s easy to be overwhelmed by the program, though. After all, there are so many tools and features that one can get lost trying to find what they need. Making a change in the timing is perhaps one of the easiest features to use. You’ll see how in this step-by-step tutorial on this essential After Effects technique.
Tutorial Rundown for Speeding up or Slowing down Clips in After Effects
- Placing Your Clips For Timing
- Applying Time Stretch
- Tweaking Time Stretch
- Previewing Your Clips
Step 1: Placing Your Clips for Timing
Let’s start by preparing our timeline for the clips we’ll be editing. In this tutorial, we will be placing two video clips on the timeline—the first one I want to be slow and the second one I want to be fast.
The goal of this tutorial is to slow down two clips and place them next to each other, essentially editing the clips together.
It should be noted that this timing tutorial doesn’t just have to be for side-by-side clips. You can also use this technique for motion graphic illustrations and composited backgrounds. For this tutorial, though, we’re keeping things simple by just focusing on two separated clips.
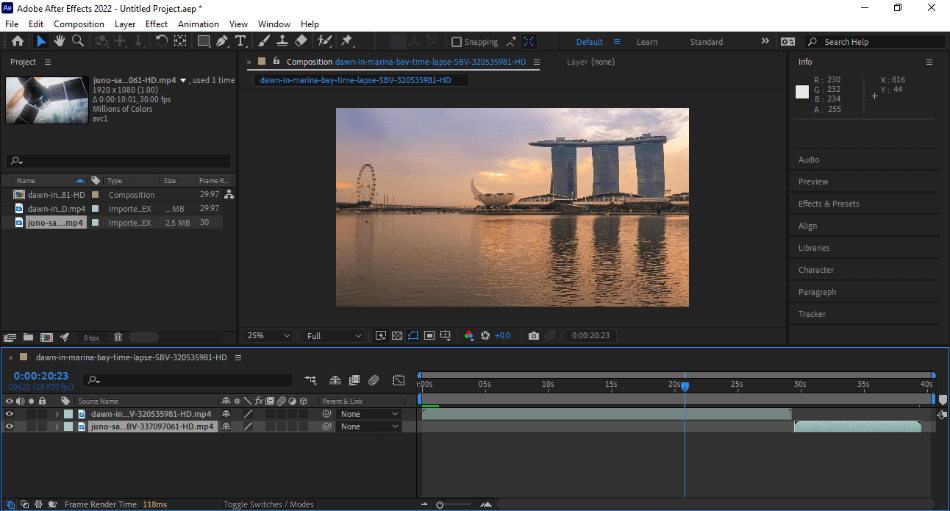
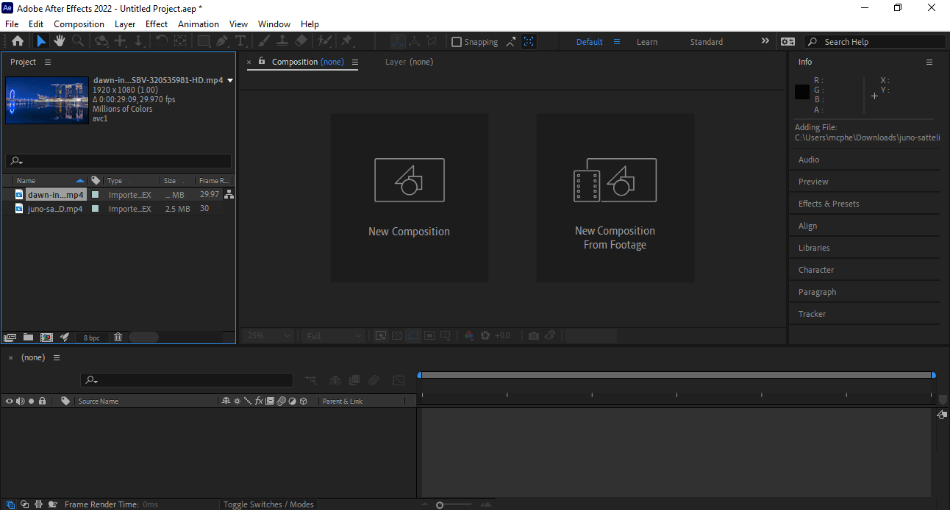
Create a new project and import your two video clips. With your video clips in the asset library, create a new composition to place your clips. Once you’ve created the composition, open it up and drag your two clips onto the timeline.
Each clip should create its own layer. Try to move them on the timeline to be right next to each other. You’ll want to take note of the composition length of time.
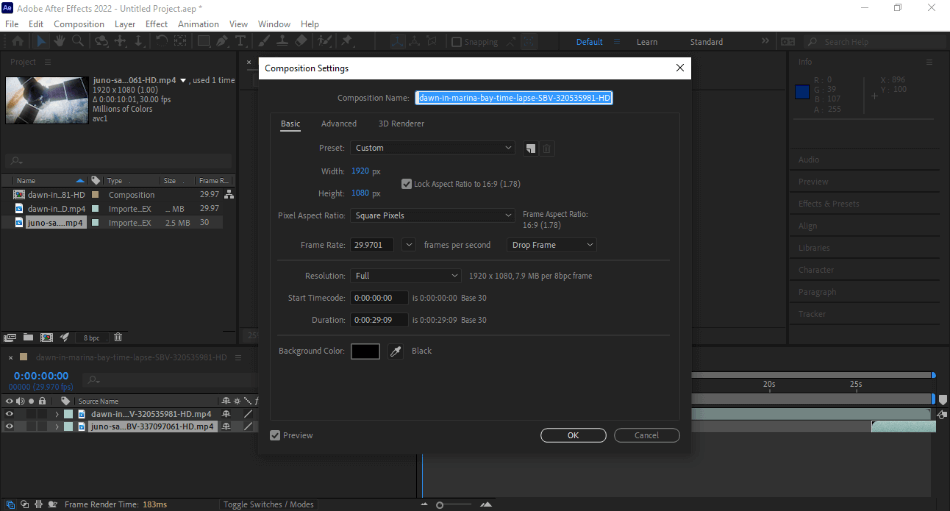
Edit the settings of the composition by navigating to Composition > Composition Settings. Change the timecode to have enough time in your composition to handle both clips. For our tutorial, this staging will make the changes seem more apparent and get you used to how time stretching alters the timeline.
Now we’re ready to begin our time change with the clips in place. One clip will speed up while the other will slow down. Let’s use Time Stretch to do so.
Step 2: Applying Time Stretch
Let’s start with the marina footage first. Click on the first piece of footage in the first layer to ensure that the clip is selected. We will be changing the timing of this clip through the layer rather than the clip itself.
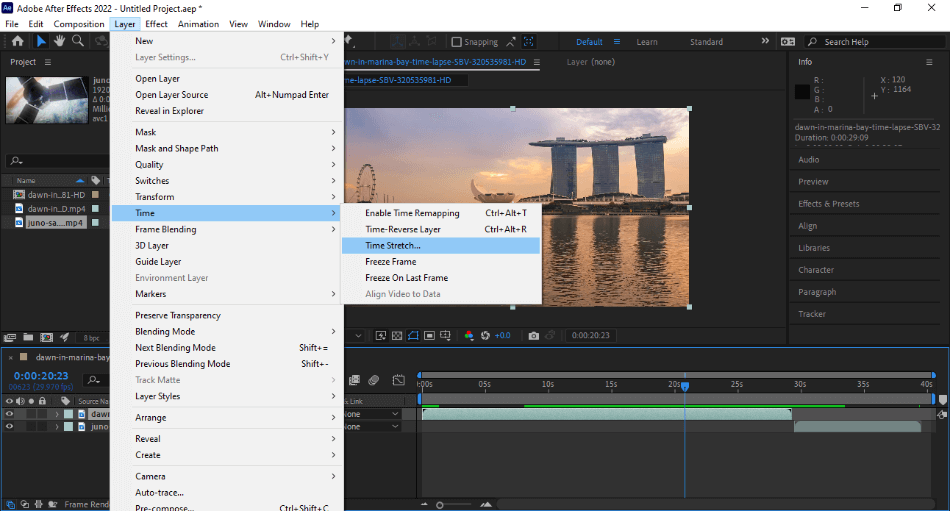
At the top of your interface, navigate to Layer > Time > Time Stretch. This will open up a mini-window for setting the stretching of time for that particular layer. We can now start instructing After Effects whether we want this layer sped up or slowed down.
Step 3: Tweaking Time Stretch
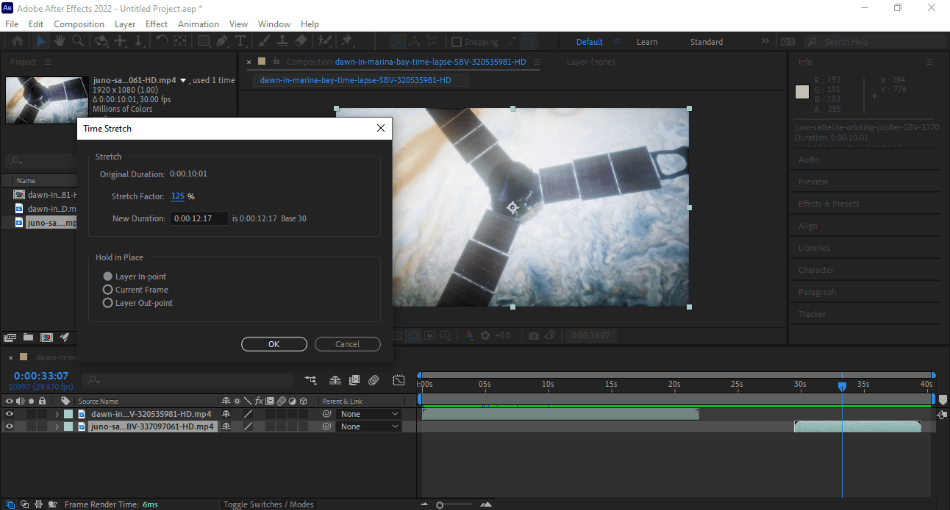
Here is what you’ll find in the mini-window for stretching time:
- Original Duration: This is the timecode for how long the video in your layer runs. Use this as a reference while making changes.
- Speed Factor: This is the percentage speed of the layer. By default, it will be at 100%. Raising it will increase the pace, and lowering it will slow it down.
- New Duration: This will be the new duration of the clip after the time stretch is applied.

So we want this layer to be slower. To do that, we’ll bring the Speed Factor down by reducing the percentage from 100% to 75%. You’ll notice how the New Duration time has changed when you make this edit.
None of this will be reflected on the timeline until you approve this change by clicking Ok. This is why we can view both the Original Duration and New Duration. We can gauge the difference without waiting for the rendering of the stretch to finish.
When you’re ready to make the change, click Ok. You’ll notice now that the layer is much longer. So now we’ve got to change our composition a bit.
Let’s go back to the composition settings and give our composition a longer time. I’m going to push it up a bit, so we have some extra room to see how far the slowed-down footage now extends. Don’t worry if it’s too long; we can change these settings later.
Next, let’s make the same Time Stretch application for the other clip. Click on that layer and then navigate to Layer > Time > Time Stretch. We’ll now change this footage of the satellite to proceed at a faster pace by changing the speed.
Change the Speed Factor to 125%. Notice now that the New Duration is shorter than the Original Duration. This means that our footage will be faster, and its placement on the timeline will be shorter.
Click Ok to apply this change. In the same way our marina footage was extended, our satellite footage has shortened. We’ll reposition it on the timeline so that it’s right next to the marina so that we can see how they both look when we preview the footage.
Step 4: Previewing Your Clips
Now comes the most critical yet time-consuming part of the process. We need to see how our footage looks now that we’ve applied the Time Stretch to both of our clips. Hit Spacebar on your keyboard with the composition timeline selected as the shortcut for starting playback.

If you’re not familiar with playback in After Effects, you need to wait for the footage to first render before getting a full preview. This means that the footage will play slowly at first as it renders out the edits you’ve made. You can see this progress with small colored bars at the top of the timeline.
When the colored bars finish progressing on the timeline, bring your timeline marker back to the beginning and hit the spacebar again. You should get a smooth preview of your sped-up and slowed-down clips if the footage is rendered correctly.
Take a close look at the footage to make sure the timing is just right. If you don’t like it, you can simply alter that by selecting the layer and bringing up the Time Stretch options. Change them to your liking and render again for another preview.
This process extends to more than just video clips. It can be helpful in making sure a logo slides in just right or a motion-graphics character moves believably. Time Stretch can be a quick-fix option for some projects if you get involved with more elaborate motion graphics projects.
The Time Stretch tool is not perfect for all your timing needs. More intricate animations may require specific alterations to your keyframes instead of a broad time difference. However, for making quick and straightforward timing edits, this is an invaluable skill to carry with you in your future After Effects projects.
Frequently Asked Questions
Adobe After Effects requires a subscription to use the application. The only way to use After Effects for free is if you take advantage of the seven-day trial version of the software. This will allow you to take advantage of all After Effects features and tools without limitations. The completion of the trial will require you to pay a monthly fee to continue using one of the apps.
After Effects costs a monthly fee to Adobe’s Creative Cloud to use. The price is $20.99 a month with an annual plan, and the cost will cover updates and patches as long as you keep paying. After Effects can also be purchased through the Complete Creative Cloud package, priced at $52.99 a month. This bundle includes After Effects and other Premiere, Photoshop, and Animate programs.
After Effects is best suited for handling compositing and visual effects applied to your videos. While you can edit videos together through this application, it’s not an ideal video editor. This is because the program doesn’t work well for previewing audio. You’ll want to use a video editor like Adobe Premiere in conjunction with After Effects if you want to edit video for more than just effects.
The annual plan for After Effects will cost you $239.88 a year. You can either pay this all at once for the year or pay through this plan month-to-month for $20.99 a month. Without an annual plan, you’ll have to pay $31.49 a month.

Mark McPherson has been working as a video editor and content writer for over ten years. His background started in animation and video editing before shifting into the realm of web development. He also branched out into content writing for various online publications. Mark is an expert in video editing, content writing, and 2D/3D animation.