(Last updated on February 3rd, 2023)
If you want to print your photos and get fantastic results, there is one key word to remember – DPI. Well two really – DPI and resolution. But in this context they basically mean the same thing. DPI affects print quality and to get the best use out of your printer, it’s a great idea to learn how to change it.
This is what we look at in the below guide! We discuss how to change DPI in Photoshop, what it does, and some important dos and don’ts.
Why is DPI Important in Photoshop?
DPI – Dots Per Inch
This explicitly means the number of individual dots crammed into one square inch of image space. Or pixels. You may hear people using the term PPI too. This stands for Pixels Per Inch. DPI and PPI are effectively the same. However, DPI is the term people use for printing images. There is a nice guide on DPI and why it matters on YouTube which has more detail – https://www.youtube.com/watch?v=1st3oc-Q6bE
DPI Affects Print Quality
DPI is vital for print quality.
Let’s say you have the exact same image with two different DPIs – Copy A has a DPI of 72 while Copy B has a DPI of 300.
This means that for every square inch on Copy A, only 72 dots will be printed.
In contrast, for every square inch on Copy B, 300 dots will be printed.
Think what that means. Thats 300 dots of color compared to 72 dots of color. The different is huge and a higher DPI means a better print quality with more color variety. Photos will look better with more realistic colors and improved gradients at a higher DPI.
DPI Does Not Improve Low Res Photos
A higher DPI is brilliant for printing photos. HOWEVER. If the original image quality is poor or was taken in a low resolution, changing the DPI will NOT improve that.
This means that it’s still important to take high-quality photos with optimum file settings and sizes in the first place!
For example, I always take photos in the CR3 RAW format with my Canon camera. This is the biggest resolution possible and I know that it will print fantastically. In contrast, if I took photos as low-res JPEGs, I just wouldn’t get the same print quality and versatility.
To reiterate – DPI doesn’t make up for low-res photos.
How to See Your Current Image DPI in Photoshop
Before we start changing things, let’s first look at how you can see the current resolution of your photos. There are two easy processes which I will explain below.
Via the File Information Box
This is the quickest way and should be available as default when you have Photoshop installed.
Each file you have open has a file info box in the bottom left-hand corner underneath the image. You can see it in the screenshot below. As you can see, it shows the pixel dimensions and the resolution in brackets.
If you click and hold this box, more information is displayed too including the image channels.
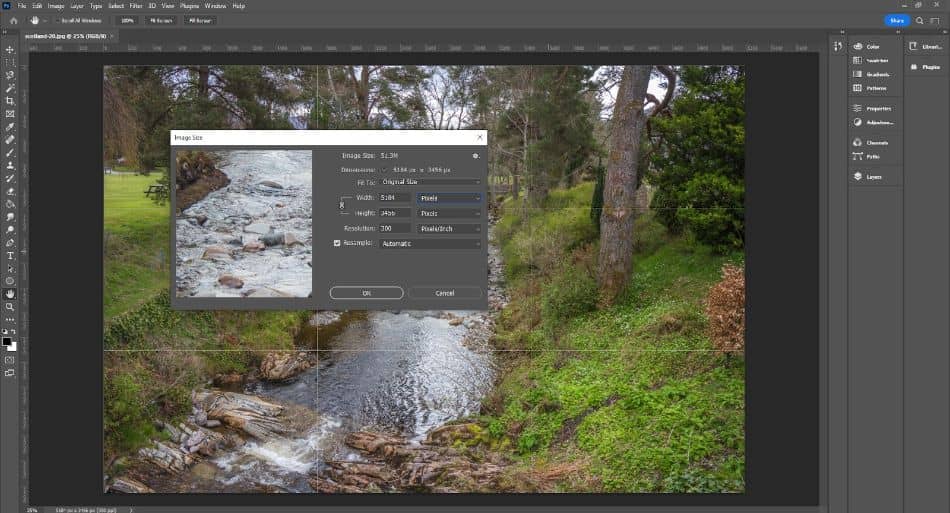
Via the Image Size Menu
Until I wrote this article I actually forgot that there was a file info box! Therefore, I typically check my image size and resolution the old fashioned way! (And will probably keep doing so even though the other way is quicker!).
You can also view the DPI via the image size menu and this is also where you change things as we will discuss below.
- Click on the Image main menu.
- Click on the Image Size sub menu.
- You can see the current resolution under the image dimensions.
How to Change the DPI of an Existing Image in Photoshop
So you know how to view your DPI, but how can you change it? Well we’ve already accessed the menu once – everything is done via the Image Size menu. Regardless, the below steps explain how to change DPI in Photoshop:
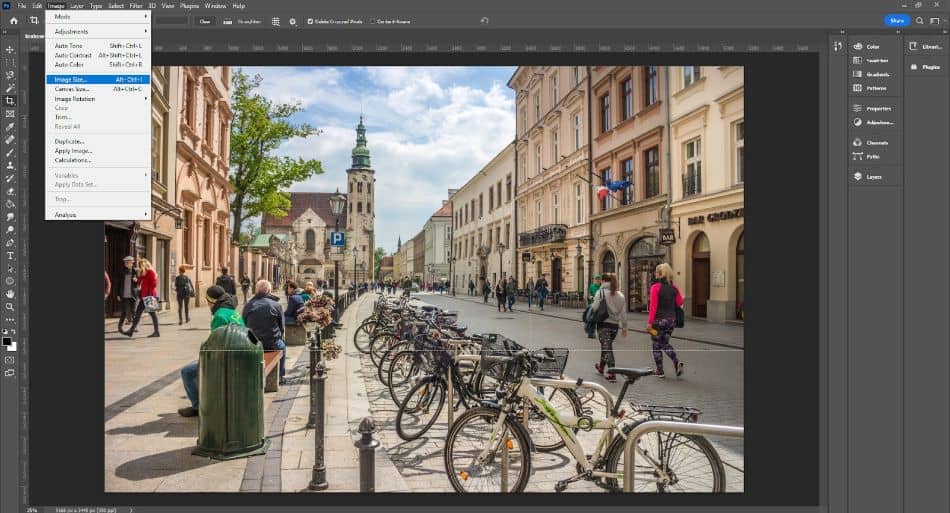
- Open your image in Photoshop.
- Click on the Image main menu.
- Click on the Image Size sub menu.
- Change the resolution measurement to Pixels/Inch (If not already set to that).
- Change the resolution to your desired number.
- Untick “Resample”.
- Click “OK”.
It’s literally that easy. I normally use the keyboard shortcut to open the Image Size menu too which on Windows computers is Ctrl + Alt + I. I’ve resized images and canvas sizes so much that it’s ingrained in my memory!
There are a few important things to remember. Firstly, always make sure your resolution measurement is set to Pixels/Inch. This is just the standard measurement pair for printing photos as opposed to Pixels/CM.
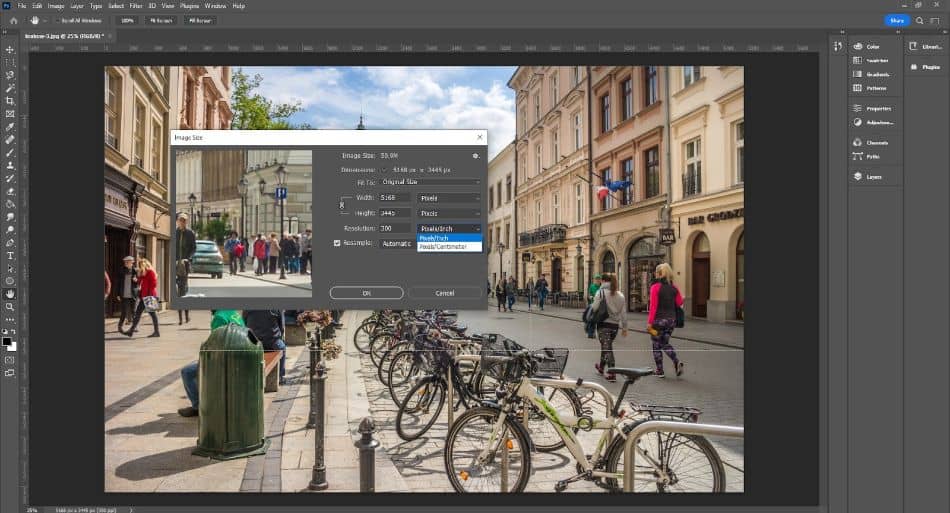
Secondly, you must untick the “resample” option. If resample is checked, Photoshop will attempt to add pixels to the image to meet the new DPI. This can result in some pretty blurry and weird-looking photos. We only want to change the resolution for printing and don’t want to try to change the image quality.
How to Change the DPI of a New Document in Photoshop
We aren’t always working with photos in Photoshop. Sometimes, you may want to create an image for print from scratch.
Therefore, it’s important to know how to change DPI in Photoshop for a new document. This is a simple process and as you will see below, you can change the defaults so you don’t have to do this each time! Regardless, here are the steps to change DPI in Photoshop for a new document:
- Click on the File main menu.
- Click on the New button.
- Change the resolution measurement to Pixels/Inch.
- Enter your desired resolution (Ideally 300 DPI for print).
- Enter the new document dimensions in pixels
- Click Create.
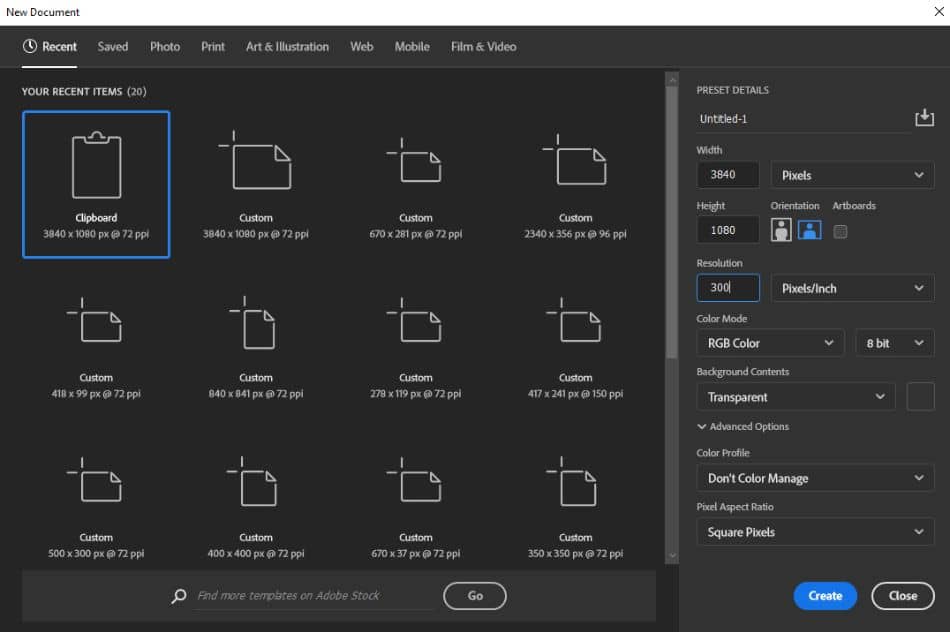
As with the existing document, make sure that you have changed the resolution measurement to Pixels/Inch. You can then set the DPI to 300 – it will usually be set as default to 72 as this is the standard DPI for screen viewing.
You can also change other important parameters here like the color mode. CMYK is advised for printing images as opposed to RGB although you should generally edit the image in RGB first before converting to CMYK.
How to Change Your Resolution Presets in Photoshop
Did you know that you can change the preset resolution too? This saves so much hassle and I would advise doing it if you print things out regularly. I changed my presets years ago and it makes things much easier.
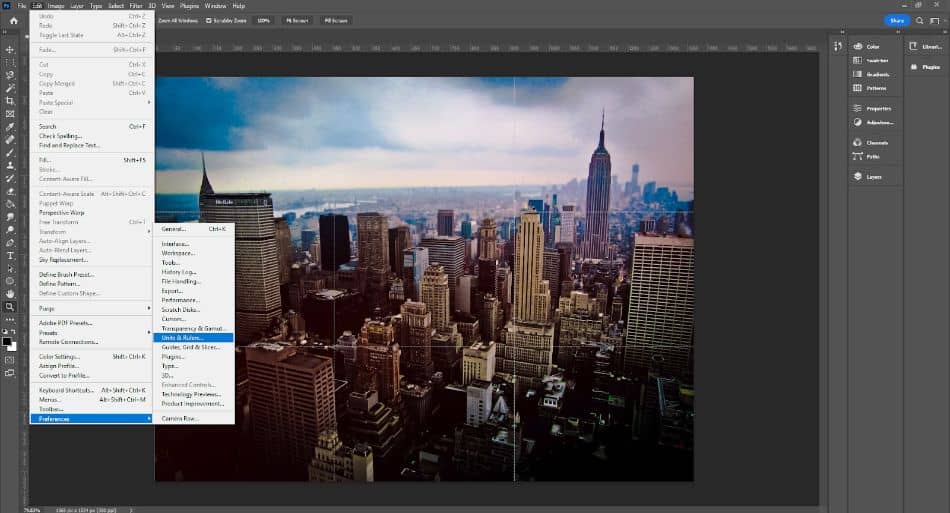
To do this, you first need to access the Units & Rulers sub menu.
- Click on the Edit main menu at the top of Photoshop.
- Navigate to the Preferences sub-menu at the bottom.
- Click on Units & Rulers in the side-menu on the right.
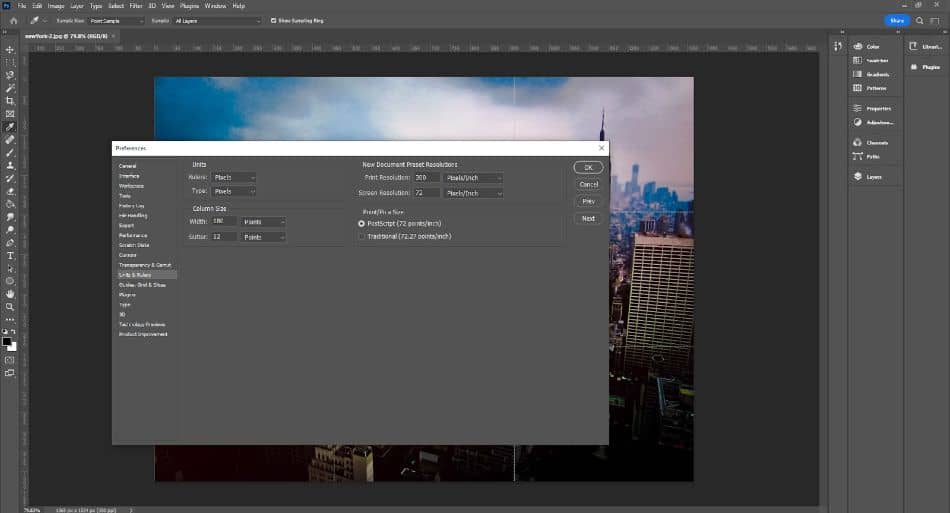
This should open the Units & Rulers dialogue box. Here you can change multiple options including:
- Standard units of measurement
- Column size
- New document preset resolutions
- Point/Pica size
I recommend having your standard units for both rulers and type set to pixels. This just makes things easier for resizing and also splitting images into set regions.
The most important part, however, is the “New Document Preset Resolutions”. Here we can change the print and screen resolution. Just set them both to 300 Pixels/Inch and you should be good to go! That means when you create a new blank document, the resolution will be perfect at 300 DPI.
Improve Your Print Quality by Changing DPI
I can’t stress the importance of DPI enough for printing. It’s possibly the most essential parameter to change if you want your photos to look great on paper. If you print your photos regularly, remember that you can change the default print resolution preset too to 300 DPI – this could save you time and effort keep manually changing each photo.
Frequently AskedQuestions
Yes. All you have to do is navigate to the image main menu at the top of Photoshop. Next, click on image size. This opens a seperate box. Here you can change the resolution from 72 to 300 DPI. Make sure that you untick the resample option too.
If you have a photo open, the DPI is displayed in the bottom left-hand corner of the software – next to the image pixel height and width. Alternatively, you can open the image main menu, then navigate to the image size option. This opens a dialogue box that shows the current image parameters including DPI.
Yes! A JPEG although using image compression can still be 300 DPI and be used to print high quality photos. It is not the best image format for photo prints, however as TIFF is usually preferred.
Yes. A larger DPI number means more dots per inch. As a result, the print quality should be far superior for a photo printed a 300 DPI as opposed to 72 DPI.
No. It simply changes the resolution for printing. However, if you change the DPI and have the “resample” option ticked, Photoshop will attempt to boost the image quality and add in more pixels. This often has poor results and is not reliable.

Mark McPherson has been working as a video editor and content writer for over ten years. His background started in animation and video editing before shifting into the realm of web development. He also branched out into content writing for various online publications. Mark is an expert in video editing, content writing, and 2D/3D animation.