(Last updated on March 9th, 2023)
The text tool in Photoshop is one of the handiest features to use. It allows you to add written content to your photos and graphics. But it also goes one step further. You can also change multiple settings like size, color, style, and font.
By default, Windows devices and Photoshop have a decent range of pre-installed fonts. These include classics like Verdana, Calibri, and Times New Roman. However, you may want something more fancy, stylish, or unique.
Don’t worry – installing different fonts to use in Photoshop is possible. Therefore, if you have a particular font you want to use for a design project, you can! In this guide, we look at importing fonts into Photoshop and share some databases with thousands of epic fonts for you to try out.
A Step-by-Step Guide
The important thing to remember about how to import fonts into Photoshop is that you aren’t installing them in the photo editing software.
Instead, you are simply installing them on your computer. Windows devices have a default Fonts folder. If you install a new font in this folder, any software that uses fonts will automatically add it to their available fonts.
So, all you need to know how to do is install the font on your computer – Photoshop takes care of the rest.
Step 1 – Download the Font
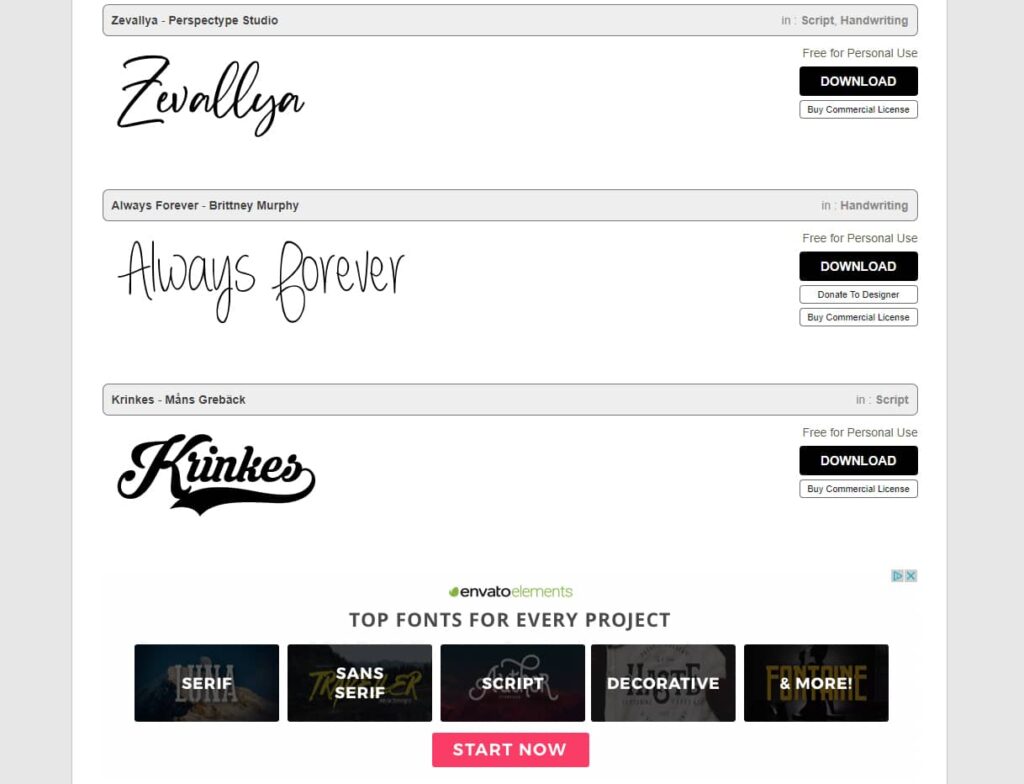
The first step is to download your font. I share some amazing font databases with thousands of free and paid fonts below. Typically, there is a download link for each font on these websites – just click it, and the files will download to your default download folder. Many of these fonts allow you to use other cool Photoshop techniques too, like outlining text.
When downloading a font from another source, please make sure that you check the license. I delve into the different types of licenses below, but ideally, you want fonts with free licenses with no usage restrictions.
Step 2 – Extract the Files
Most font database websites have fonts downloadable as either a compressed folder or the raw TTF or OTF file.
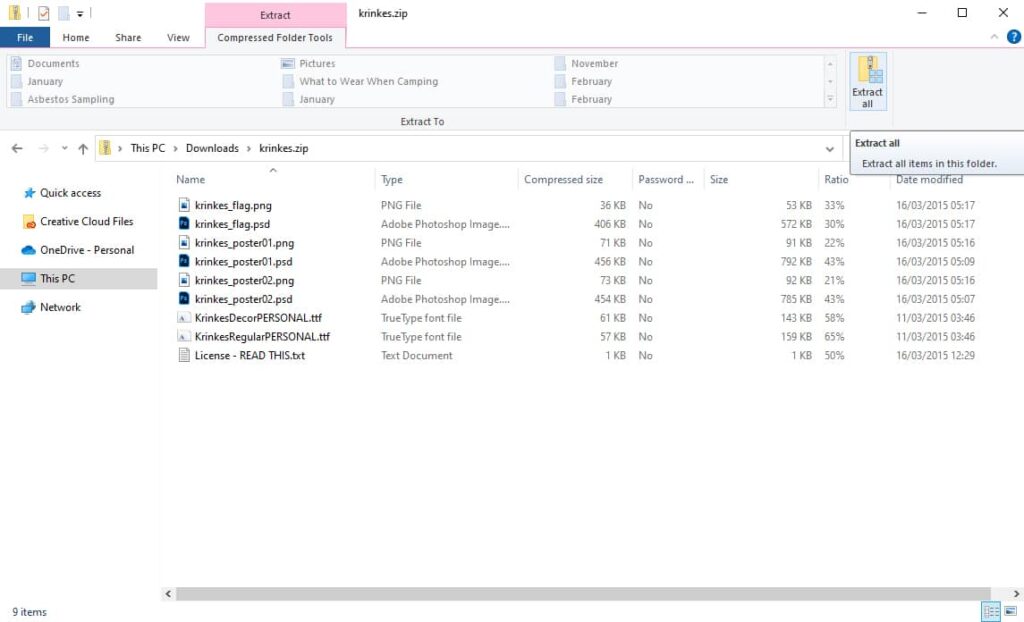
You need to extract them if they download as a compressed folder. Years ago, this required something like WinZip to achieve. However, now, you can open the folder and click the “Extract All” button in the top right-hand corner.
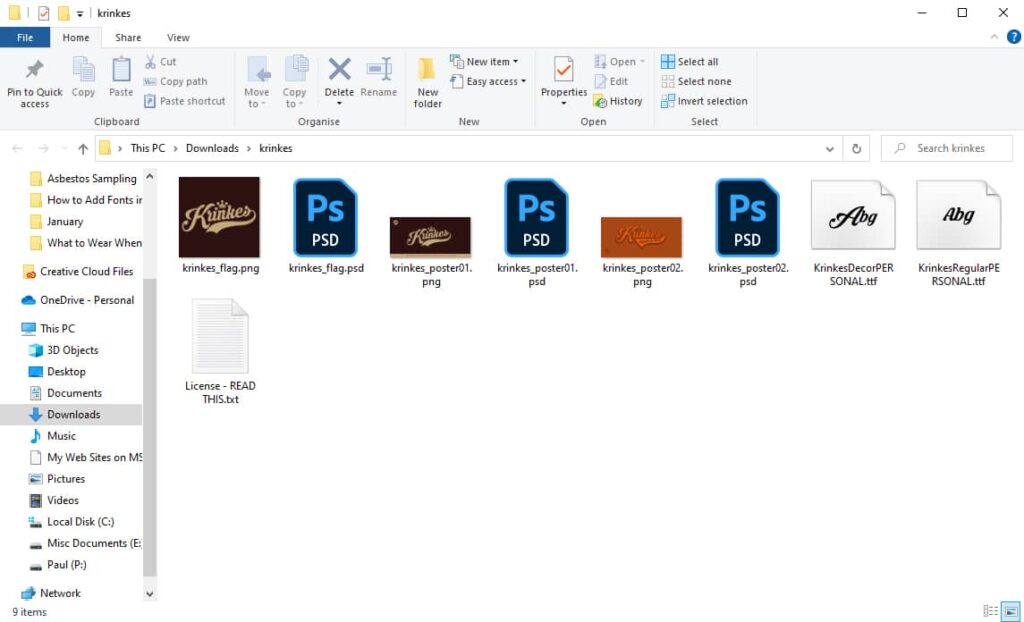
Once you have extracted it, it should appear in your downloads folder as a standard file without the zip icon. As shown below, you should also see a font preview on the TTF or OTF files.
Step 3 – Install the Font
Now the files are extracted, we can install the font. The file types you are looking for are:
- TTF: TrueType Font
- OTF: OpenType Font
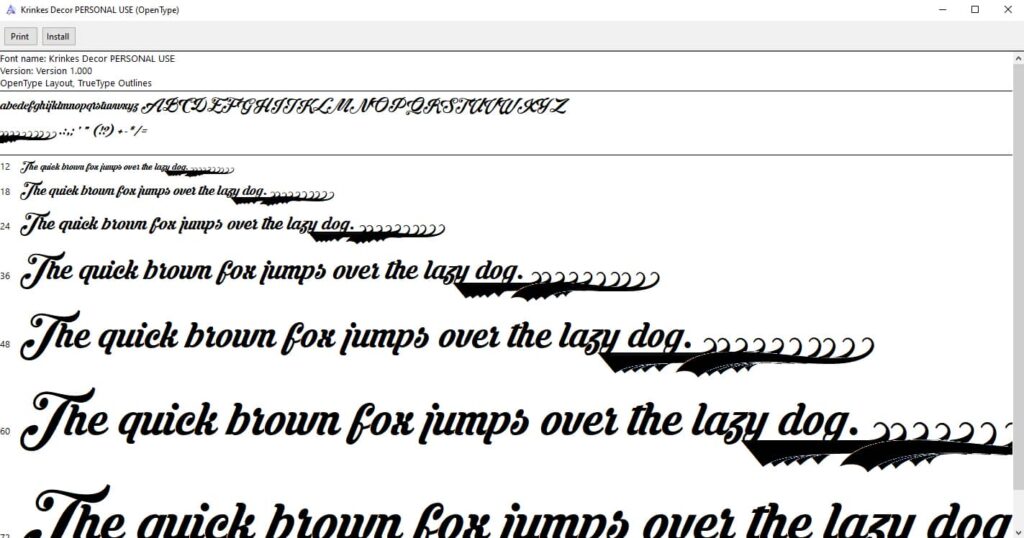
The most common is the TTF, the font file I recommend installing. Simply double-click on the TTF file. This should open the font file, and you should see a preview of the different styles and characters.
With this file open, click the “Install” button in the top menu. A small installation progress box will appear and disappear – once this is done, your font will be installed on your computer!
Step 4 – Use the Font in Photoshop
That is all it takes to import fonts into Photoshop. Once the TTF file has been installed on your device, Photoshop should scan the font folder the next time you open the software and detect the newly installed item.
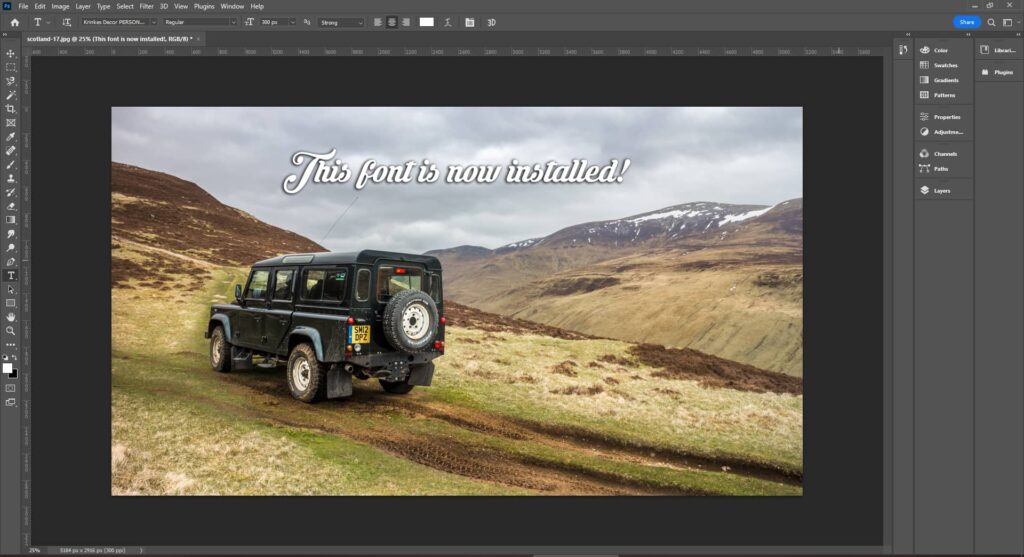
When you use your text tool next, the font will appear in the font drop-down menu. We can see below that the “Krinkes” font that I used in the guide now shows for me in Photoshop.
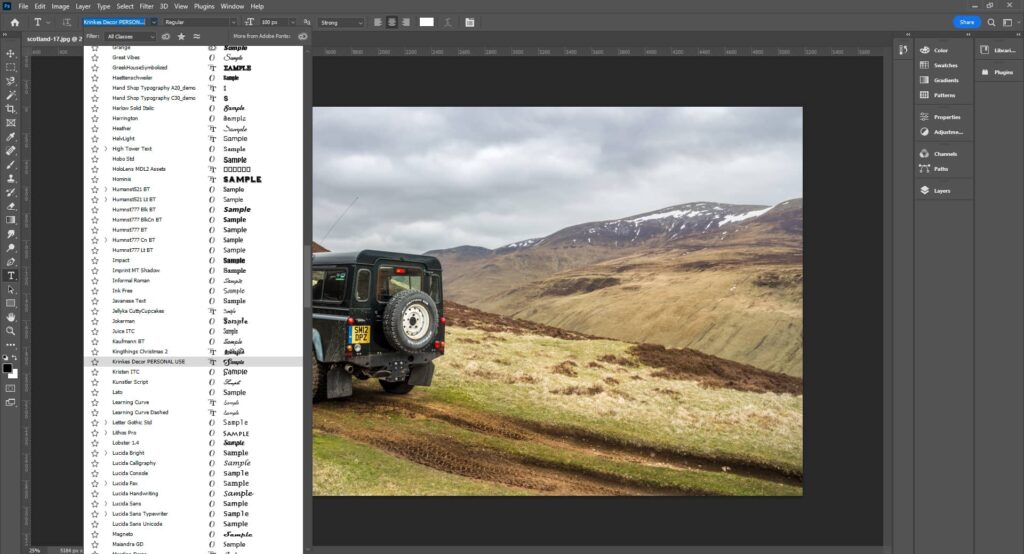
You can use the font usually, and it will stay installed on Photoshop for as long as it remains in the font folder on your computer.
How to View Your Installed Fonts
There may be an instance where you want to check what fonts you have installed or clean your fon directory. Often, this folder can become cluttered, and you might have fonts that you will never use again – my fonts folder is littered with hundreds of items!
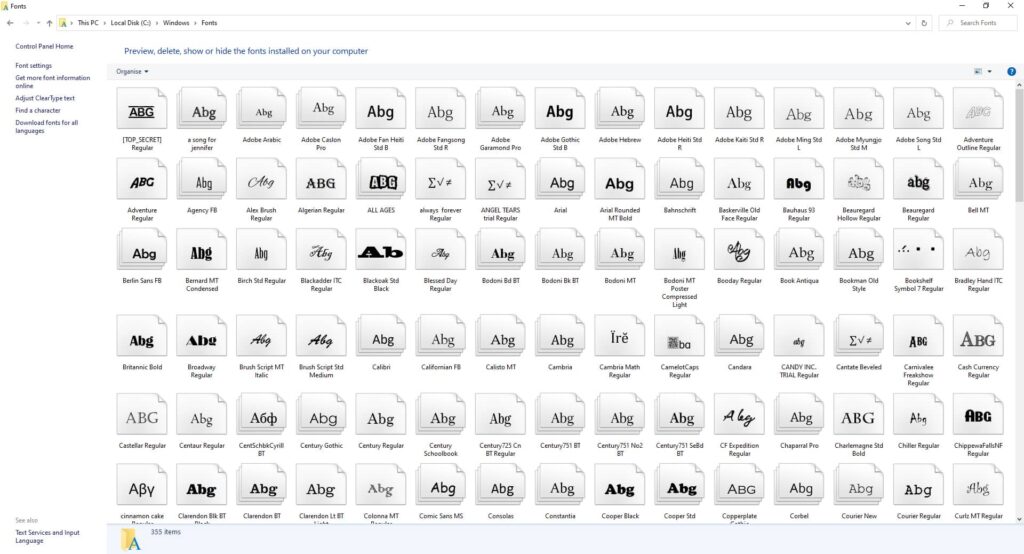
As a result, it’s great to know how to view your installed fonts outside of Photoshop. To do this, you need to access the following folder path in your Windows File Explorer:
C: > Windows > Fonts
The C: drive is the storage drive where your operating system was installed. This is usually called the C: drive by default, but you may have renamed it. This Fonts folder within the main Windows system folder contains all your installed fonts that Photoshop uses.
Useful Font Databases
So, you now know how to import fonts into Photoshop—it’s pretty easy, right? But where can you get some cool fonts from in various styles and genres?
To start, Photoshop itself has a great range of fonts available. However, many online databases are available where you can get free and paid fonts. Some of the best repositories available include:
1001freefonts and Dafont are both huge databases offering personal and commercial fonts. 1001freefonts for example covers multiple genres and styles like 3D, calligraphy, curly, fantasy, and italic. Moreover, you can buy inexpensive packages that allow you to use thousands of fonts personally and commercially.
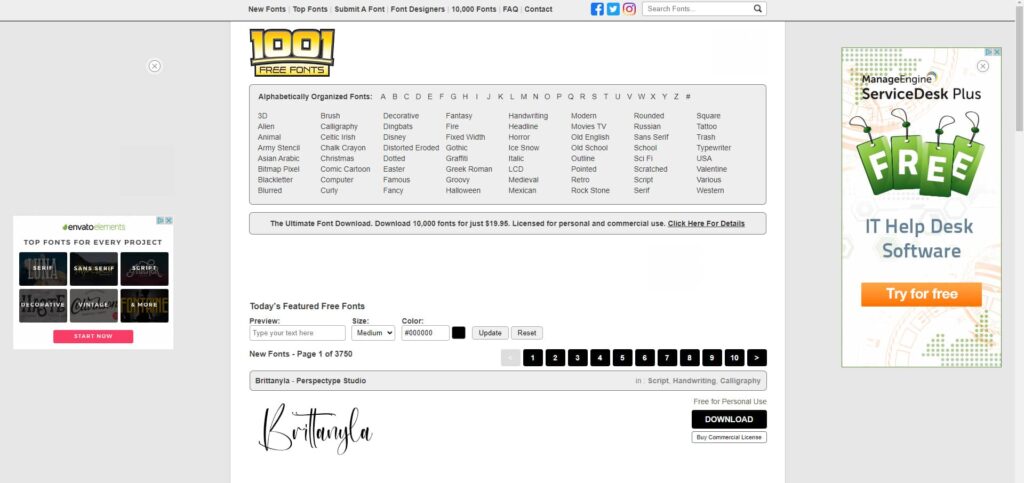
The only downside with these typical database websites is the number of adverts. This is mainly how they make revenue; navigating them can be tricky.
If this puts you off, consider the Google and Adobe font databases. These are much easier to use and have the backing of these reputable companies.
You must be 100% sure of the license when downloading any font. The following are typical types of font licenses:
- Personal use: These can only be used for personal projects where you don’t stand to earn money
- Commercial use: These can be used for business purposes involving monetization
Typically, a font will state what it can be used for. Some are available for both personal and commercial use. Others require a license to be bought for commercial use but are free for personal use. The main point is that you must check!
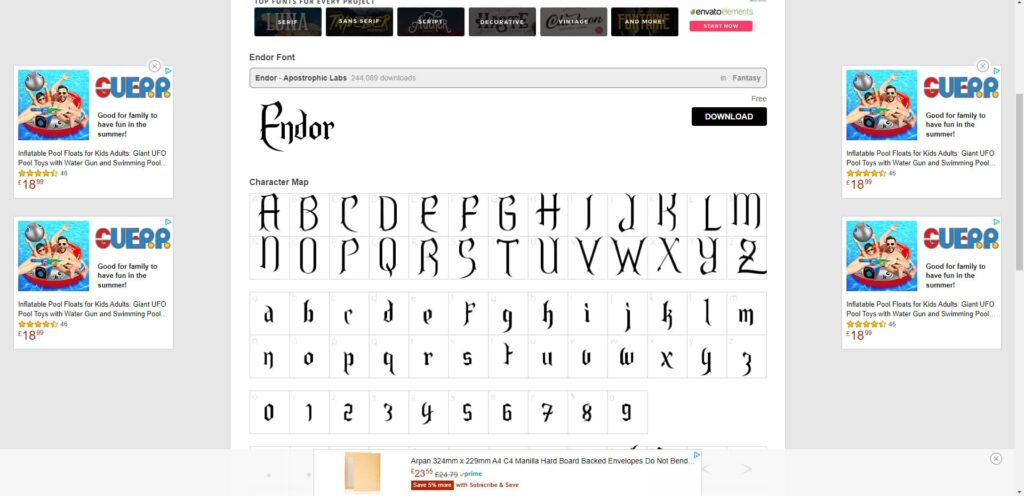
In the example below, we can see that the Endor font available on 1001freefonts is free to use – this means anyone can use it in any capacity – personal or commercial. Aside from using free fonts, remember that you can save money too by benefiting from the Photoshop student discount.
Broaden Your Typography
I hope you found this guide on importing fonts into Photoshop helpful! As you can see, the process is really simple. The main issue I usually have is choosing a font! There are thousands of unique fonts available so why not search the databases we have listed and see what amazing styles you can find?
Frequently Asked Questions
First, you have to download the TTF or OTF file. Once it is downloaded, you can simply double-click on it, and this should install it into your Windows default font folder. When you open Photoshop, this should automatically load the font into your fonts list so you can use it with the text tool.
Yes! Photoshop recognizes thousands of custom fonts if installed into your Windows device’s default fonts folder. Make sure that you have a license to use the font or that you only use fonts from free font websites that don’t have copyright restrictions.
First, you have to download the font from the website. Make sure you save it to an easily accessible location. Next, uncompress the font. Open your font book, click add font – find the location of the folder where you saved the downloaded file, and click okay.
This should have now installed the font and appear from the drop-down list in Photoshop when you next open it.
Photoshop comes installed with a great range of default fonts, including standard typefaces like Calibri and Verdana. However, it is possible to install custom fonts too from other sources. You can access these different fonts when using the text tool.
Many excellent free font repositories are available – just doing a simple Google search for “free fonts” should yield great results. You must remember that Photoshop supports TTF and OTF font file formats – nothing else. Also, check the font’s licensing to see how it can be used (i.e., personal or commercial).

Paul is a lifelong photographic hobbyist and has been taking epic shots from around the world for the last decade. His travels have taken him to places like Antarctica, Thailand, and Greenland and this has given him the chance to photograph places few people have seen. As a self-professed nerd, Paul loves photo editing and his programs of choice are Lightroom Classic and Photoshop. In recent years Paul quit the standard office life and became a full-time freelance writer to share his passion for photography and tech with those wanting to learn.
