(Last updated on February 13th, 2023)
Procreate has some nice brushes, but they may not have everything you’re looking for in your design. The good news is that there’s plenty of room for customization in the drawing application. Read on to make the most of your Procreate brushes and craft one of your very own.

Procreate and Brushes
Procreate has a lot of control over drawing by utilizing both touch and the Apple Pencil. After getting used to the process, you may desire to do more with your brushes. You may have a specific pattern or want to paint images on your canvas with a brushstroke.

While there are plenty of Procreate brushes to download and purchase, it’s just as easy to create one of your own. We’ll cover a few different ways to make the brushes in Procreate better suit your needs.
How to Create a Brush in Procreate
Let’s walk through the process of creating a brush in Procreate with a step-by-step guide. For this tutorial, ensure you use an iPad with an Apple Pencil. It’s possible to do this without an Apple Pencil, but it’s recommended with a pencil.
- To start creating a brush, we’ll need to open the Brush menu or Brush library. You can open this by tapping on the Brush icon and selecting the plus sign in the interface’s top-right corner. This action will create a new brush.
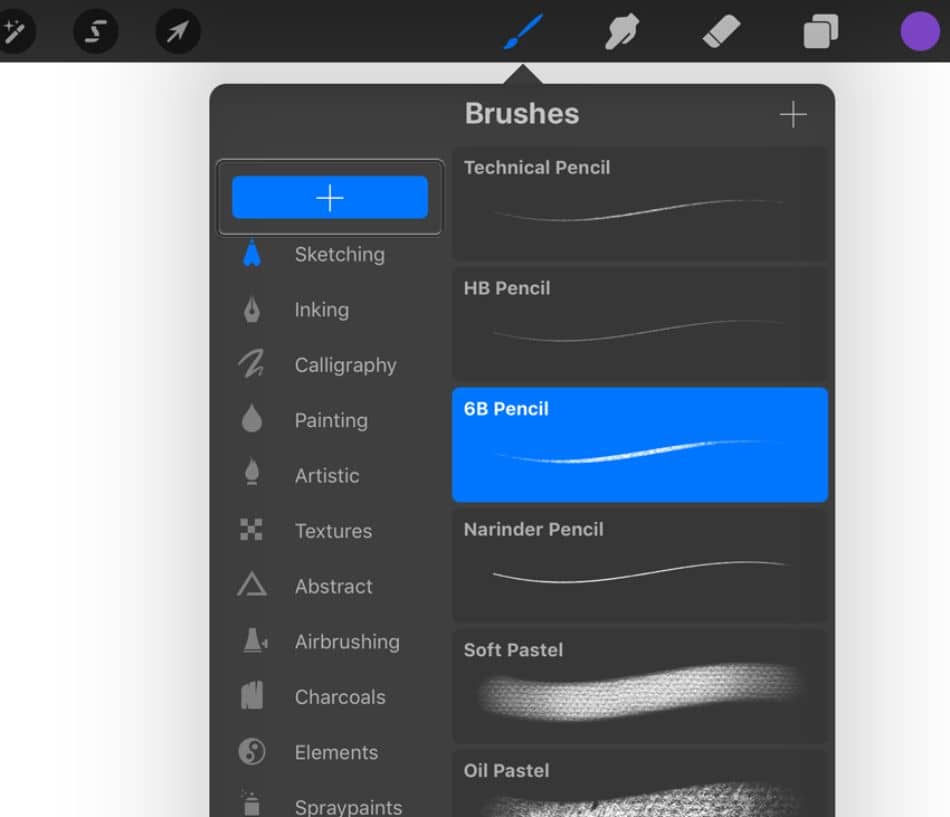
- The new brush should be labeled as “Untitled Brush” in the listed brushes. With the new brush selected, start changing the brush using the settings in the settings menu (aka Brush Studio).
- The brush’s many settings are sectioned off into different tabs. Here are what each of those tabs contributes to customizing brushes:
- Stroke Path: This tab contains sliders for altering the spacing, jitter, and falloff for how your brush will recognize the paths of your brush as you use them.
- Stabilization: This tab contains sliders for altering how rough or smooth your brush strokes look.
- Taper: The tapering of the brush can be changed with how much pressure you apply in Procreate. This tab allows you to edit the taper for the Apple Pencil and your fingers. These are vital settings to consider depending on your drawing method.
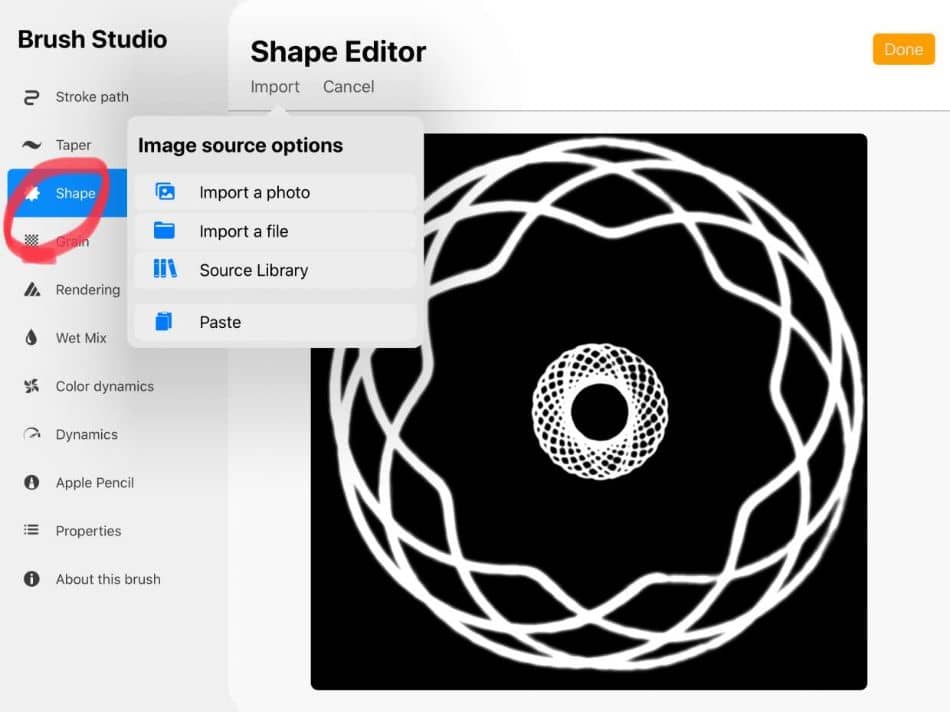
- Shape: Here is where you can edit the more crucial aspects of your brush. Scatter, rotation, and filtering options are present in this tab. Additionally, using the Shape Source option, you can use images or shapes created in Procreate to become a part of this brush.
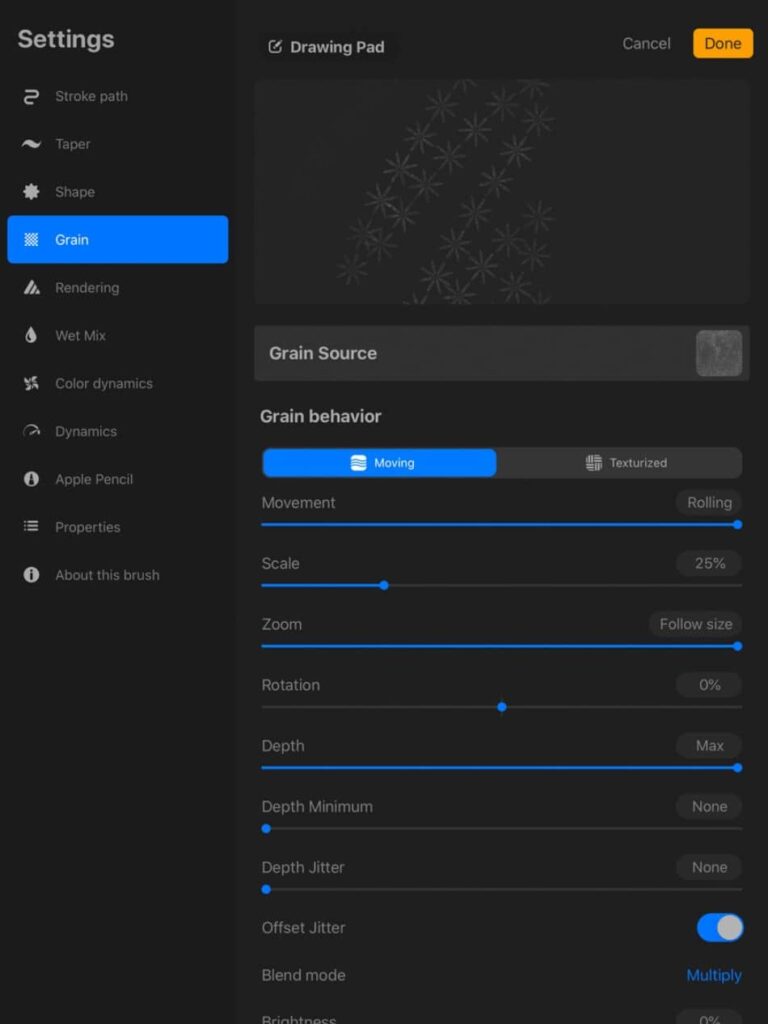
- Grain: The grain tab can create textures based on designs you’ve already made in Procreate. All you have to do is copy and paste that pattern into the Grain Source option. After that, you can alter the grain of your brush for movement, scale, zoom, depth, rotation, jitter, and blend mode.
- Rendering Options: These options can give your brush more of an extra sheen. The possibilities for rendering your brush include the modes of Light Glaze, Uniformed Glaze, Intense Glaze, Heavy Glaze, Uniform Blending, and Intense Blending. You can also alter the edges of the brush to have a look that is wet or burnt.
- Wet Mix: If you’re aiming to make your brush closer to a water-based medium, the Wet Mix tab has plenty of options for making that happen with your brush. Play around with the settings to cause your brushes closer to the look of paint or watercolors on paper.
- Color Dynamics: If you’re looking to make your brush handle colors in a certain way, the Color Dynamics tab covers the effectiveness of colors with your brush. These options include Hue, Saturation, Brightness, and Intensity. Additionally, you can change the color’s jitter, pressure, and tilt.
- Dynamics: Sometimes, the speed of your brush can determine how your designs will appear. If you like to draw fast or want a specific type of effect with your quick drawing, use the sliders of this tab to alter a brush’s size, opacity, and jitter based on the timing of your brushstrokes.
- Apple Pencil settings: For Procreate users working with an Apple Pencil, you’ll find the full extent of the hardware control in this tab. You can better tab into the pencil’s pressure effects and the tilt, which can affect the size, opacity, bleed, and flow when using your brush.
- Properties: In this tab, you can set the range for your brush’s size and opacity depending on how you draw.
- When you’re happy with your brush, change the title of your brush to a new name and click Done. Your brush is now saved and ready to use on your Procreate canvas.
How to Make Stamps With Procreate Brushes
As you’ve seen with the brush settings, there are many possibilities with the types of brushes you can create. Everything from elaborate patterns to wet-looking paint can be made. You may have also noticed that you can use custom designs created in Procreate for your brushes.
While turning designs into brushes isn’t complex, there are some crucial aspects to consider. For example, if you want to turn a pattern into a stamp, there are a few things you need to know. Here’s a step-by-step guide on transforming your brushes into stamps using designs in Procreate.
- Start by opening a square canvas in Procreate. Make sure it’s square to look more like a stamp.
- Paint on the canvas using a hard brush with black color. Draw whatever design you wish but make sure it doesn’t go off the canvas area.
- When you’re happy if your design, navigate to the Actions menu in the top-left part of the screen and appear as a wrench icon, from the submenu, tap the Copy Canvas option.
- Open the Brush menu and create a new brush using the plus icon.
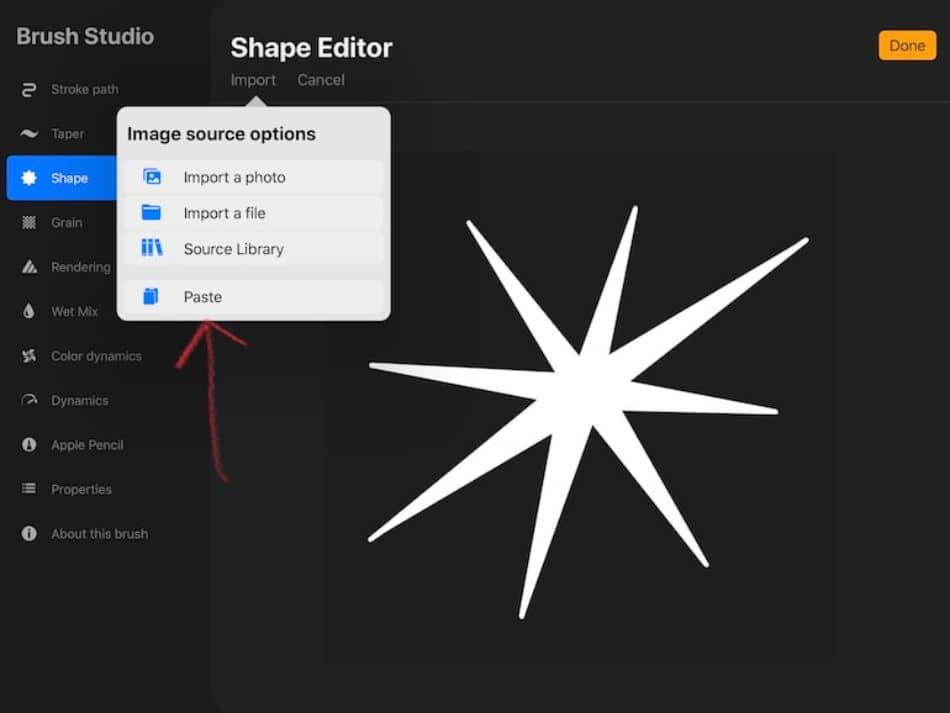
- Within the brush settings options, select the Shape tab. In the Shape settings, tap Shape Source, opening the Shape Editor window. Paste your canvas into the editor.
- In your shape image, tap the image itself with two fingers. This action will invert the color so that it is now a white shape on a black background. Then tap Done.
- With the defined Shape, we will now open the Stroke tab of the brush settings. Adjust the spacing of your brush to the maximum level. This will ensure the stamp won’t repeat itself with a brushstroke. Feel free to play with the jitter if you’d like a bit of movement to your stamp.
- Now open the Properties tab of the brush settings and turn on the button for Use Stamp Preview. This will give you an idea of how your stamp will look. Look it over and decide if you need to make additional changes before finishing.
- With your stamp created with all the right settings, tap Done to save the brush.
When To Use a Stamp Brush

- Watermarks: Placing authenticity over your work can be easy when using a stamp brush as a watermark. Use a low opacity and make it big enough to protect your work.
- Signatures: In the same way watermarks can make your work complete, a well-placed signature can make it more personal. Try drawing your name, making it a brush, and then using it when finished with your latest design to claim it as your own.
- Environments: Creating galaxies of stars and grass fields can be accomplished with ease using a stamp brush.
How to Create a Pixel Brush
Another fun type of brush to develop in Procreate is a pixel brush. It’s an ideal brush type for creating artwork similar to old-school video games. Here’s how to make a brush built for pixel art.
- Start with a square canvas in Procreate and then open the brush menu. Create a new brush by tapping the plus icon.
- Copy the canvas by opening the Actions menu (wrench icon). Then select Copy Canvas.
- We can start making our brush. Go to the Shapes tab in the brush settings and tap on Shape Source. In the editor window, tap the Import button and select Paste.
- Now open the Stroke Path tab and turn the Spacing slider to 0%. These settings will make your brush paint more in a straight line without spaces.
- Open the Taper tab in the brush settings. In the Pressure Taper section, turn the size and opacity settings to maximum and the pressure slider to 0. Push the size and opacity to the highest settings in the Touch Taper section.
- Open the Wet Mix brush settings tab. Set the Charge slider to disabled and the Pull slider to 50%.
- Open the Apple Pencil brush settings tab. Set the opacity to 0%.
- Finally, we’ll open the Properties brush settings tab. Find the Smudge slider and set it to 50%. Find the Brush Behavior section and set the brush’s Maximum Size to 0%. This will make the initial brush size small, but you can change it when drawing on canvas.
- Save your brush and start drawing with it. You will need to zoom in on your canvas to see what you’re drawing. When you’re happy with your pixel drawing with the pixel brush, blow up the design using the Selection Tool, which will look like an arrow. Expand the design, and it should be like pixel art.
When To Use a Pixel Brush
- Video Game Artwork: If you want to create graphics like old games from the Super Nintendo and Genesis eras, the pixel tool is ideally suited for making those types of designs.
- Sewing Design: Some sewing designs are easier to master with less detail and more giant blocks of color. The pixel brush would be perfect for these designs.
How to Create an Image Brush in Procreate
In the same way that Procreate brushes can recognize designs, they can also recognize images. Turning an image into a brush pattern can easily create highly detailed and intricate designs. Let’s go through the process of making such a brush.
- Start by turning your image monochrome or grayscale using a photo editing program. The easiest one to do this with is iPad’s photo editor since you can use a simple filter in that program. Be sure to increase the contrast so that the black and white are more distinct. Save that image.
- With your saved grayscale image, start with a square canvas in Procreate. The recommended size is 3000px x 3000px.
- Open the Actions menu and select Insert a Photo.
- If the photo you brought is not a PNG, erase the unwanted white background and areas you want to be removed using the eraser tool.
- Copy the canvas by navigating to Actions > Copy Canvas.
- Open your new brush settings and then open the Shape settings. Tap on Shape Source to open up the Shape Editor. Tap Import and then select Paste.
- Tap two fingers on the image in the editor to invert the image, and then tap Done.
- Open the Stroke Path tab and move the Spacing slider to 100%.
- Open the Apple Pencil settings and set the opacity to 0%.
- Open the Properties Menu tab and toggle Use Stamp Preview.
- Press Done to finish the customized brush. You can now draw with the image.
When To Use An Image Brush
- Wallpaper: Drawing wallpaper patterns with detailed designs can be easily accomplished with an image brush.
- Realistic Backgrounds: Blades of grass and puffs of clouds can be placed quickly as brushes.
- Crowds: Creating multiple brushes of people can make it easy to design a scene of a crowded concert or marching parade.
Tips and Tricks
- Reset If You Have To: It can sometimes take extra work to retool your custom brushes constantly. If it gets too complicated, don’t be afraid to reset and start over, as it might save you some time.
- Keep Your Images Contrasted: It can help to have multiple versions of images you want to transform into a brush tool. Save a few versions with different grayscale levels and contrast to find which works best for your design.
Frequently Asked Question
Black and white images can be turned into brushes in Procreate. Once you’ve got a relatively sizeable black-and-white image, open it in Procreate, copy the canvas, and create a new brush. Now go to the shape tab of the brush settings and paste the copied canvas. Play around with the settings until you’ve altered the image to be your desired brush.
After creating a pattern on the Procreate canvas, copy it and open the new brush settings. In the grain tab, paste in your copied pattern. Tweak the settings to get the pattern just right and ensure it repeats to feel more like you’re drawing a repeating pattern.
The Create New Brush option can create custom brushes in Procreate. This button will open up the brush settings menu, where you can customize your brush for everything from patterns to textures.
Yes, brushes you create in Procreate can be made into purchasable add-ons. The brush sets created in Procreate can be sold on such online markets as Etsy, Creative Market, Design Cuts, and Hungry JPEG.
Procreate doesn’t place monetary limits on the output of your artwork in the application. This means you can use the app’s many brush sets (including ones you download) to create and sell your digital artwork.

Mark McPherson has been working as a video editor and content writer for over ten years. His background started in animation and video editing before shifting into the realm of web development. He also branched out into content writing for various online publications. Mark is an expert in video editing, content writing, and 2D/3D animation.