(Last updated on March 9th, 2023)
You can use many styles and techniques to produce amazing and unique photos. One simple method I love is black and white. You can turn a simple photo into a masterpiece by removing all the colors and leaving only black and white.
Black and white images look fantastic. They are bursting with contrast and are highly atmospheric. It’s a photography type I recommend beginners try, as it helps you appreciate things like contrast, shadows, and lighting more.
If this sounds interesting, below, I will show you how to make an image black and white in Photoshop using the adjustment tool. I’ll also share some of my own black-and-white shots for your enjoyment!
Black and White Considerations
Before I show you the simple technique, there are two considerations. These are important and dictate if you should convert an image into black and white:
- Suitability
- Image mode
Suitability – Will the Photo Make a Good B&W Conversion?
Firstly, it’s important to realize that not every photo makes a good black-and-white conversion. Certain characteristics make perfect B&W shots.
This is subjective, and there is no absolute right or wrong answer, but as a general rule, photos with more contrast make better B&W images. By contrast, I mean light and dark areas.
Photos with multiple opposing bright and dark areas work better in B&W. This is because when the colors are converted, the dark parts turn dark grey or black, while the lighter parts turn light grey or white. The overall effect is a B&W shot with much more detail and depth. Also, remember how contrast and colors change when you resize images.
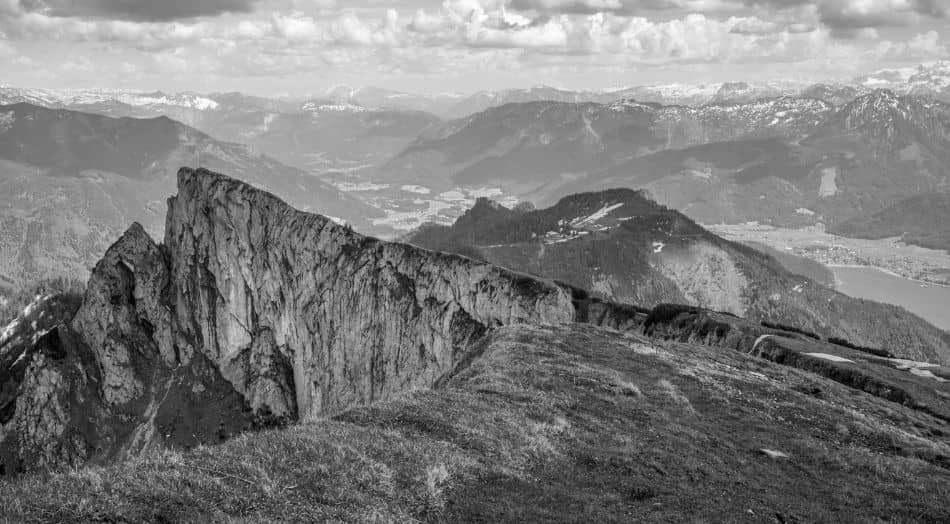
This is demonstrated in the below photo I took of a railway station in Scotland. It works brilliantly as a B&W shot due to the contrast. On the one hand, we have a bright railway station and fencing. This is framed perfectly and contrasts amazingly with the darker surrounding landscape and trees:
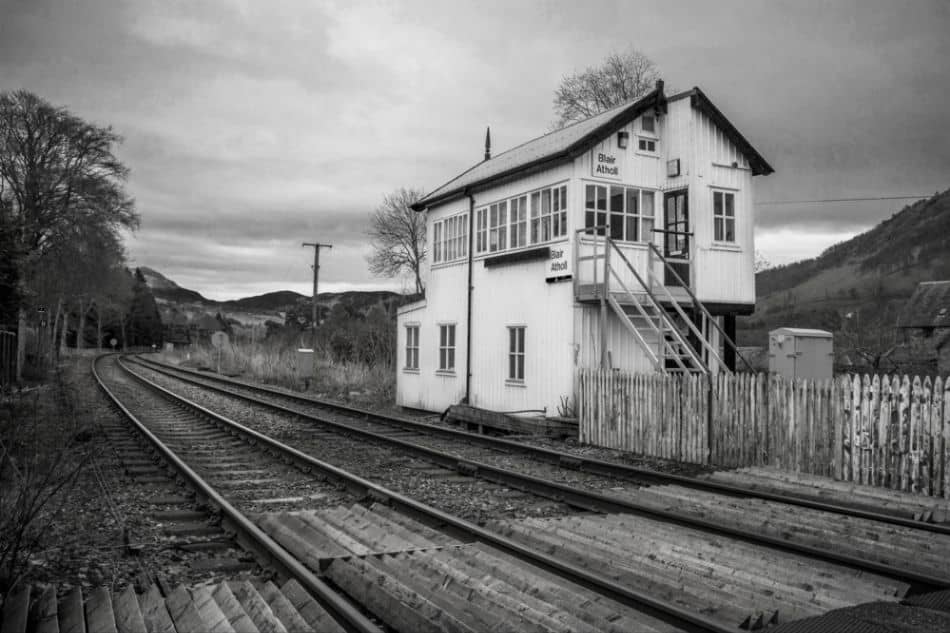
Image Mode – Can I Turn This into a B&W Photo?
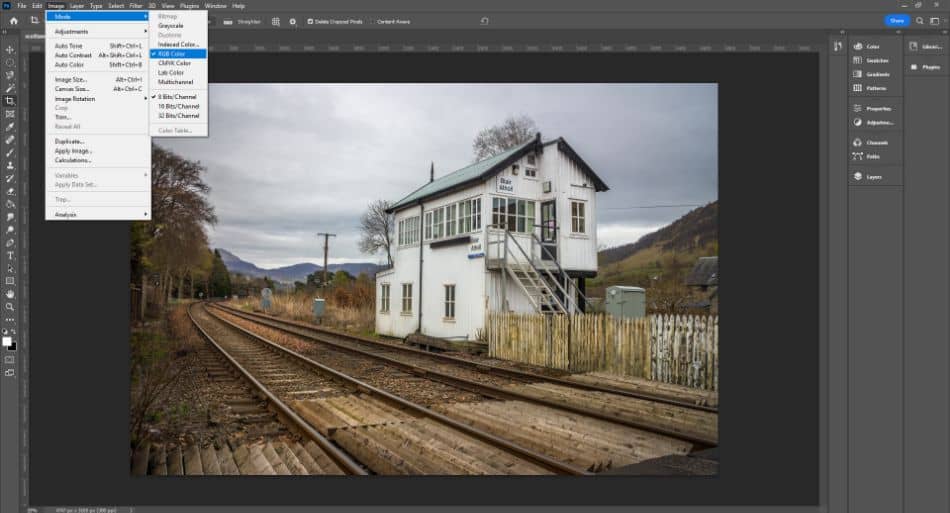
Secondly, from a technical aspect, the photo must also be suitable for a black-and-white conversion. Simply put, an image must use the RGB color space to be converted to black and white.
The black-and-white adjustment option won’t be available if it is anything else like CMYK or Indexed Color. Don’t worry, though – you can convert your images to RGB easily:
- Click on the Image main menu at the top of Photoshop.
- Hover over the “Mode” sub-menu.
- Click on “RGB Color.”
That’s it! Your image is now fully editable, and you can use the technique we discuss below.
Adjustment Layer
Making an image black and white in Photoshop is especially easy. The simplest way is just to click Image > Adjustments > Black and White. This turns the image black and white and opens the pop-up box where you can change the individual color strengths.
However, this doesn’t give you the flexibility of using an adjustment layer. Using the adjustment toolbar and creating a new black-and-white layer mask, you can always revert to the original image or make additional changes on top of it more accessible. Moreover, the background remains editable.
Step 1 – Make Sure the Adjustment Toolbar Is Active
To make this work, we first need to activate the adjustment toolbar. This toolbar is incredibly useful, and it is where you can make various creative edits to your photos. These include black and white, selective color, photo filters, color balance, and hue/saturation.
Anytime you use an adjustment from this toolbar, it creates a new layer mask. As mentioned above, this is important as it gives you greater control and leaves the background layer still editable. To activate the adjustment toolbar, do the following:
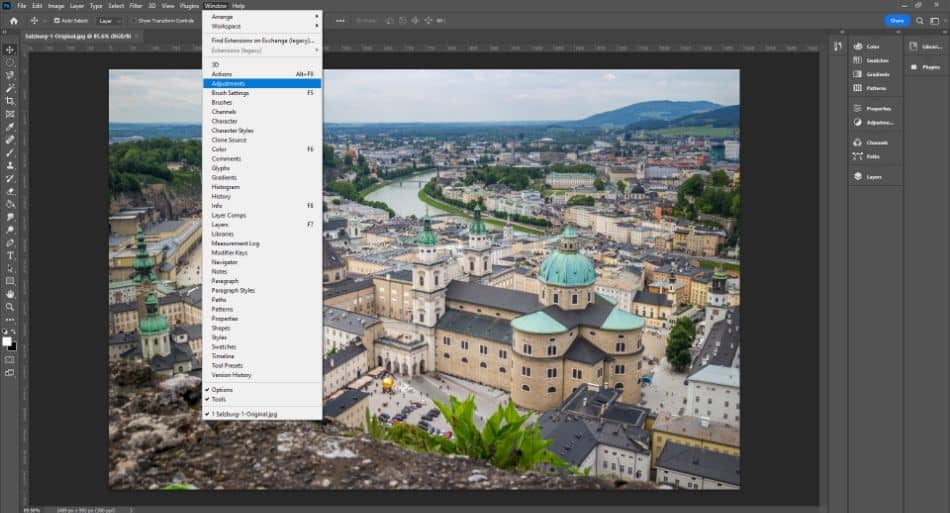
- Click on the Window top menu in Photoshop.
- Click on “Adjustments.”
- If not already open, click on Adjustments on the right-hand toolbar.
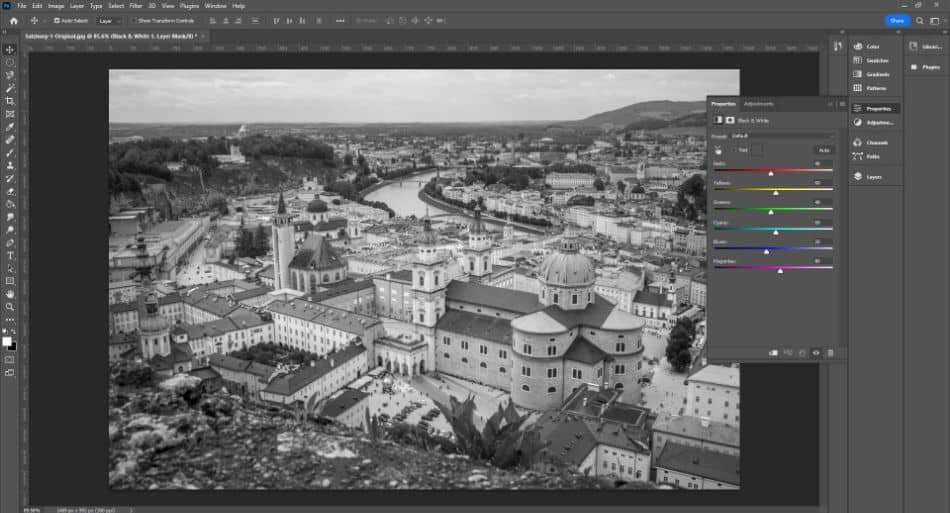
Step 2 – Create a New Black-And-White Adjustment Layer
We now have the toolbar active and can start working! All you have to do now is to click on the black-and-white adjustment option – it looks like a rectangle split in half with one side light and one side dark (usually located next to the scales).
Once you click this, the adjustment layer’s properties tab should open. This is where you play with the parameters of the different adjustments you have made. If you wanted to make an object black and white, you would have to rasterize it first.
Step 3 – Change the Color Parameters
After clicking the black and white option, your image should already be converted. Therefore, you could stop here if you wanted – the job is done.
However, you now have the chance to fine-tune the image. This is done via the properties above tab. For a black-and-white adjustment mask, the properties tab shows six different colors with sliders:
- Reds
- Yellows
- Greens
- Cyans
- Blues
- Magentas
These are the standard color groupings, and the sliders represent the strength or hue of each color group. By changing the sliders, you can affect the prominence of different colors, which will radically alter the composition of your black-and-white photo.
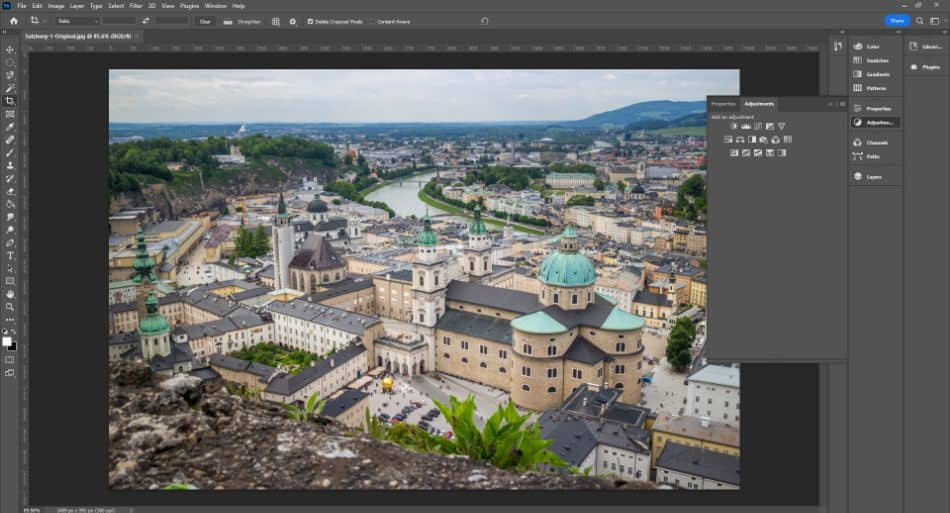
For example, the below photo of Salzburg has a prominent blue sky. If I dragged the cyan and blue sliders toward the right, the sky would be much lighter, and some cloud detail would be lost. Alternatively, if I dragged those sliders to the left, the sky would become darker and more brooding. The Cathedral in Salzburg could also be a prime candidate for cutting out an image in Photoshop, which is another cool technique.
You have to look at the composition of your image and see what different colors are present and where they are prominent. You can then experiment with the sliders to change the contrast of these colors. It can be a learning curve, but nothing is permanent – if you don’t like how a slider has changed the image, just drag it back to where it was or click on the reset button at the bottom of the tab!
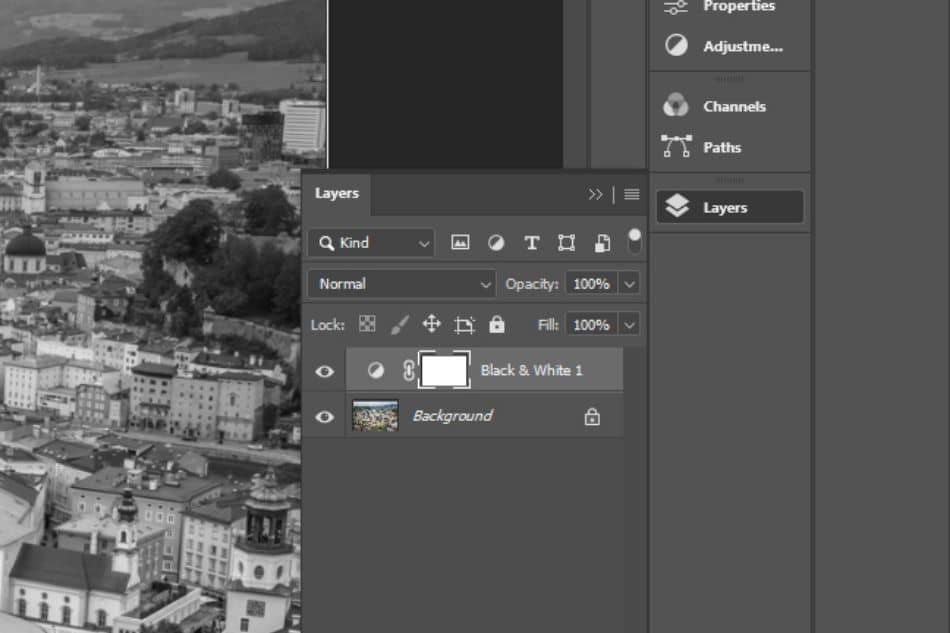
If you do deselect the adjustment panel by accident or go on to do further edits, you can still change the black and white adjustment layer after:
- Click on the layers tab.
- Select the adjustment layer.
- Double-click on the circle to the left of the lock symbol.
This should re-open the adjustment properties tab and show you the black and white color slides again.
Create Stunning Black and White Photos Today
I hope you now know how to make an image in black and white in Photoshop. Fine-tuning your layer masks and getting the right look can take time, but this is part of the fun!
Spend time changing the different color sliders and seeing how they affect the overall composition of the black-and-white photo. You can produce some incredible photos and turn relatively mundane shots into genuine artwork!
Frequently Asked Questions
First, ensure you have an active adjustment toolbar by selecting it in the window menu. Next, click on the “black and white” option in the adjustment toolbar. This creates a new black-and-white adjustment layer mask that you can then edit.
Grayscale and black & white are essentially the same thing in Photoshop.
The only possible reason is that your image mode is something other than RGB. To make black-and-white photos in Photoshop, your image must use the RGB color space.
Yes. Firstly, you can use the undo feature to revert your changes. Alternatively, if you have created a new black-and-white adjustment mask, simply go to the layers panel and delete the adjustment mask layer to leave only the original color background.
Yes. Firstly, you can use the undo feature to revert your changes. Alternatively, if you have created a new black-and-white adjustment mask, simply go to the layers panel and delete the adjustment mask layer to leave only the original color background.
Yes! In the adjustments panel, there is a selective color tool. Here you can change the strength of different hues individually, including red, yellow, green, and neutrals. By changing the different sliders, you can affect which colors are prominent.
Paul is a lifelong photographic hobbyist and has been taking epic shots from around the world for the last decade. His travels have taken him to places like Antarctica, Thailand, and Greenland and this has given him the chance to photograph places few people have seen. As a self-professed nerd, Paul loves photo editing and his programs of choice are Lightroom Classic and Photoshop. In recent years Paul quit the standard office life and became a full-time freelance writer to share his passion for photography and tech with those wanting to learn.