(Last updated on March 16th, 2023)
Among Photoshop’s stellar features is the ability to change the color of the background. No matter the image, the app can find a way to alter that background hue. I’ll show you how to change the background color in Photoshop and address each method.
1. The Fill Color Change Method
You can get away with a simple fill if your image has a simple background. It’s not always practical but worth considering if there are no significant issues of shadows and gradations. This method is best suited for images that are simple drawings like vector objects with a one-color background.
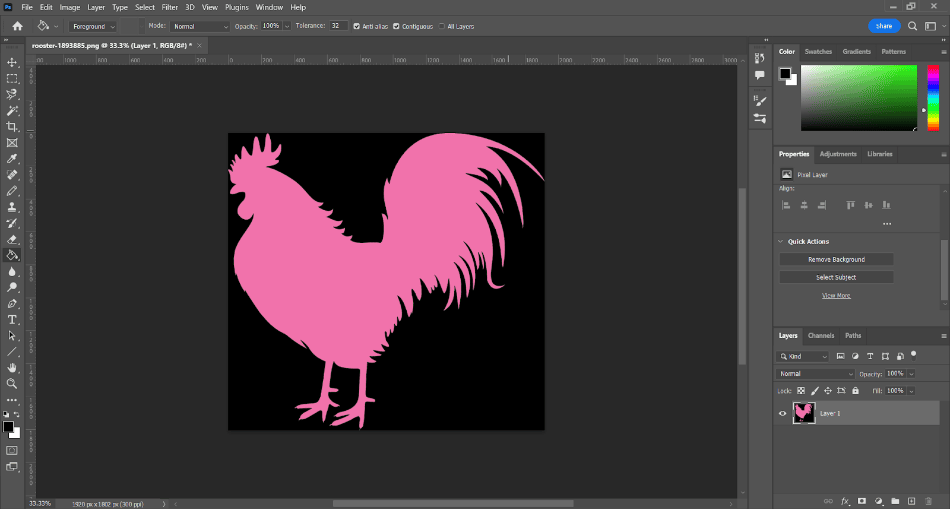
There’s not much to this method. After selecting the Fill tool from your toolbar, choose a color and click on the background color. If it covers too much or too little of the background, try changing the tolerance level in the fill properties.
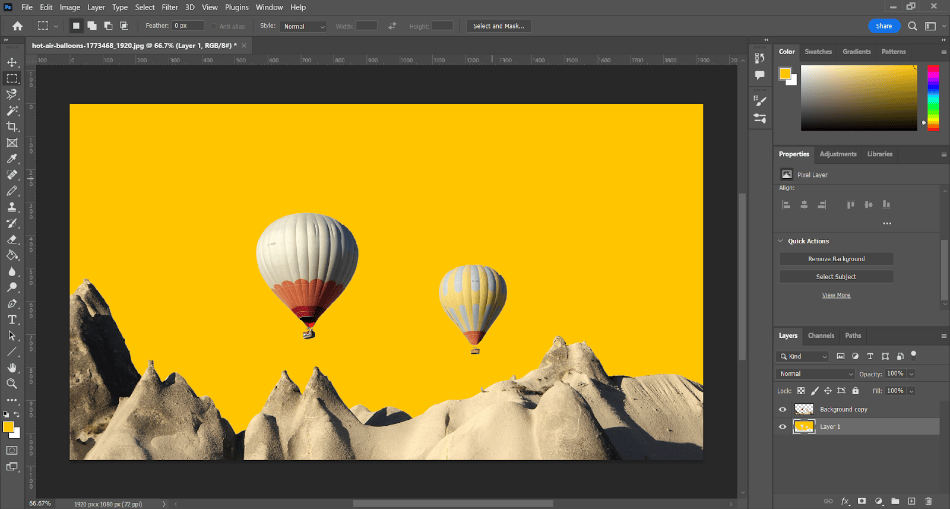
2. The Selection Method
The more effective way to change background colors is to isolate the background. This method works best for images or photos with much detail in the foreground and background. With a proper selection and isolation, you can easily change background colors.
Here’s a step-by-step process to select and change the background color.
After bringing your image into Photoshop, choose a selection method to isolate the background. Use one of the following tools to accomplish this:
1. Object Selection
This method is best suited for selecting a foreground object automatically, but it can be manipulated into choosing the background by inverting the selection.
2. Lasso Tool
This freehand tool can be ideal for selecting the background if you’ve got a steady hand to draw around the borders.
3. Quick Selection
This tool automatically detects the area to select as you draw.
4. Magic Wand
With one click of the Magic Wand, you may be able to select the entire background if it’s a simple color.
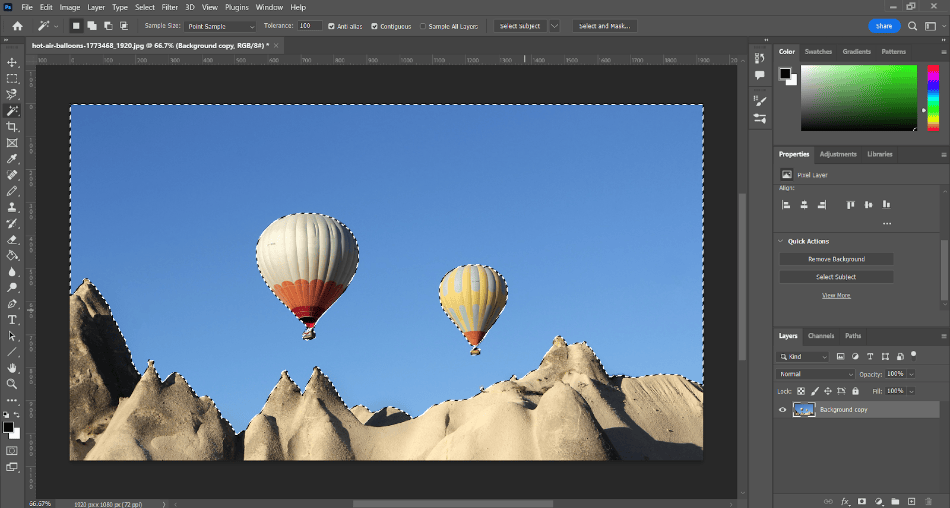
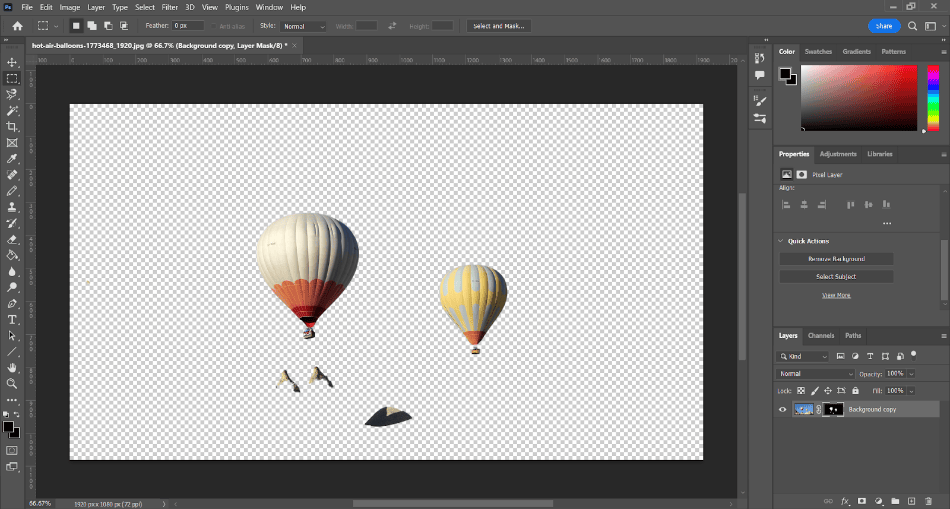
After selecting your background, press Delete to get rid of the background. The background should now look like a checkerboard pattern, meaning a clear alpha channel is behind it.
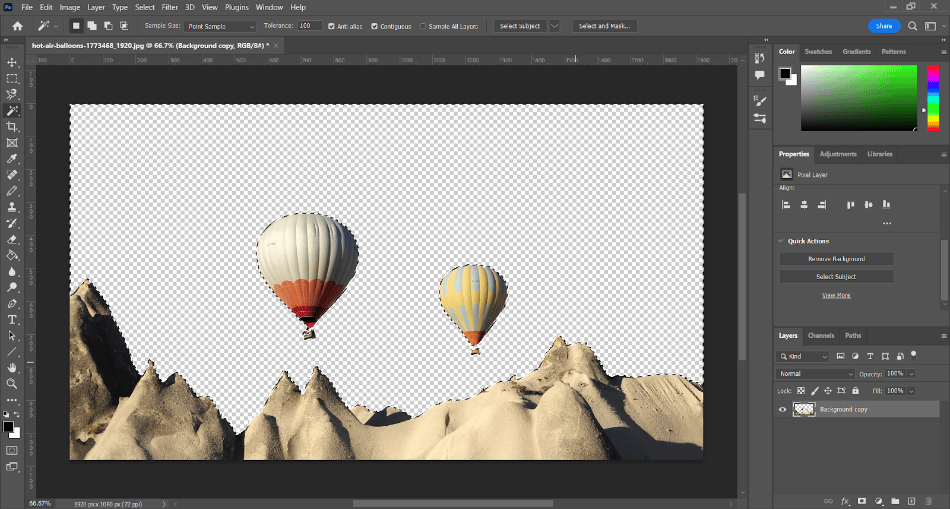
Create a new layer and drag it below the foreground layer in the layers panel. Add a fill color for whatever you want the background to look like now. The background color should now be changed.
This method can change both background and foreground elements in Photoshop. This technique is good practice as it can aid in several Photoshop projects.
3. The Remove Background Button
One of Photoshop’s more advanced tools is the Remove Background button. With an image layer selected, navigate to the properties panels and find the area that says Quick Actions. In this section, click on the button Remove Background.
After a few seconds, the background will be automatically removed. This method is quick and dirty as it often removes too much or too little of the background. This method isn’t as highly recommended since it can’t be modified.
If you click ‘View More’ in the Quick Actions area, you will also see the Select Background button. This feature isn’t perfect and has failed more often than it works. These quick-fix options may be worth trying first but are not ideal when ditching a background to replace it with a new color.
4. Photoshop Quick Masks and Adjustment Layers
There’s another method to consider when changing background colors. Think of this way as a combination of the fill and selection method. Here’s how to add masks and adjustment layers to pull off an easy background color change.
1. Choose the Quick Selection Tool from the toolbar with your image already in Photoshop.
2. Use the tool to draw around the canvas and select the background. Use the Subtract from Selection tool to remove areas of the background or foreground. Don’t worry if the selection isn’t perfect. I’ll use masks to trim the edges.
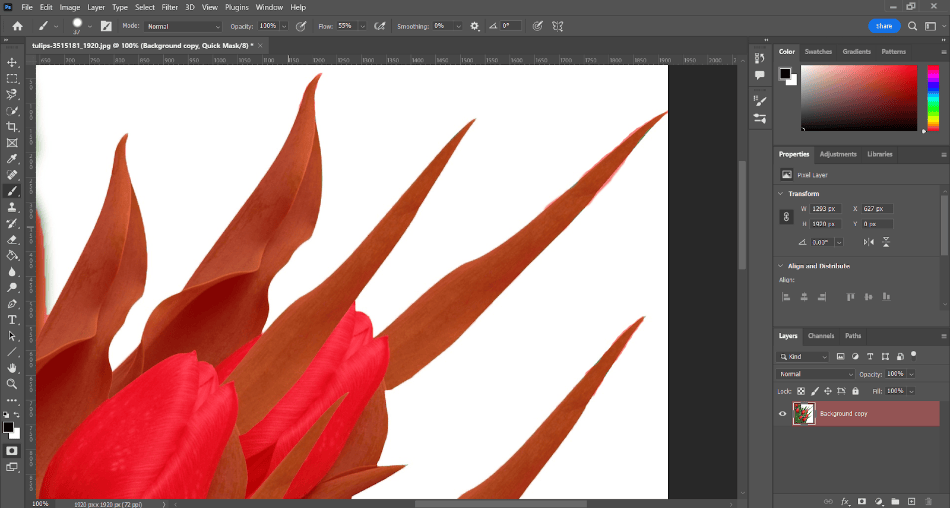
3. With the selection made, press Q to enter Quick Mask Mode. The selection should now appear in red.
4. In the Quick Mask Mode, you can paint more of the area you want to be covered. You can do this by selecting the Brush from the toolbar or pressing B. Make sure the color is black or white so the mask will recognize it.
5. Press Q again to disengage the mask mode and return to your selection.
6. With your selection still highlighted with the moving-ants border, go to your Layers panel and click on the New Adjustment Layer icon in the bottom toolbar. Then select Solid Color.

7. You’ll now be able to change the color specifically for the background with the color picker. Choose the new color and see it appear on your canvas.
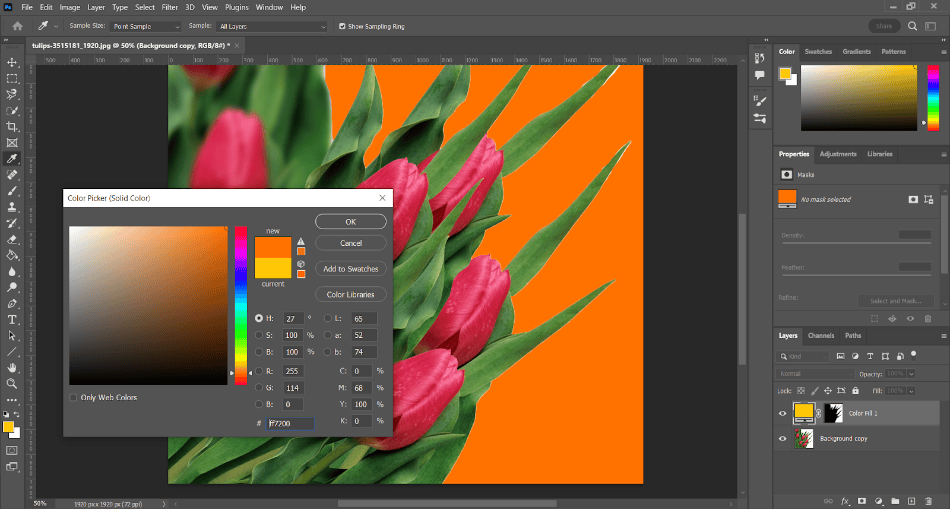
8. Click Ok to finalize the color choice. If you want to change the background color, simply edit the Solid Color adjustment layer you added.
There are some benefits to changing background colors using a mask and adjustment layer. You can change properties by clicking on the selection or filling in the layers panel.
You can refine the mask to be smoother or sharper for the selection.
For color, you can bring up the color picker again.
This method is recommended for having constant control over your background. If you ever want to change the selection, it can easily be altered with sliders rather than using different selection tools again. It’s also handy to make the background color easier to edit instead of adding a new fill every time you want it changed.
Conclusion
Changing backgrounds can be an essential part of editing photos in Photoshop. There’s more than one way to do it. Consider your photos, and you’ll easily be able to swap out skies or ditch the green background for a custom one.
Tips & Tricks
Use Many Layers
Always consider changing background colors with layers. You’ll have much more control over not only changing the colors but blending them as well.
Sky Replacement
If your background is a sky and you simply want to replace it with a different sky, Photoshop has a unique feature designed just for the skies. Navigate to Edit > Sky Replacement. The sky will be detected, and you can choose from several different skies to replace it.
Don’t Fear Masks
If you struggle to get the perfect selection, use the mask mode features. They can help make your selection more refined with smoother edges and density.
Back It Up
Always keep a duplicate layer of the image you’re trying to change. This is useful for more than just being able to return quickly if you make a mistake. It’s also a great way to compare the original image with the one you altered.
Frequently Asked Questions
A: The best way to change the background color of an image in Photoshop is to isolate the background on a separate layer. Separate the background from the foreground and remove it. Then create a background layer below the foreground and use that blank layer to add the color.
A: To change a background to white in Photoshop, the best way is to remove the background with a selection tool and then place a white background below the primary layer.
A: Layers can be easily altered for their color by adding a Solid Color Adjustment Layer. Click it and select Solid Color. You’ll then be able to add a new color to the layer through the color picker window.
A: The background color of an image in Photoshop can be added by pressing Control and Backspace if you’re on a PC or Command and Backspace if you’re on a Mac.
A: There are various ways to change a background in Photoshop. If you want to replace it with a new background, simply remove it using a selection tool. If you will replace it with a color, use the selection method with a quick mask and adjustment layer for solid color. If you want to replace the sky with a different one, use the Sky Replacement feature to add a new sky instantly.

Mark McPherson has been working as a video editor and content writer for over ten years. His background started in animation and video editing before shifting into the realm of web development. He also branched out into content writing for various online publications. Mark is an expert in video editing, content writing, and 2D/3D animation.