(Last updated on January 9th, 2023)
Photoshop’s most powerful ability is background removal. Removing a background allows you much creative freedom with your photos. There are many ways to do this, and we’ll let you know the best ways to get rid of the background.

Sometimes you just want to place a dog in space or a car in the ocean. Doing that with any photo requires getting rid of that pesky background. It’s perhaps one of the most quintessential Photoshop operations.
There’s more than one way to get rid of the background. The technique ultimately depends on what type of photo you’re working with. A green screen might be easy enough to erase, but more complex images may require different tools.
We’ll review several techniques to remove the background and get crisp transparency behind your subject. These methods can be as simple as wielding one tool or as elaborate as drawing around the background being removed. There’s quite a variety, and we’ll review the advantages and disadvantages of all these methods.
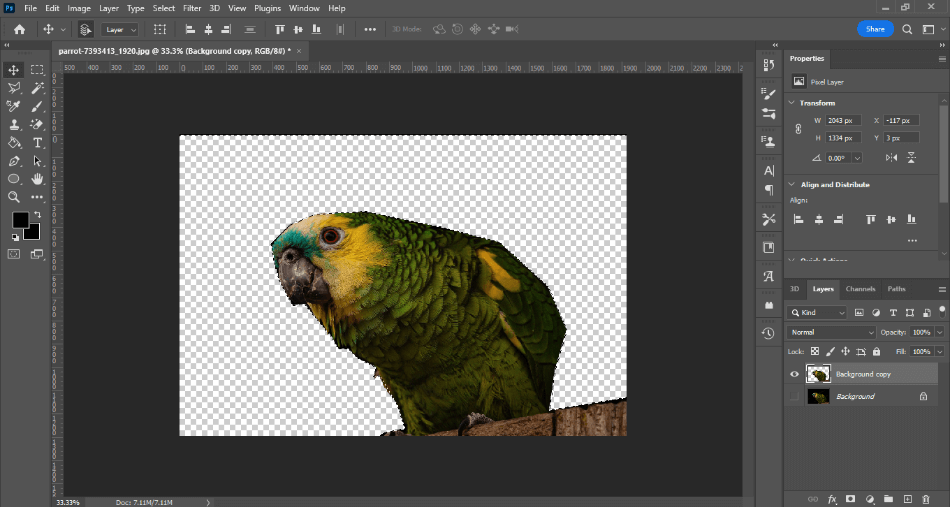
The Object Selection Tool
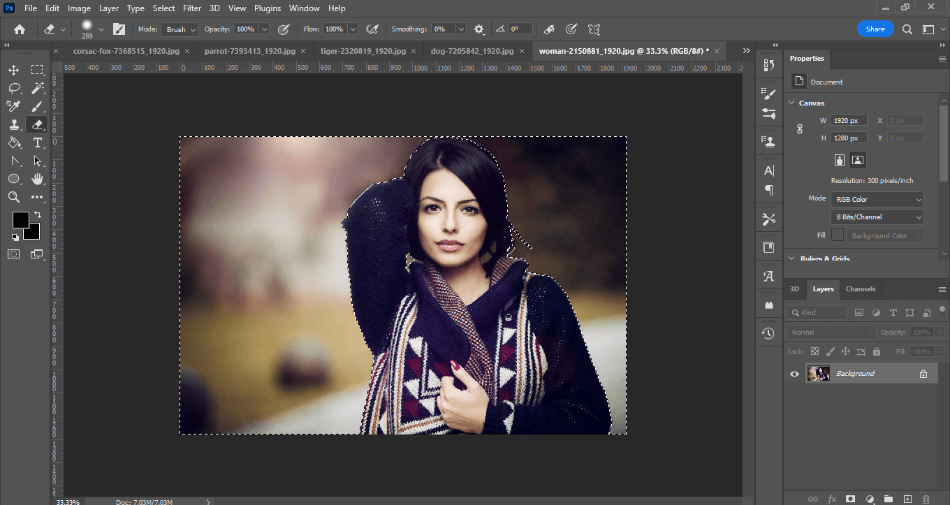
One of the newest additions to Photoshop is the Object Selection Tool. This tool uses innovative technology to better isolate a specific part of an image you’re trying to remove. The Object Selection Tool can be helpful not just for eliminating backgrounds but foreground subjects as well.
You can find the Object Selection Tool in the toolbar at the same spot as the Quick Selection Tool. Once it’s selected, you’ll then hover over the part of the image you want to keep separate from the background. Wait a few seconds, and it should turn blue.
You can now click on the part of the image you want to be selected. If you want to save more foreground subjects, simply hold Shift and then hover and click on the other areas. Use this if you have a few people or things you want to avoid being taken away while removing the background.
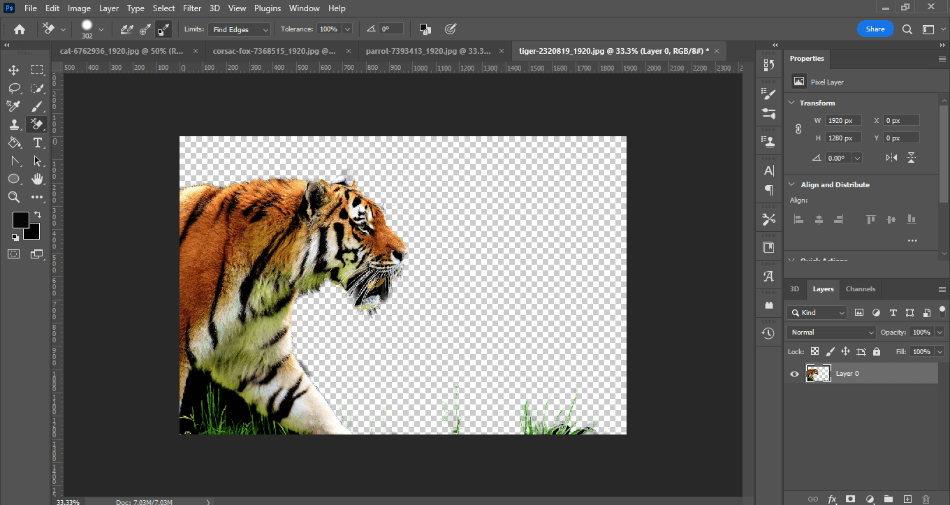
Go to Select > Inverse so that only the background is selected instead of objects. You’ll unlock your image layer by clicking the lock next to it in the layers window. This should change the layer name to Layer 0.
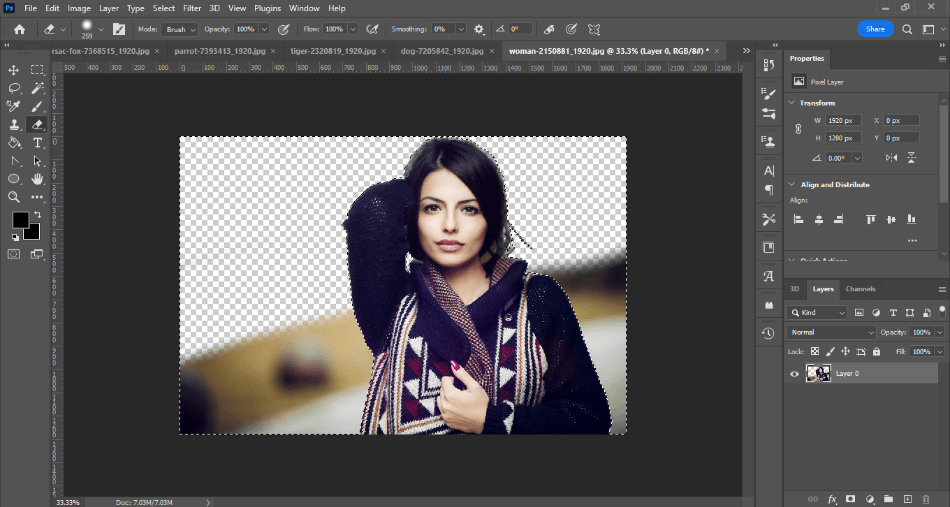
Now you’re ready to remove the background. Grab the Eraser tool from the toolbar and start erasing the image. You’ll notice that only the background you’ve selected will be removed, not the objects we specified first with the Object Selection Tool.
This is one of the more innovative ways to remove a background considering the technology at play. It’s also easy to use, considering Adobe Sensei can autodetect the subjects you’re trying to preserve. If you ever need to go back and remove more of the background, simply repeat the process.
Quick Action Steps:
- Choose the Object Selection tool from the toolbar.
- Hover the object area you want to separate from the background and click on it.
- With the object selected, go to Select > Inverse to change the selection to the background instead.
- Erase this background using the eraser tools.
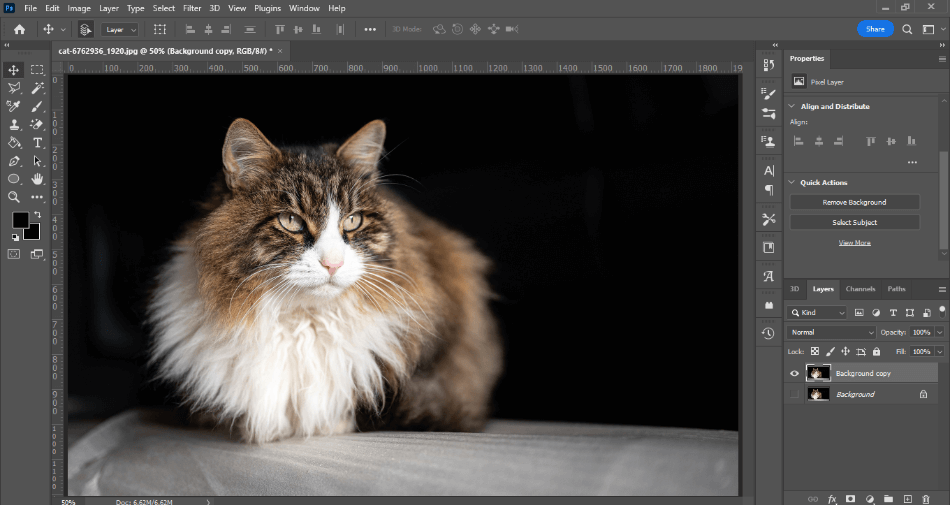
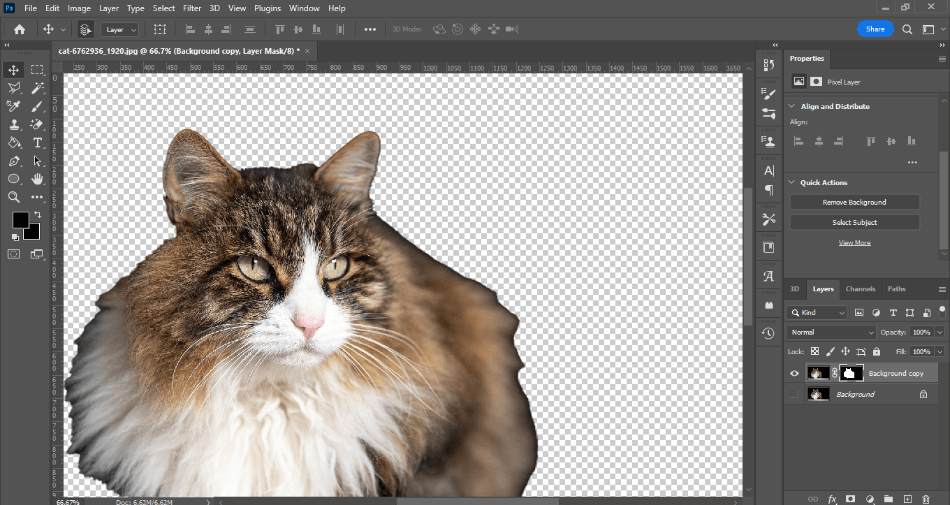
Quick Selection Tool
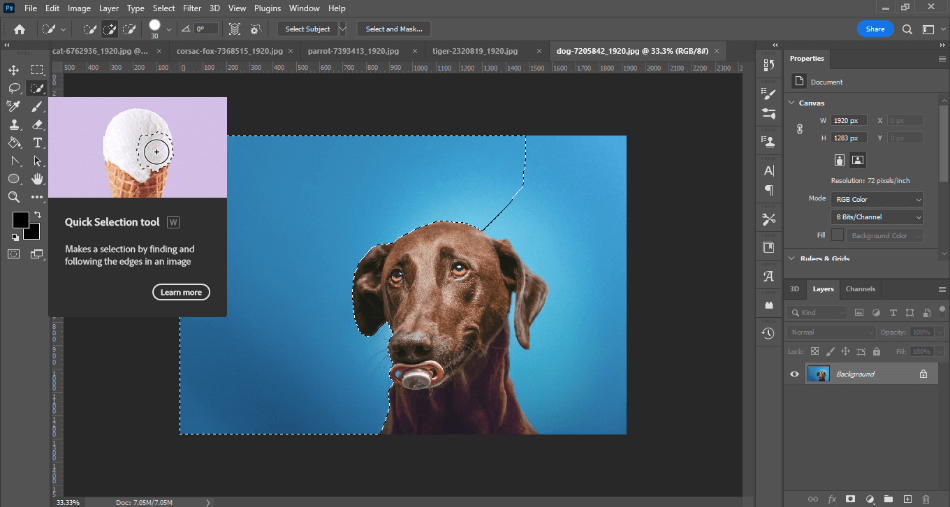
The Quick Selection method is a great way to make intricate background removal quickly. It differs from the manual selection method by recognizing edges better. So you won’t have to spend many minutes trying to draw the right shape around your background.
The Quick Selection Tool is just below the Object Selection Tool in the toolbar. You can find it next to the Object Selection Tool. Before we start working, make sure you duplicate your image layer to save the original.
Start clicking and dragging around the image to make your selection. Blocks of the background will start to be taken up by the selection as you drag. The smart technology will automatically detect which areas to include in the selection you’re trying to make.
The path might not be perfect. You may notice some edges it might’ve missed if you’re working with a complex photograph. You can trim by holding Alt on the keyboard and painting the areas of the selection you want to be removed.
When you’re happy with your selection, you’ll want to save it. Navigate to Select > Save Selection to save and name your selection. This will preserve the area we separated from our object or foreground.
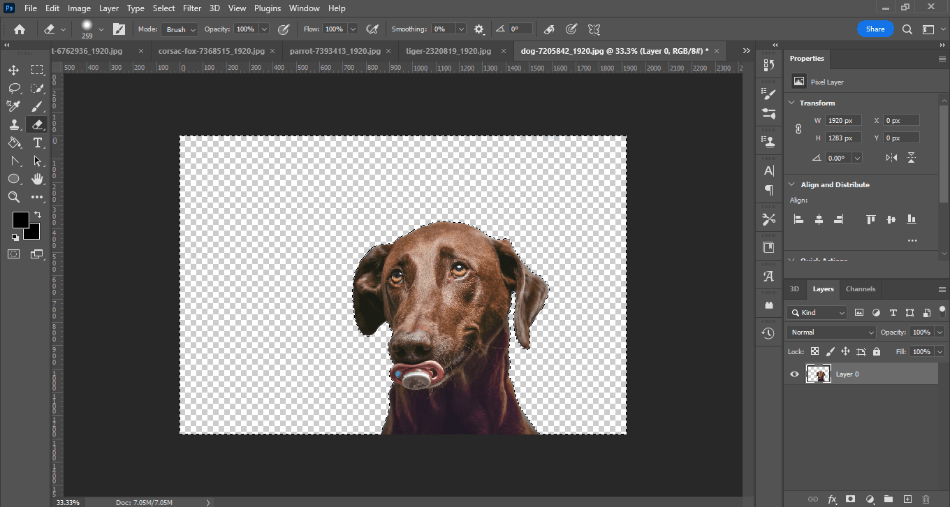
With your selection finalized, you can now erase the background. You can just push Delete to remove it or use any eraser tools. It’s up to you how you want to get rid of the area you’ve selected.
This is a method that is recommended for mildly detailed photographs. If you have a sky that is a bit cloudy or a backdrop with some shadows, the detection of the Quick Selection Tool should be a perfect fit for your project. Be prepared to spend a little time honing the proper selection, although not as long as you would with the standard Lasso tool.
Quick Action Steps:
- Choose the Quick Selection Tool from the toolbar.
- Click and drag around your image to select the background.
- Go to Select > Save Selection.
- Push, Delete or erase the background using eraser tools.
Background Eraser Tool
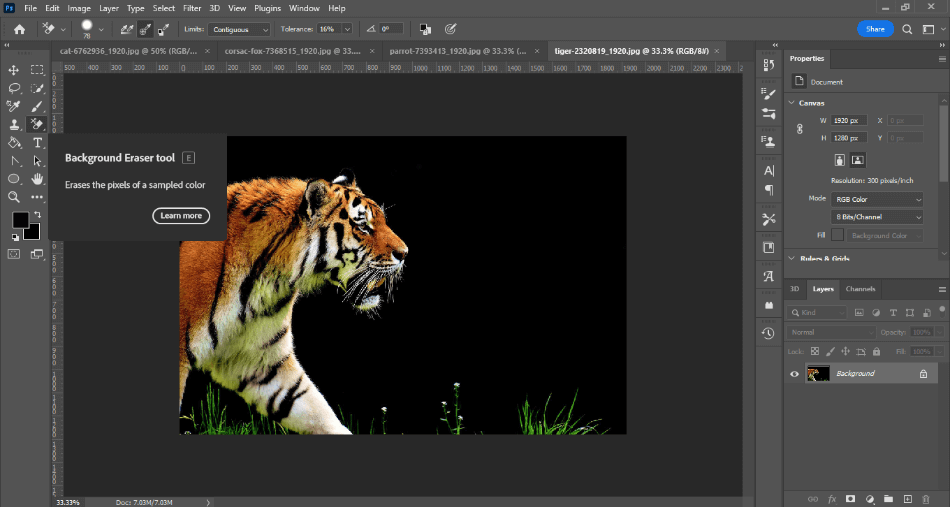
One of the quickest ways to remove a simple background is to use the Background Eraser Tool. This handy brush has improved over time to erase background in the same way you’d paint on a canvas. It’s a valuable tool if your background is a solid color or not all that detailed.
You can find the Background Eraser Tool by clicking and holding on to the Eraser icon in the toolbar. You’ll find the Background Eraser Tool in the submenu. Once you select it, you should have a circular brush with a plus sign as your cursor.
Hover the brush over the area of the background you want to erase. Make sure the circle isn’t touching the portions you don’t want to remove. Click, and you’ll see that portion of the background disappears.
Now that the brush recognizes the background, you can start dragging the brush around. Only the background you’ve selected will be erased when dragging. If the background isn’t too complex, you should be left with a clean, transparent background in the area you brushed.
Like most brushes in Photoshop, you can change how the brush works. From the tool options panel, you can alter the size, hardness, spacing, and even pen tolerance if you’re using a stylus. Make the size big for erasing vast patches of the background, or turn the hardness down if you want a subtle falloff.
The Background Eraser Tool is not perfect. If you try to erase the background again and part of your foreground gets caught in the circle, you could end up erasing the parts you want to keep. You’ll want to keep this in mind as your brush away the background with more than one click.
You won’t want to use the Background Eraser Tool if you have a detailed background. It is possible to use this tool to get rid of a clear sky or a brick pattern. That being said, you’ll have to play with the settings to get the tool just right.
You’ll want to use the sampling options for photographs with a lot of detail. These can be found in the top toolbar as three buttons with eyedroppers. The settings include Continuous, Once, and Background Swatch.
Continuous is the sampling we discussed where you click, and the brush recognizes the background to erase. Once is a simpler version of Continuous better suited for solid-colored backgrounds. Background Swatch will remember a color you specify through the color swatches rather than selecting it in your image.
Be aware that this tool may not recognizes all the edges to trim. You’ll have to play around with the Tolerance settings to ensure there are no artifacts or edges. This is why this tool is only recommended to get rid of the simpler backgrounds quickly.
Quick Action Steps:
- Choose the Background Eraser Tool from the toolbar.
- Choose a sampling method for finding the background to erase.
- Start brushing out the background you want to erase.
Read more:
The Pen Tool
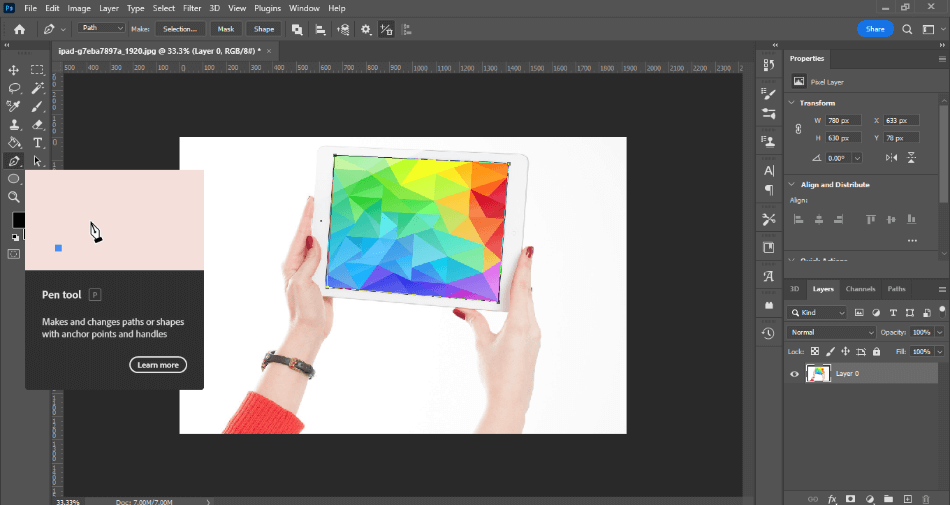
For Photoshop users with a steady hand and plenty of placements, the pen tool is a classic method for background removal. This tool will give you a lot of control over what you want to be removed. The bigger problem is that it’s a tool that requires some extra time to utilize.
You’ll start using this method the same way you would with any background erasing tool. Duplicate the image so that you’ll be able to save the original and create a new version you can edit. Label them accordingly so that you know which is which.
From your toolbox panel, select the Pen tool. It should be located above the Text tool. You’ll then start drawing a path around your background; click for each point. Don’t forget to use Control + Z if you make a mistake.
If the background is too extensive, you can work backward. Simply draw a path around your foreground subject instead of your background. You can then invert the selection by going to Select > Inverse, making everything except the subject selected.
Now we need to specify the selection as a path. Navigate to Window > Paths, and you will see the Paths panel open. You should see your selected object as a path layer in this panel.
Now click the three bars in the right corner of Paths. Right-click on it and select New Path. Your selection should now be saved as a path layer.
The next step is to right-click on the new path and select Make Selection. You’ll then click OK in the dialog box. The path should now look moving, as though ants are crawling all over the edges.

With your selection made, you can now delete the background. Simply press Delete or go wild with the erase tools. It’s up to you how you want to delete the background at this point.
The pen tool method is recommended for those who want the most detail. If you’re not happy with more automatic methods or your foreground has a lot of fine details, the pen tool can work wonders for making the best selection. Be prepared to spend the most time with this method, as it takes a lot of time to draw the perfect path.
Quick Action Steps:
- Select the Pen Tool from the toolbar.
- Choose Select > Inverse.
- Create a new path in the Paths panel.
- Right-click on the new path layer and select Make Selection. Click OK.
- Press Delete to remove the background or use the eraser tools.
Magnetic Lasso Tool
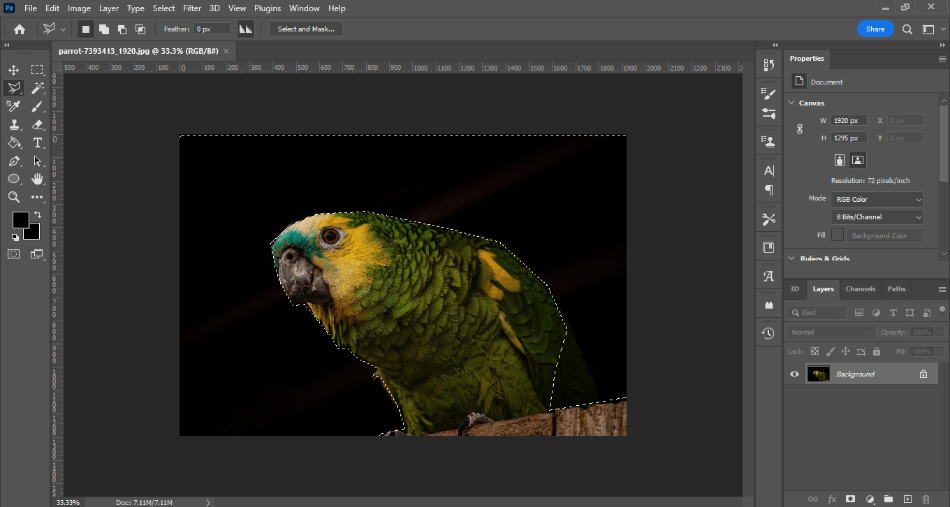
The Magnetic Lasso tool could almost be named the magic lasso for its easy use. Think of it as the faster version of the pen tool. This is mostly because it works the same way.
After duplicating the layer, find the Magnetic Lasso in the toolbar. Start drawing a path around the background on your newly created image layer. Do your best not to touch as many edges. You won’t have to be precise, but try to get it as close as possible.
Once you close off the path, you’ll notice how well the Magnetic Lasso tool has recognized the background. This aspect is due to how the tool detects color changes and decides what should and shouldn’t be included in this selection. This will work incredibly well if you’re trying to remove a perfectly blue sky or a blank white background for a photoshoot.
Once again, you can do the opposite and draw around the object and then choose Select > Inverse. You’ll then save your selection by going to Selection > Save Selection. With the selection adequately saved, you can erase the background with either a simple Delete or detailed painting with the eraser tools.
The Magnetic Lasso tool is helpful as a speedier pen tool. It’s great for detail but smart enough to read more of the background you want to remove. Perhaps try using this method before going at the image with the pen tool, as it takes less time to make the selection.
Quick Action Steps:
- Select the Magnetic Lasso Tool from the toolbar.
- Draw a path around the object.
- Choose Select > Inverse.
- Choose Selection > Save Selection.
- Press Delete to remove the background or use the eraser tools.
Quick Action
If you want the speediest way to get rid of the background, look no further than Quick Action. It’s not one of the most accurate methods, especially for detailed photographs. However, this trick can work wonders if you have a straightforward background.
You’ll start duplicating your image layer. Right-click on your Background layer and select Duplicate Layer. Turn off the original layer by hiding it. You may want to give your duplicate layer a new name to make it more recognizable.
Open your Properties panel by going to Window > Properties. Make sure your new layer is selected. Look in the Properties panel for your layer, and you should find a button that says Remove Background button under the section Quick Action.
The background should now be removed from your foreground subject. Your subject should be decently masked if the background is all one color. If the background is a bit more complex with shadows and details, there might be some lingering borders and masks you’ll have to erase.
There are not a whole lot of options for tweaking this tool. It’s an essential and bare-bones function of getting rid of the background. If it doesn’t quite work, you should seek one of the other methods mentioned. It comes recommended for green-screen backgrounds best.
Quick Action Steps:
- Click on your image layer and find the Properties panel.
- Find the section for Quick Action and click on Remove Background.
- The background should now be removed.
Frequently Asked Questions
There are many ways to remove a background in Photoshop. The fastest methods are to either paint out the background with the Background Eraser tool or use the Remove Background button in the Quick Action properties. If that doesn’t do the trick, you can try separating the background as a selection and then deleting it.
Making an image in Photoshop transparent requires erasing it. If you’re trying to save your image with a transparent background, you’ll want to use the PNG format. This will keep your transparency if you use it in another Photoshop file or for a website.
Photoshop’s easiest shortcut for background removal is the Remove Background button. With your image layer selected and unlocked, you’ll find the Remove Background button in the Quick Action area of the Properties panel.
If the background of an image is white, you can remove it easily in Photoshop. The Magic Background Eraser tool might do the trick, but it’s not perfect. You may want to try the standard Background Eraser tool or the Remove Background button in the Quick Action settings. These are fast and effective methods for removing the background if it’s one color.
You can isolate the area of an image using one of the many selection tools. You can create a path using the pen tool, the magic lasso tool, the quick selection tool, or the new object selection tool.
Photoshop costs a monthly subscription price to use. The application cost is $20.99/month under an annual contract. You can also purchase the subscription under the Photography Plan at $9.99/monthly, giving you access to Lightroom and Lightroom Classic.
Yes, there is a tool in Photoshop specifically for changing the sky. It’s called the Sky Replacement tool. Enable this feature and Photoshop will automatically detect and replace the sky. You can select from several sky templates or use another file to replace the sky. There’s no masking or selecting required if the sky is visible.

Mark McPherson has been working as a video editor and content writer for over ten years. His background started in animation and video editing before shifting into the realm of web development. He also branched out into content writing for various online publications. Mark is an expert in video editing, content writing, and 2D/3D animation.