(Last updated on February 10th, 2023)
An image doesn’t always have to take up your entire Photoshop project. Sometimes it can be subtle if given transparency. In this article, we’ll show you how easy it is to perform this common Photoshop technique of making your images see-through.

Transparent Layers
One of the easiest ways to make an image transparent is to add transparency to the layer it occupies. This method is handy as you can quickly see how a transparent image can affect other layers. Here’s how to apply transparency to an image layer.
- In the Layers tab, select the layer with the image you want to be transparent. Unlock the layer if it’s currently the background by duplicating it.
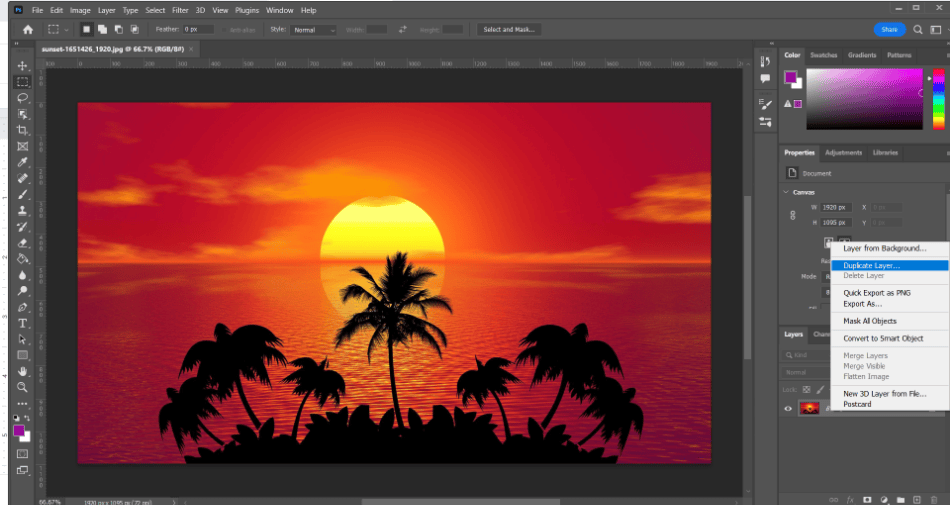
- Look for the Opacity box in the layer options. It should be set at 100%. The layer will be completely invisible if you turn it down to 0%. Play around with the settings to find the right level of transparency.
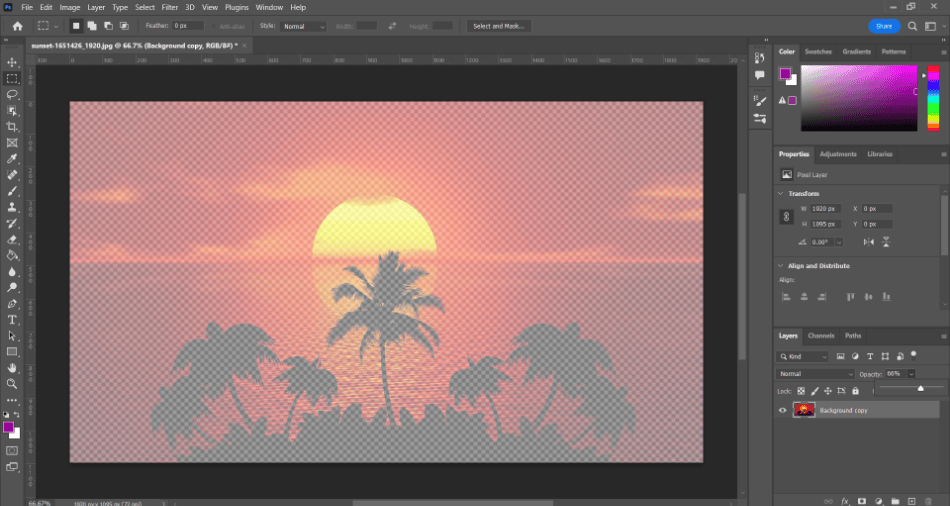
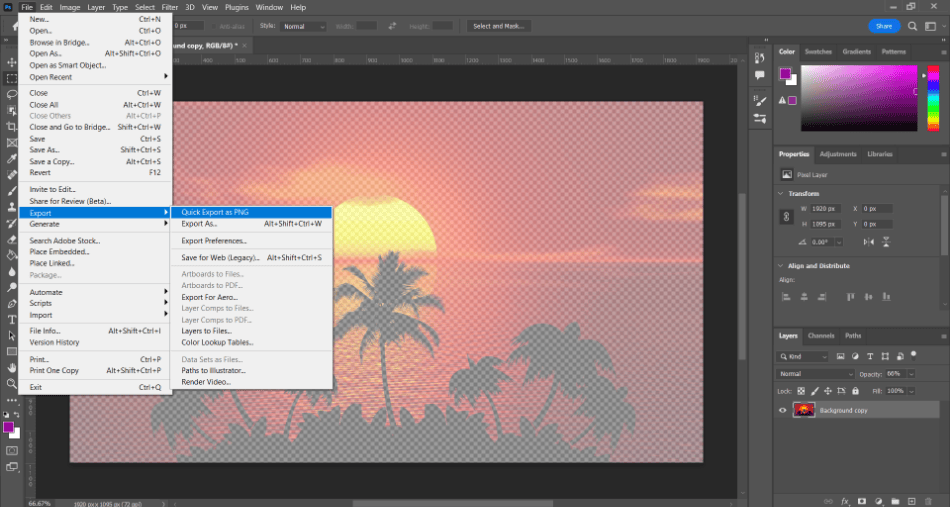
- To save the transparent image, ensure the image layer is above a blank background with no color. Then save it as a PNG by going to File > Export > Quick Export as PNG. The PNG format will keep the transparency of the image.
There are two benefits to making the image layer transparent. The first is that it can blend better with other backgrounds and colors in your Photoshop file. Second, you can save the transparency recognized in graphic design programs, website designs, and 3D model textures.
Transparent Selections
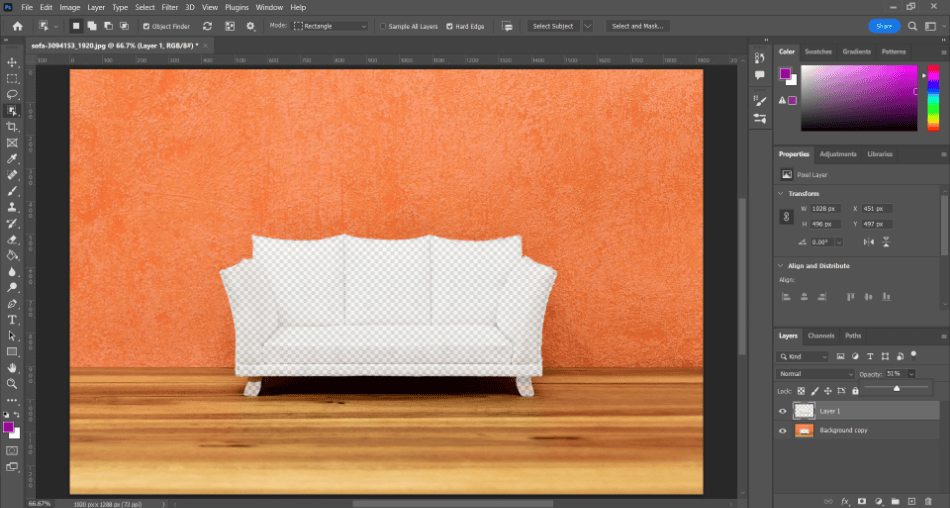
Let’s say you only want a part of the image made transparently. The best way to do this is to isolate a part of the image using the selection method and then make that selection transparent. Here’s how to apply transparency to a portion of an image.
- Select the layer with the image where you want to have transparency. Make sure it’s not locked so that you can edit it. You may have to duplicate the layer to do this.
- Select the portion of the image you want to be made transparent. You have a few options for doing this. Here are the selection options to consider:
- Object Selection Tool: This smart tool automatically detects the borders of a selected area and highlights them. This is the fastest method if you want to isolate a prominent subject.
- Quick Selection Tool: This tool can detect edges automatically as you drag them across the screen to make your selection.
- Magic Wand Selection Tool: This one-click tool detects the selection area based on its set strength.
- Marquee Selection Tools: These tools are handy for selecting a specific shape in your image, like a circle or rectangle.
- Pen Tool: This is the old method of simply drawing around a portion of the image by hand using the pen tool.

- With your selection made, we now need to isolate it. Copy the section by pressing Control and C (or right-clicking and selecting Copy) and then delete it by pressing Delete.

- Create a new layer in the layers tab by clicking the Create New Layer button at the bottom. Select this new layer and then paste it into the selection. The cut-out part of the image should now be on its separate layer.

- To add transparency to the selection layer, reduce the opacity in the layer options.
Starting With a Transparent Background
If you create a blank Photoshop file, you’ll start working with a white background. While you can replace this with a transparent background with some layer organization, you can start with transparency immediately. This can be ideal if you import an image and tweak the opacity.
Here’s how to create a Photoshop file with a transparent background already applied.
- In Photoshop, go to File > New to create a new document. This should open up the new Photoshop document options menu.
- In the new document window, locate the section labeled Background Contents dropdown box. Click on it and select Transparent instead of White.
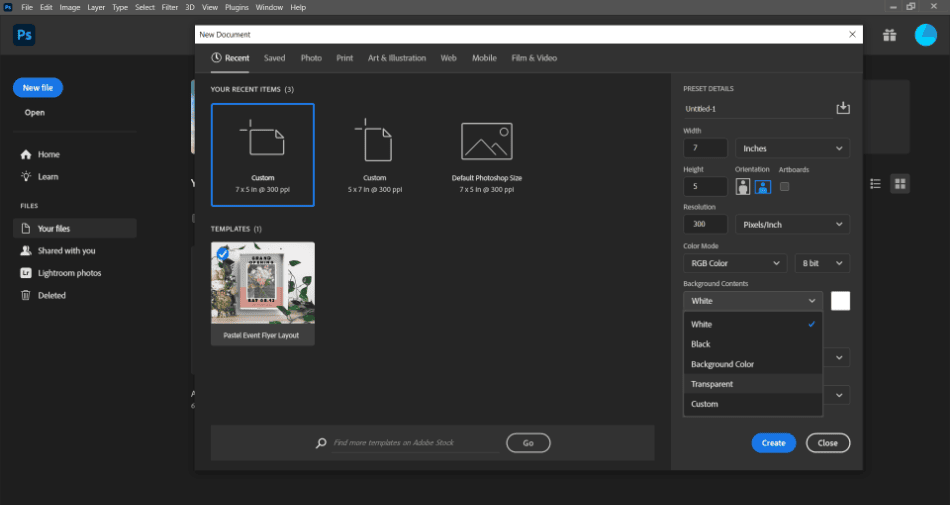
- Click Ok to create the project. You should now be working with a transparent background to add an image on top of it.
Painting Transparency
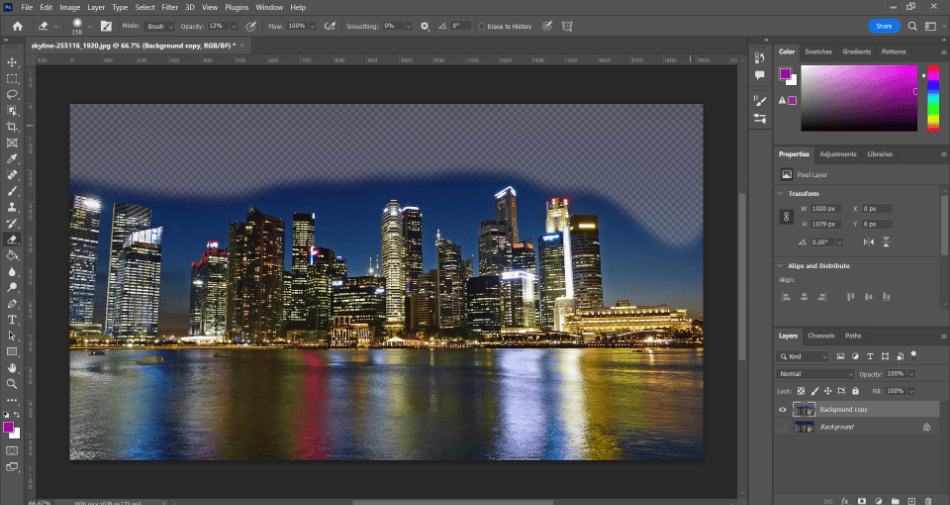
If you’d prefer to add different transparencies to portions of the image by hand, this can be accomplished with Photoshop’s erasing tools. This method is one of the more challenging ways, but it can be ideal for those desiring the most control over their transparent images. Here’s how to paint transparencies in Photoshop.
- Select the image layer you want to be made transparent. You should duplicate this layer and hide the original, so you have a backup in case you make any mistakes.
- Select the Eraser tool from the toolbar on the left side of the screen. Locate the eraser settings at the top of the screen and change the opacity percentage. In the same way, you’d change the opacity for an image layer and set the range of how much you want to erase. 100% will entirely erase the image, while 0% will erase none.

credit: Mark McPherson.
- After selecting the brush size, start painting with the eraser tool over the areas you want to be made transparent. The transparency should show up instantly in the areas you paint.
Tips and Tricks
- Always Save as PNG: Transparencies will only appear in images saved as PNG files. Images with transparencies saved as JPG will place backgrounds behind your transparent images.
- Remember Locked Layers: If you open an image directly in Photoshop, it will automatically be locked in the background layer. Duplicate this layer to start making changes to it.
- Keep The Background Transparent: When creating a new Photoshop file, ensure the background is transparent. This is good practice if you use Photoshop to create multiple transparencies.
- Check The Color: If you can’t add transparency to your image in Photoshop, you might work with an image using CMYK colors. Navigate to Mode in the top-window options and select RGB color to ensure that you can add transparency.
Frequently Asked Questions
A Photoshop picture can be transparent by turning down the opacity. This can be accomplished by either turning down the layer’s opacity or using the eraser tool with an altered opacity.
JPEG images can be made transparent by changing their opacity. After bringing the JPEG into Photoshop, unlock the layer and locate the layer’s opacity settings. Change the opacity percentage, and you should start seeing transparency. Save it out as PNG to have this transparency saved as an image file.
There are two options for fading a photo in Photoshop. You can either change the layer’s opacity or its blending mode. Use the opacity if you want a see-through look, and choose a blending mode if you want it to fade more into the layer below it.
There isn’t precisely a transparency tool in Photoshop, but you can use the eraser tool as one. Change the opacity settings of the eraser and start drawing on your image to create transparency.
White backgrounds can be easily replaced with transparent ones in Photoshop by adding a new layer and deleting the background layer. The new layer you create will be transparent. You can also automatically start with a transparent background in Photoshop by changing the background options in the new project creation window.

Mark McPherson has been working as a video editor and content writer for over ten years. His background started in animation and video editing before shifting into the realm of web development. He also branched out into content writing for various online publications. Mark is an expert in video editing, content writing, and 2D/3D animation.