(Last updated on November 1st, 2022)
Is your iMovie project missing something? Does that certain something just happen to be some text for either a title or subtitle to better explain your ideas? If that’s the case, check out this tutorial on how you can add text to your iMovie projects.
If you own a Mac computer and you have videos you want to edit, the chances are that you’re using iMovie, the consumer-grade editor that often comes bundled with most Mac machines. With such a simple interface and unimposing editing workflow, it’s a solid choice for beginners editing their home movies or dabbles in some more professionals videos.
While iMovie is pretty easy to use, a little instruction can’t hurt to get the most out of the program. This is especially true for text and titles, an essential component for videos where you’ve got much critical information to communicate.
You may want a decent text introduction. A video with lots of talking could use some subtitles so others can understand the muffled dialogue. Some credits can make your movie feel more like a theatrical experience by listing out who is in the film and the people behind the camera.
1. Creating Text and Titles
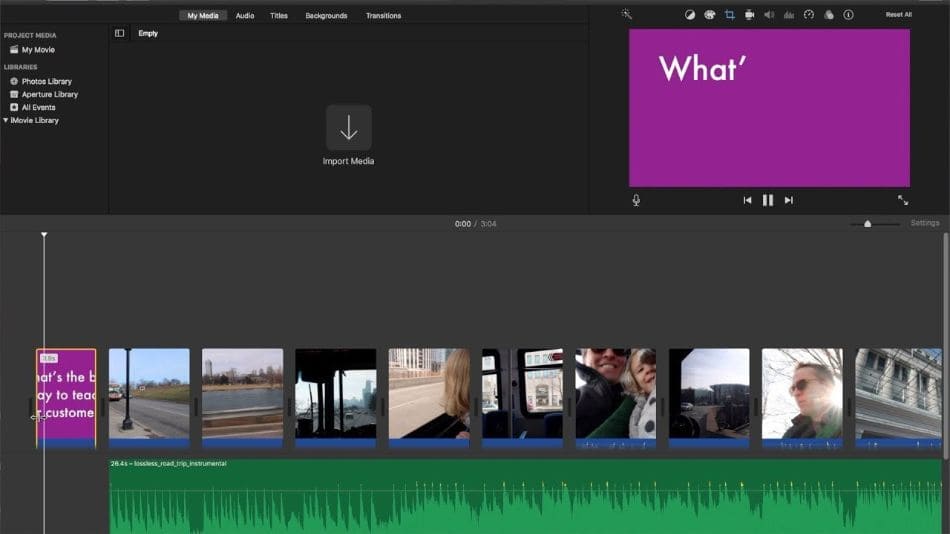
Text and Titles can be added in iMovie to any asset. It doesn’t matter if you want your text on top of a video, still, or background. As long as it’s on your timeline, you can apply text over it with great ease.
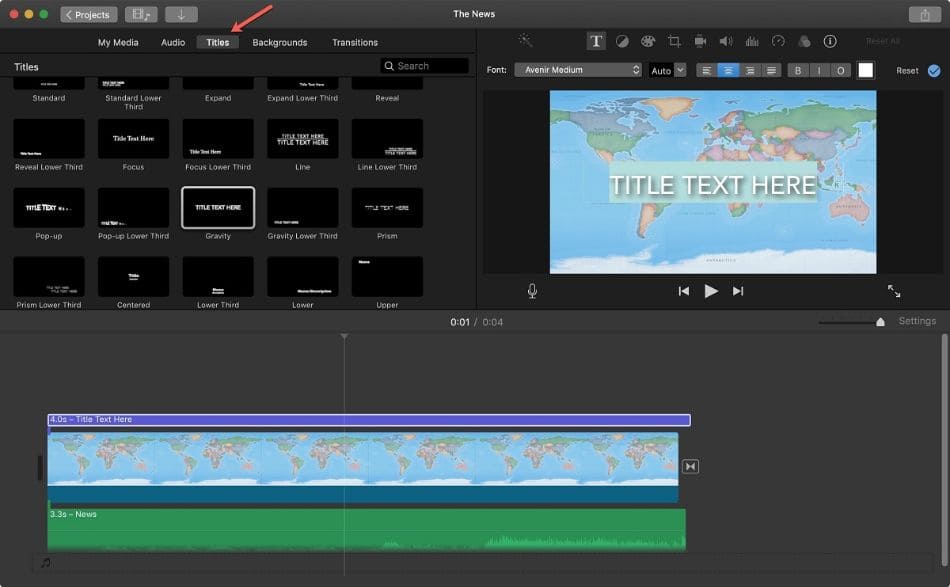
If you’re familiar with other graphic design or video editing programs, the process of adding text is very simple. The T icon in the toolbar (mobile) or Titles (desktop) in the browser, as you may have guessed, allows you to place text onto a timeline asset.
You can find the text button in the bottom part of the interface on the inspector bar. After you click that, you’ll select a title style. We’ll get more into styling up text later in this article but let’s focus specifically on creation right now.
Place the text within your asset accordingly, and then start typing out the type of text you want to add. If you’re using iMovie on desktop, the text can also be added as easily as dragging the style you want into the viewer.
Keep in mind the length of your text to gauge both placement and style size. The last thing you want is a text that goes off the screen or blocks vital critical areas of the video you don’t want hidden.
2. Styling Text
Now that we have our areas as text present on the timeline, we can start the more creative part. Styling the text is essential to giving your videos a particular style and separates a quality project from one that was rushed out with default text styles.
With your text in the timeline viewer selected, click on Edit. This will allow you to change the text that you wrote onto the video. So if you ever want to change the text without fiddling about with clicks, remember this process.
The text can be maneuvered around the viewport like any other asset in the timeline viewer. You can grab it with the Selection tool to move its positioning. You can pinch the corners and drag to change the size.
To control how long the text will appear on the screen, you can simply drag the text layer on the timeline the way you would drag any clip or image. Click and drag the end to extend the time or bring it in to shorten.
Double-click the clip with text, and you’ll be able to make bigger changes to the font type, color, and size. However, that’s just for desktop, as making changes on the mobile version is a little different.
Changes to text content can be made by double-clicking the text in the viewport and making your changes. Type out your refined text and click the Apply button to make the change official.
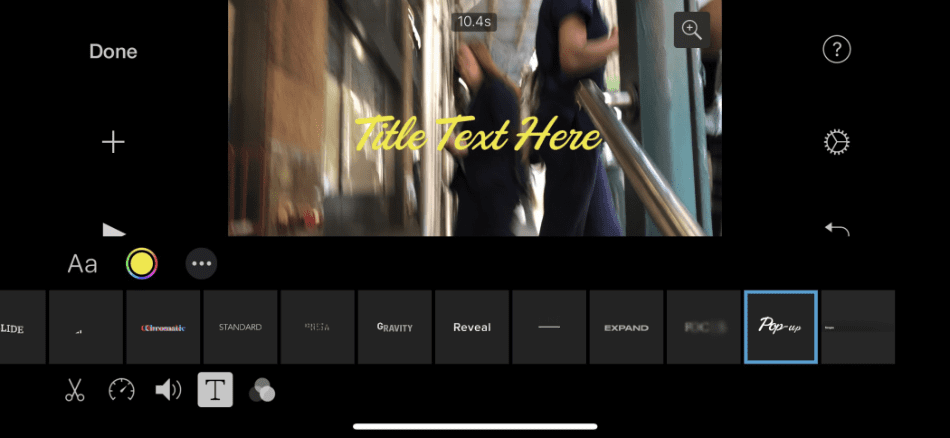
For those working on mobile, if you want to change how the font itself appears, you’ll tap on the Font button (labeled as Aa) to change the specific font format and the size and other features related to how the text will appear.
If you want to change the color of the text on the mobile version, you’ll need to open the Color option, which can be accessed by clicking on the color wheel icon. This action will open up the area for choosing the color for your text.
3. Specific Titles
Now we come to the final details that will differ a title sequence from the ending credits. Animations added to a text define these aspects well. Titles generally have some transition, while end credits tend to scroll upward.
You’ll want to click the Media Library button to engage the browser. Ensure your timeline is placed at the beginning or end of your timeline for where you want to put the opening titles or end credits. Be sure to make sure you have the titles over the background you want or add them in before changing these titles.
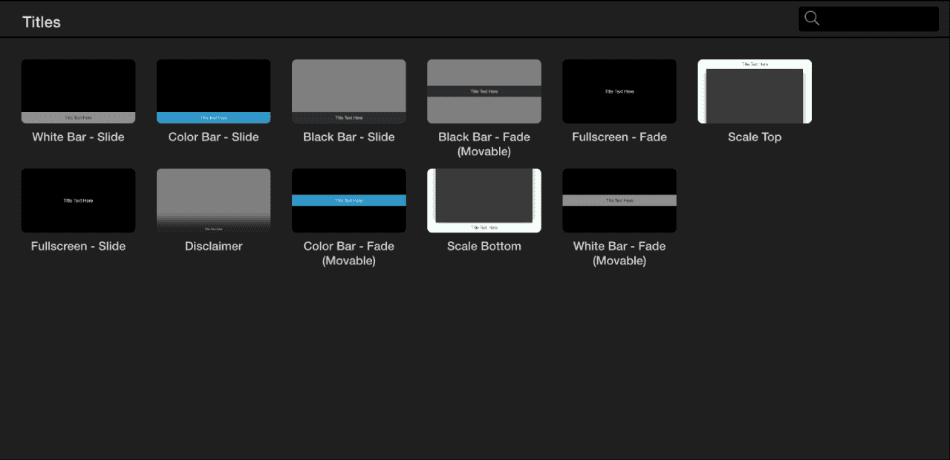
Under Titles in your browser, you’ll find various types of texts to add to your video. These texts have different animations and positioning to make sure your text will look like a revealed title or a scrolling end credit sequence.
You can play around with these different types of animations and edit them accordingly for which ones will work best for your video projects. Try them out for yourself and combine them with the text-editing tools present in the program.
4. Animations
The last thing to mention is the keyframing of animation. iMovie can supply you with a handful of transitions for your title to give movement to your text. However, you may find them limited and want to try your hand at your animated titles.
Animating titles in iMovie is not that much different than animating assets of Premiere and After Effects. With the text selected, click the plus sign inside a diamond to create a keyframe in your viewport. Scroll a little further, create another keyframe, and alter your text.
You can use the arrows next to the keyframe button to note the different animation frames you’ve created. With the right timing, you’ll have created a compelling animation for your title sequence. This process can get a bit tricky so take your time and experiment.
Frequently Asked Questions
If you’re seeking to create multiple lines of text, it’s best to write out the spacing in a word document such as Notepad first and then copying and pasting that text into iMovie. If you’re trying to add two different types of text, however, you will have to get a bit creative. Since iMovie isn’t the best at handling multiple layers for text, you’ll have to either select a title preset that includes numerous lines or render out a clip with text already on it and then bring it back into the program for another text layer. It’s a bit of a hassle, but iMovie wasn’t exactly built to be that versatile of a professional video editing program.
If you want your text to move across the screen, you’re going to have to select a proper transition. iMovie supplies a few, but if you’re going to get highly specific with your titles, you will want to keyframe the animation. In your viewer window, you’ll notice a button that looks like a combination of plus sign and square. That’s the keyframe button. Position your timeline at the beginning of the text and then click the keyframe button to save a frame. Move your sider further out and make another keyframe with changes to scale or position. This is the process you’ll use to create text that can pop out from the side of the screen.
A: iMovie is somewhat limited in how text can be placed on your video footage. While it is true that the text you add will be recognized in the program as a layer, the application can only recognize one text layer at a time. If you want to add multiple layers of text, you’ll have to rework your footage by either saving footage with text and bringing it back into iMovie or to retool your text layer to appear as though there are layered text layers lines.
You can alter your text layers outside of iMovie. If you have Photoshop or a similar application, you can save your title as a transparent PNG and then bring it into iMovie. Doing this will allow you to have more control over the tags you want to appear in iMovie rather than relying on whatever presets the program will give you.

Mark McPherson has been working as a video editor and content writer for over ten years. His background started in animation and video editing before shifting into the realm of web development. He also branched out into content writing for various online publications. Mark is an expert in video editing, content writing, and 2D/3D animation.
Dear Mark,
You say, “With your text in the timeline viewer selected, click on Edit.” But there is no “Edit” to click. I am on a MacBook running 10.13.6, and iMovie is v.10.1.6. Where should this “Edit” be? Can you provide a screenshot? I am not given a selection tool and cannot change the size by dragging. None of these things seem to be available.
You also mention animating the text by first clicking “the plus sign inside a diamond.” I don’t see anything like that in my interface.
I have found the provided titles VERY limiting over the years and sure would like to be able, at least, to move them to a different location on the screen! I hope you can help me find these features.
Thank you!
-A-