(Last updated on November 2nd, 2022)
Want to know how to export on Final Cut Pro? You have come to the right place!
Follow along to learn the basics of exporting. We go over how to export the default master file along with several other file types.
Exporting in Final Cut Pro
You can export in Final Cut Pro using these four simple steps:
Step 1: Open the timeline.
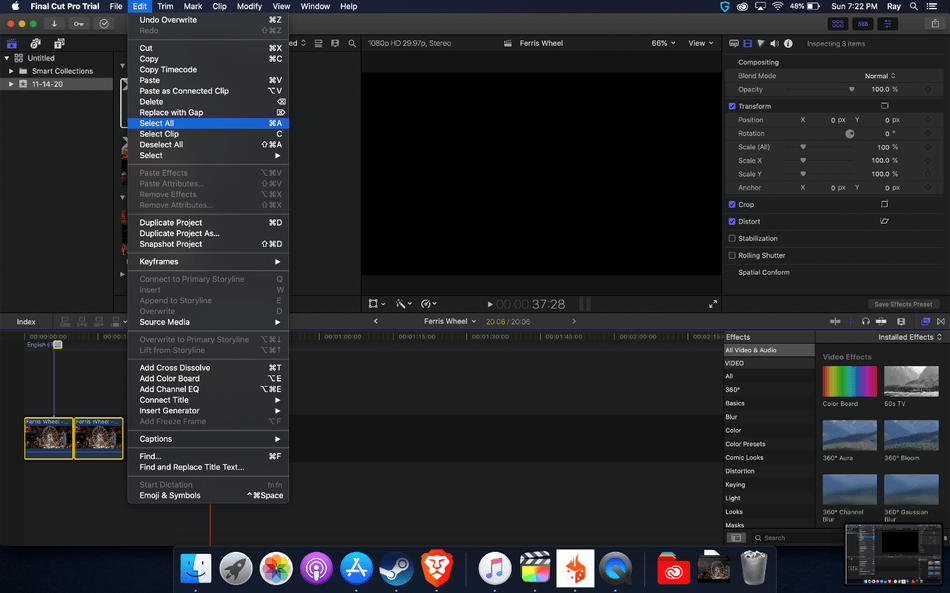
Step 2: Go to Edit > Select All or press Command + A.
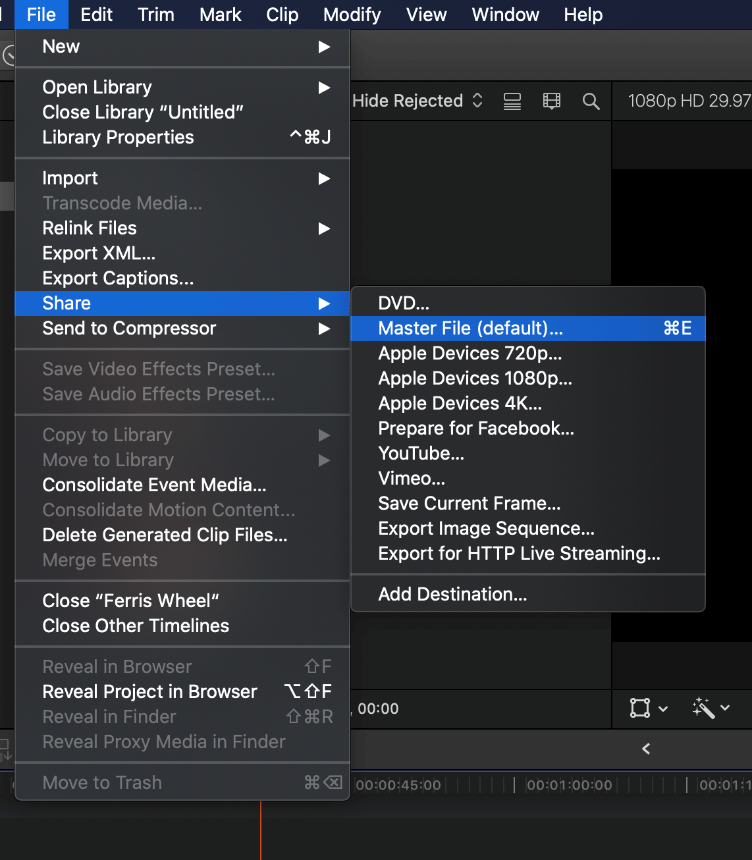
Step 3: Go to File > Share > Master File. Or click on the Share Project icon on the upper right
corner to select Master File.
Step 4: Click Next and save your video to complete the process.
Related: Final Cut Pro vs Premiere Pro | The Ultimate Battle (2023)
Basic Exporting on Final Cut Pro
There are many presets to use for exporting in Final Cut Pro. You can export your videos directly to YouTube, share them on social media, and more. Let’s first show the basic process with the master file, step-by-step.
- Click into the timeline. Then, either go to Edit > Select All or press Command + A. This will select all your clips.
- Then, go to File > Share > Master File, or click on the Share Project icon on the upper right corner selecting Master File or press Command + E.
- The Master File panel will now be pulled up. There are three tabs to look through, Info, Settings, and Roles:
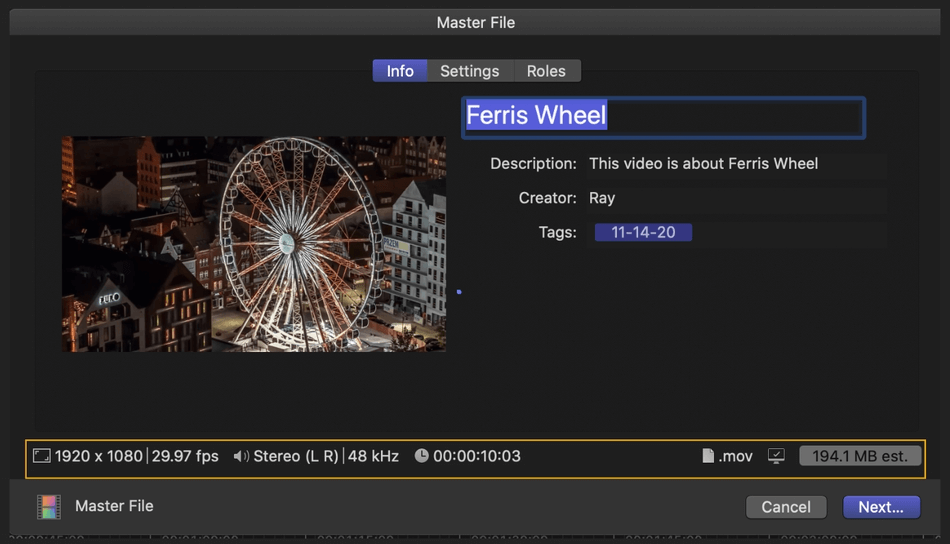
Info
Shows you all of the information about your film. You can rename your project, change the description, creator name, and add tags.
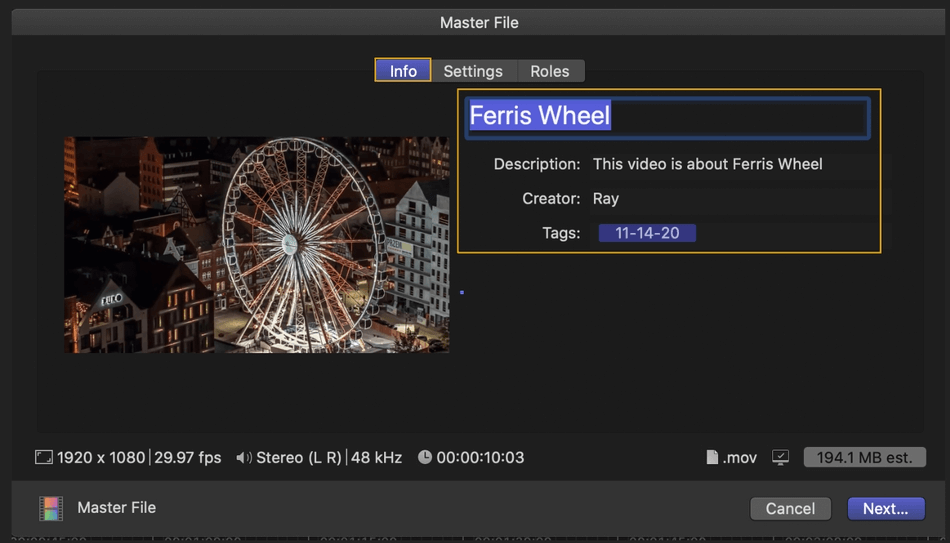
You can skim through the project by dragging your cursor over the image.
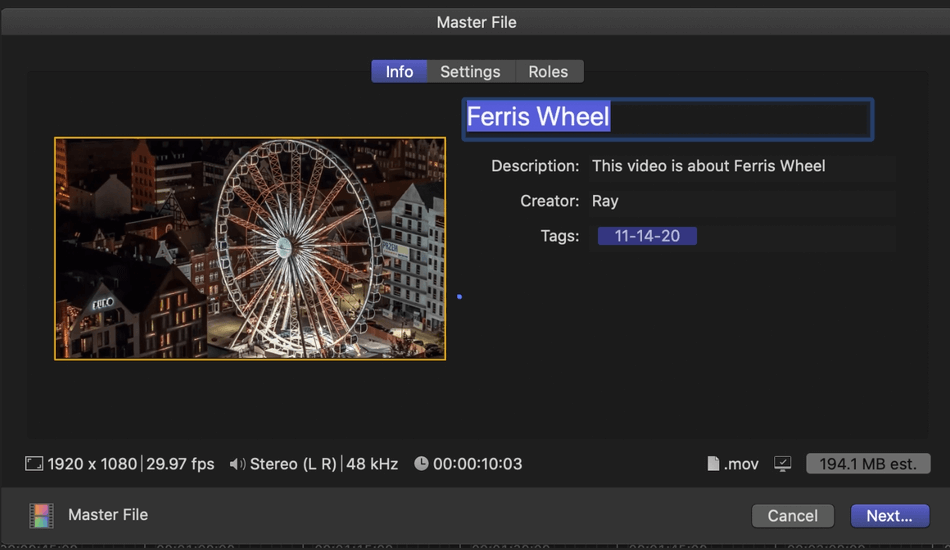
The bottom line will show all of the movie’s information, including resolution, frames per second, audio information, duration, type of export file, compatible devices, and the file size.
Settings
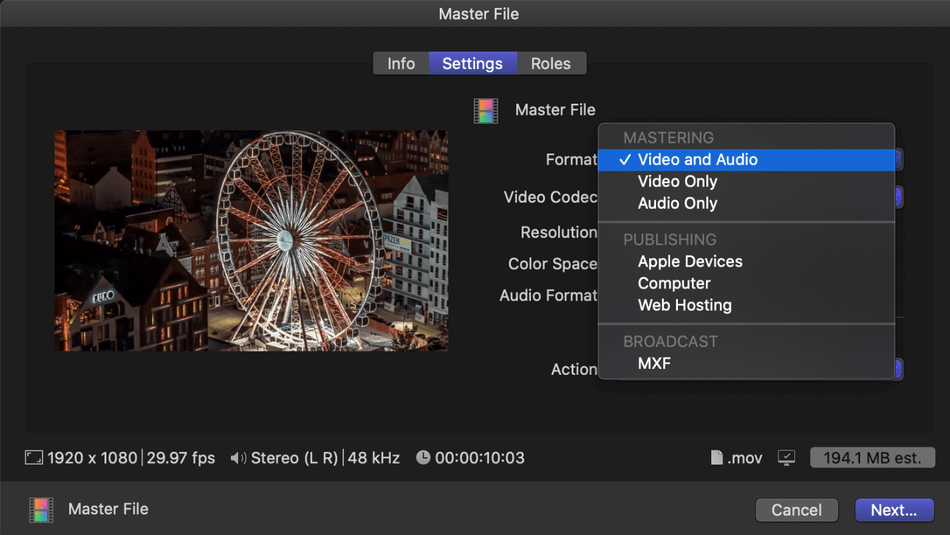
Here, you can change the format of the film. First, you can choose your format, choosing between publishing just the Video, Audio, or both, or to Apple Devices, Computer, Web Hosting, or MFX.
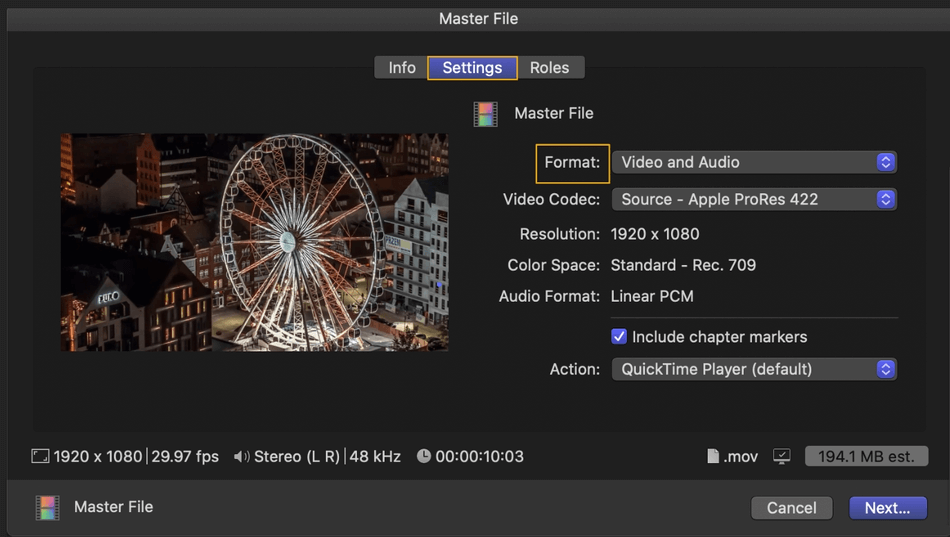
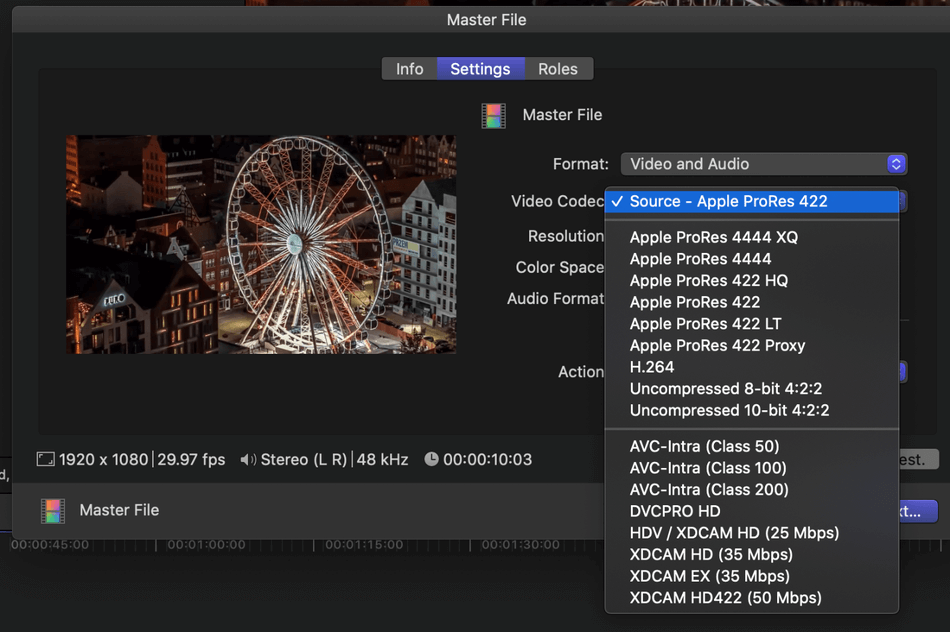
Choose the video codec.
Here is information on your resolution, color space, and audio format.
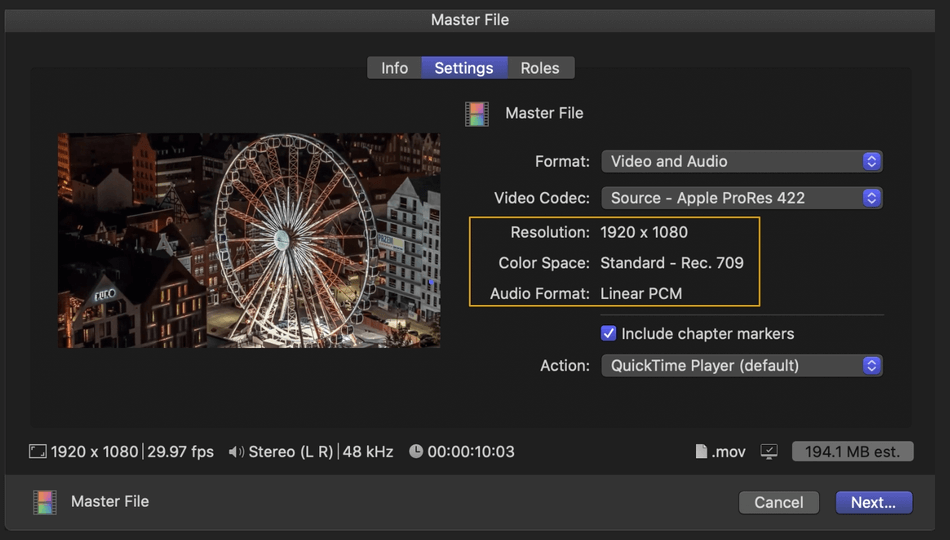
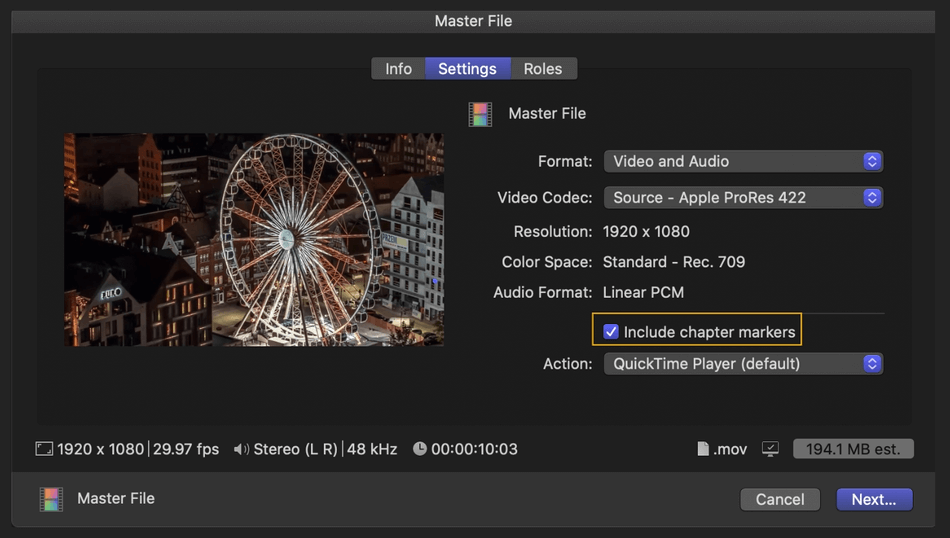
You can include chapter markers by checking the box. Chapters are a standard feature for DVDs, podcasts, and Blu-rays, helpful for viewers so they can jump between scenes.
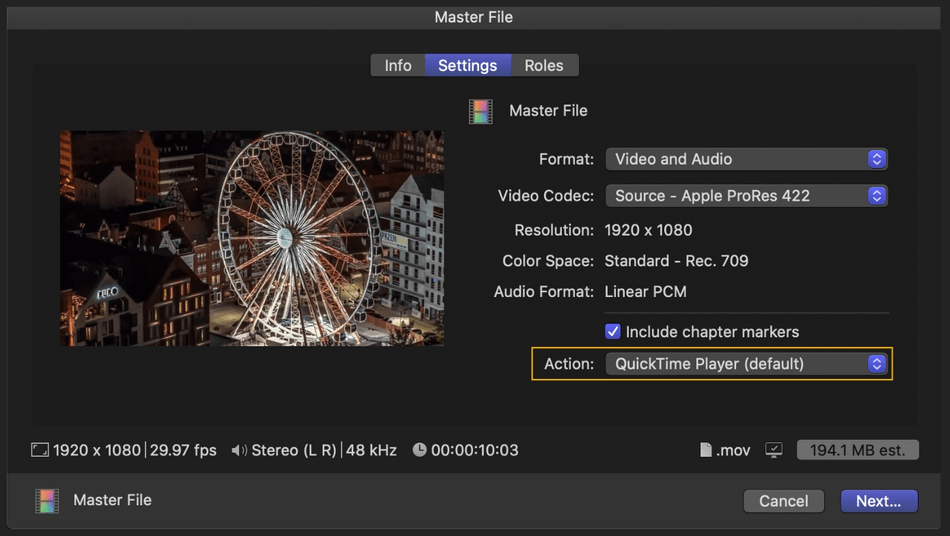
The action menu determines what happens after the export is finished. You can choose Save Only, open with a video player, etc.
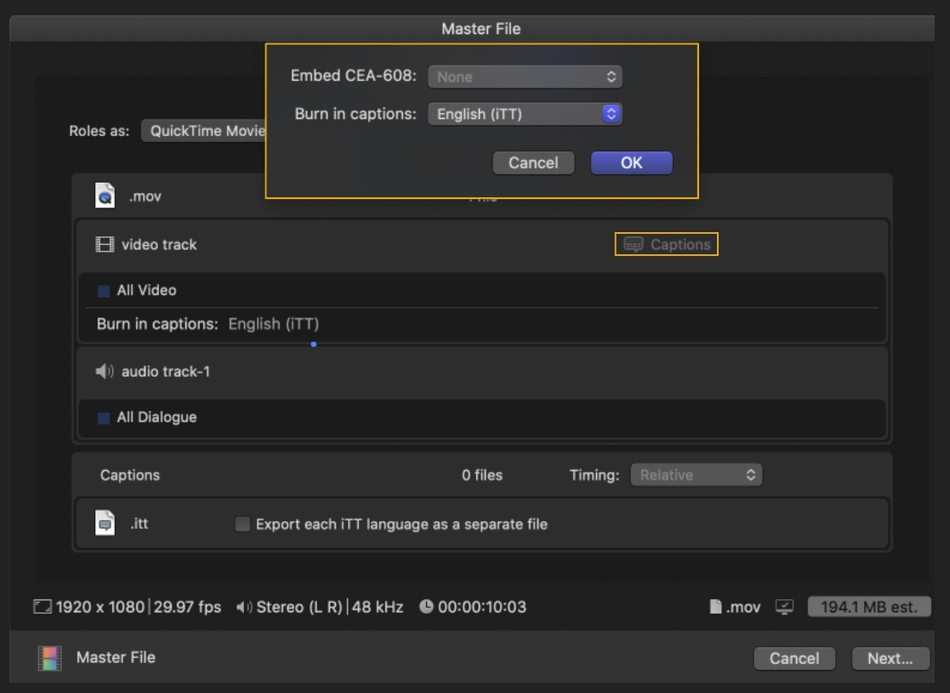
Roles
This tab allows you to export your video into separate media files.
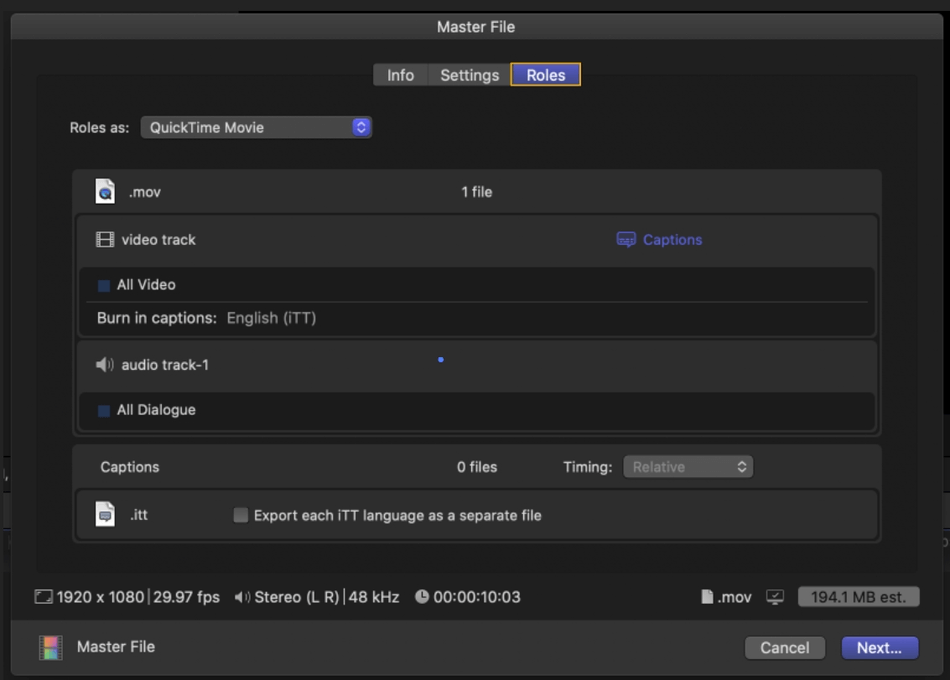
For example, you can export the dialogue, sound effects, captions as separate media files. You assign roles to each aspect and then export.
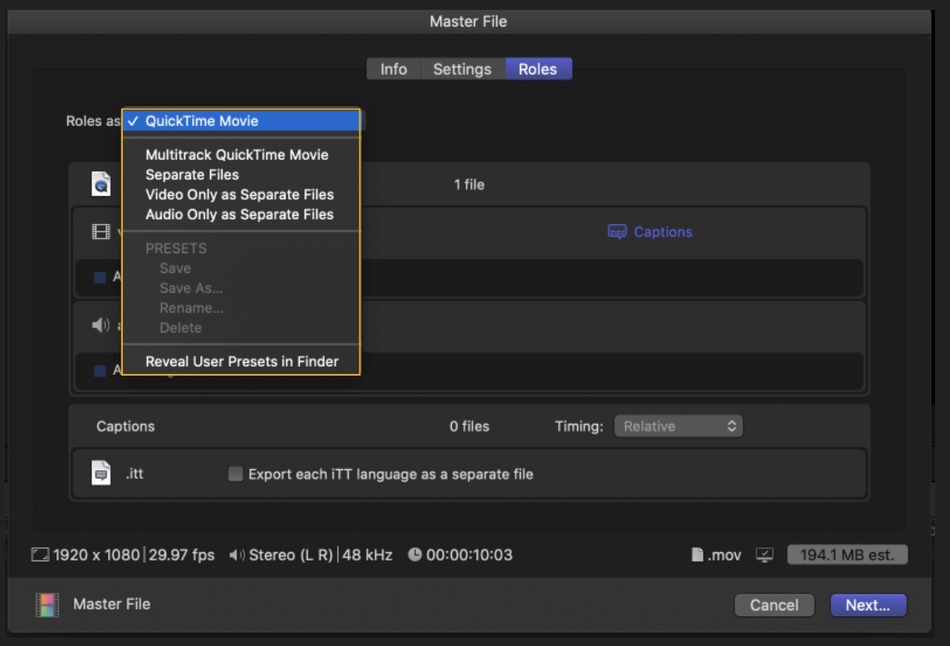
Here is also where you can select the captions to be burned into your footage.
- Once you hit Next, you will be prompted on where to save your video. Once saved, the file exports. Depending on the action picked in the Settings tab, your video will either open up in another file or save.
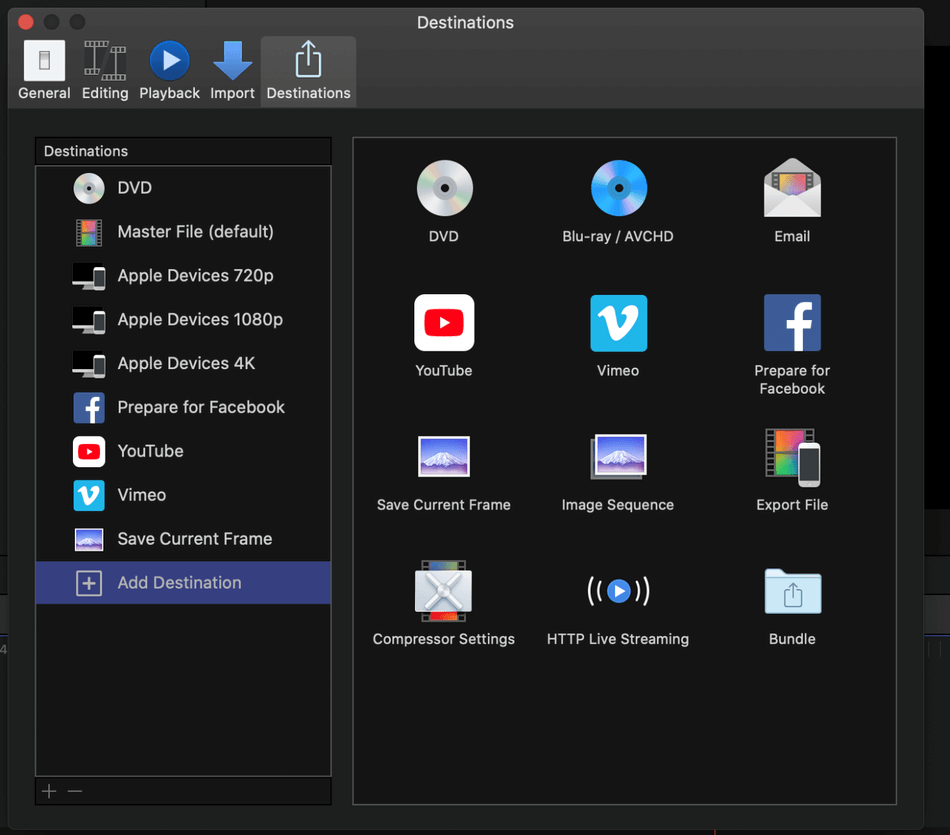
Destinations
Destinations are preconfigured export settings designed for specific viewing platforms. When finishing a project, you may need different movie versions depending on how the film will be shown. The destinations offered are:
- DVD: Perfect for exporting your project to an SD DVD (Standard Definition).
- Master File: This is the default export setting, creating a .mov QuickTime file.
- Apple Devices 720p: Exporting files for Apple devices. *
- Apple Devices 1080p: Exporting files for Apple devices. *
- Apple Devices 4K: Exporting files for Apple devices. *
- YouTube: Export video configured for YouTube, publishing directly to the site.
- Vimeo: Export video configured for Vimeo, publishing directly to the site.
- Facebook: Export video configured for Facebook.
*The full list of compatible Apple Devices for each resolution is listed on Apple Support: https://support.apple.com/guide/final-cut-pro/intro-to-sharing-projects-ver9d10063a/mac
You can customize and save new destinations, replacing the default set. You can also create destination bundles, exporting a video into several different outputs at once.
Further customization can be done using the Compressor. The Compressor is a professional-grade transcoding app designed to work with Final Cut Pro to create detailed, customizable export settings.
Adding a Destination
- Select your footage.
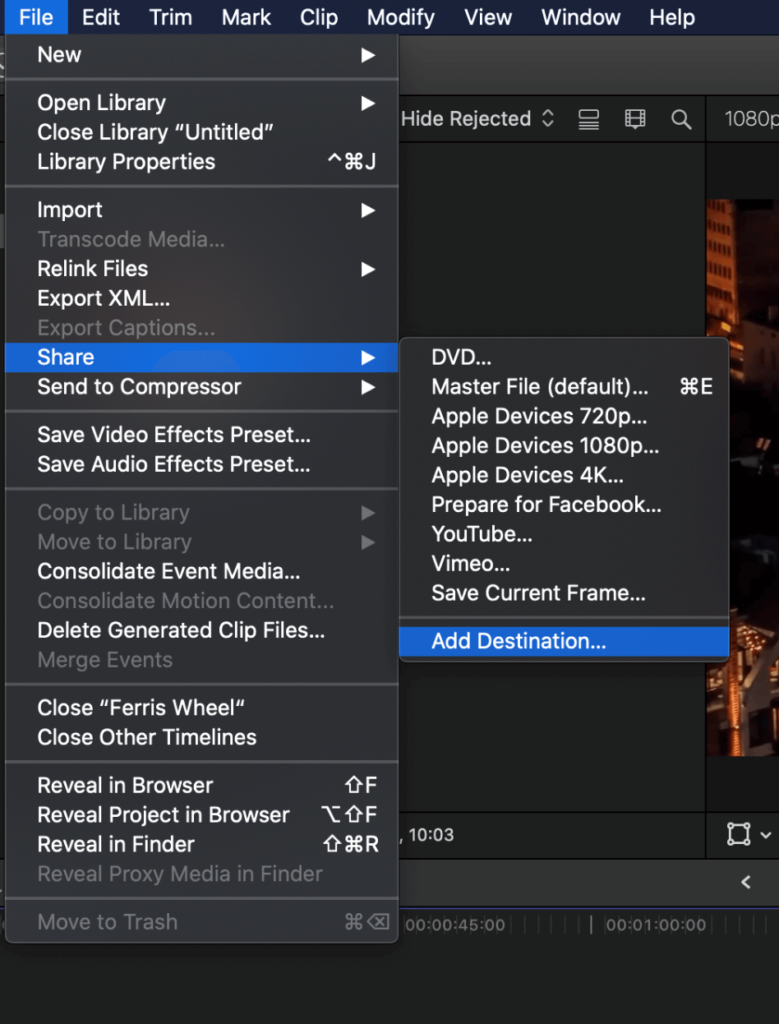
- Go to File > Share > Add Destination
- A Destination Panel will pop up. Here you can add destinations, customizing them in the Compressor, or creating a Bundle.
Exporting Still Images in Final Cut Pro
In Final Cut Pro, you can also export a still image. To do this:
- Position the playhead in the timeline to the still you want.
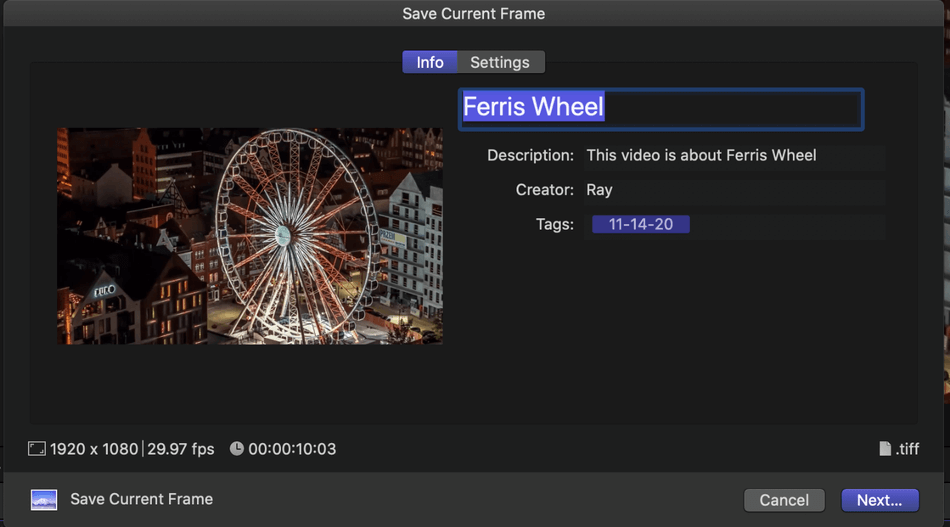
- Go to File > Share > Save Current Frame (Save Current Frame isn’t a default option. If this option isn’t listed, go to File > Share > Add Destination. A Destination’s panel will pop up. From here, double-click Save Current Frame, adding this destination to the list of options.)

- In the Save Current Frame dialogue box, there are two tabs, Info, and Settings. Let’s start with Info. Here, you can see all of the information that will be saved with the file. You can change the title, add tags, change the description, and creator name.
- At the bottom of the panel, there is information about the file. There will be info such as size, frames per second, and where the clip is taken from the clip’s duration.
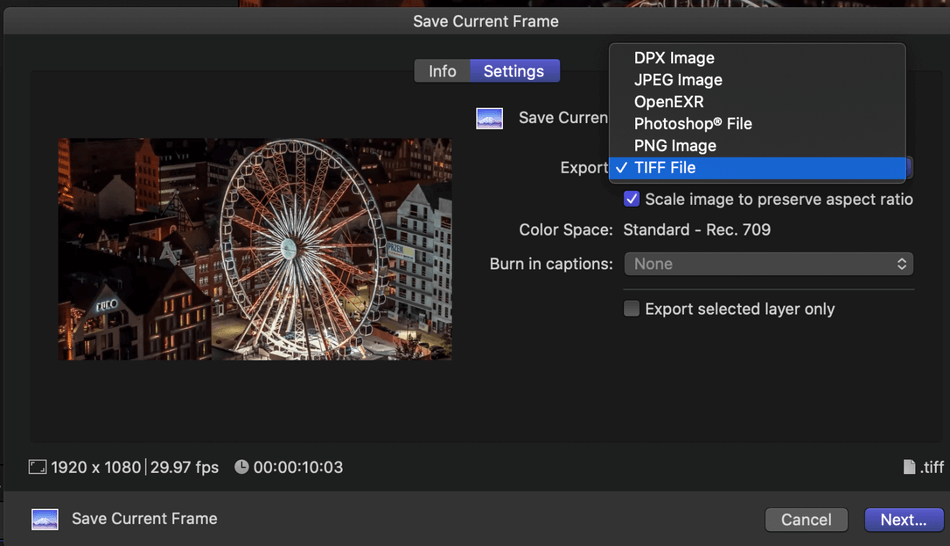
- In the Settings tab, you can choose between different export formats such as DPX, JPEG, OpenEXR, Photoshop, PNG, and TIFF. You can scale the image to preserve the aspect ratio, checking this box off/on, and view the color space. You can also burn in captions to the image.
- Hit Next, and you will be prompted to choose a location and save the file.
Exporting Image Sequences in Final Cut Pro
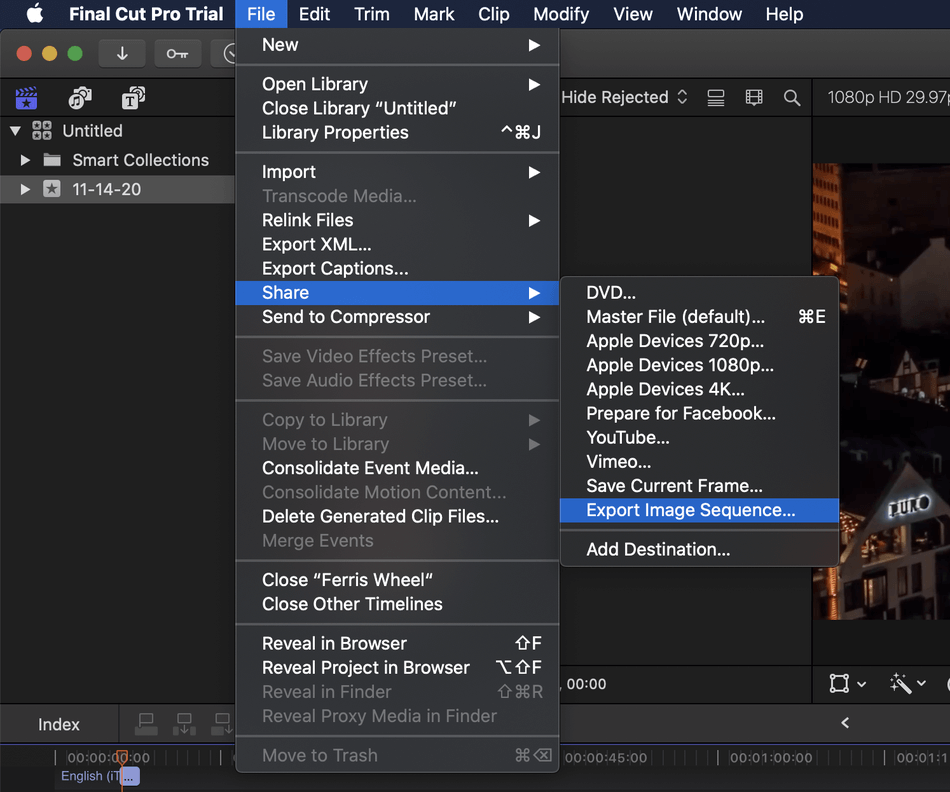
You can also export an image sequence in Final Cut Pro. Exporting image sequences turns the video into a set of sequentially numbered still images. To do this:
- First, select one or more whole clips or projects in the browser. Or, select a range of either one or more clips in the browser. Or select a range in a project in the timeline. To select a range, set in and out points by using I and O commands.

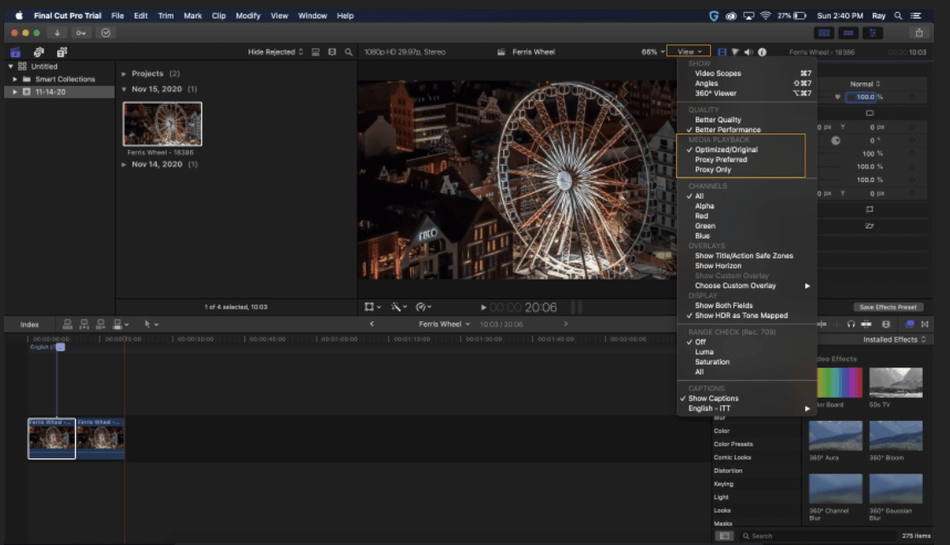
- Next, if you are using proxy footage, change the Media playback to optimized/original. Changing the playback will ensure that the images are taken from the original media rather than low-quality proxy footage.
- Next, go to File > Share > Export Image Sequence(Like Save Current Frame, Export Image Sequence won’t show up by default. To add, go to File > Share > Add Destination. In the Destinations panel, double-click to add Image Sequence to the Destinations tab.)
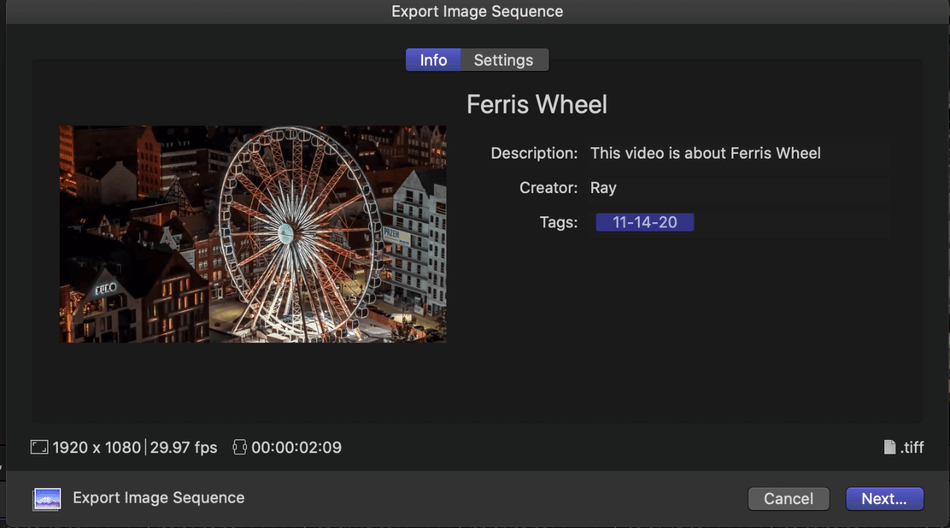
- The Export Image Sequence dialogue box should now be pulled up. Here you can change the title, description, creator, and add tags. You can preview your chosen clip. Info about the sequence will be on the bottom line.
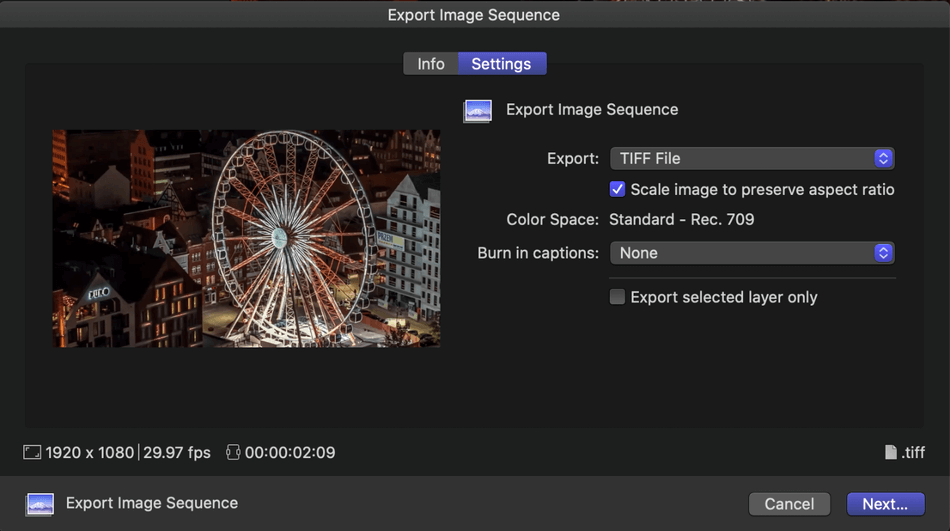
- Under Settings, you can change the Export file type, choosing between DPX, JPEG, OpenEXR, Photoshop, PNG, and TIFF. You can scale the image to preserve the aspect ratio. The color space will be displayed. You can also burn the captions into the images.
(Noted, this is not the same as embedded captions. The captions are permanently in the footage for the exported video.)
- Once your info and settings are all set, hit next. You will be prompted to name the file and pick the saving destination. Once this is done, the file will be exported. Your sequence will be waiting for you in a file folder.
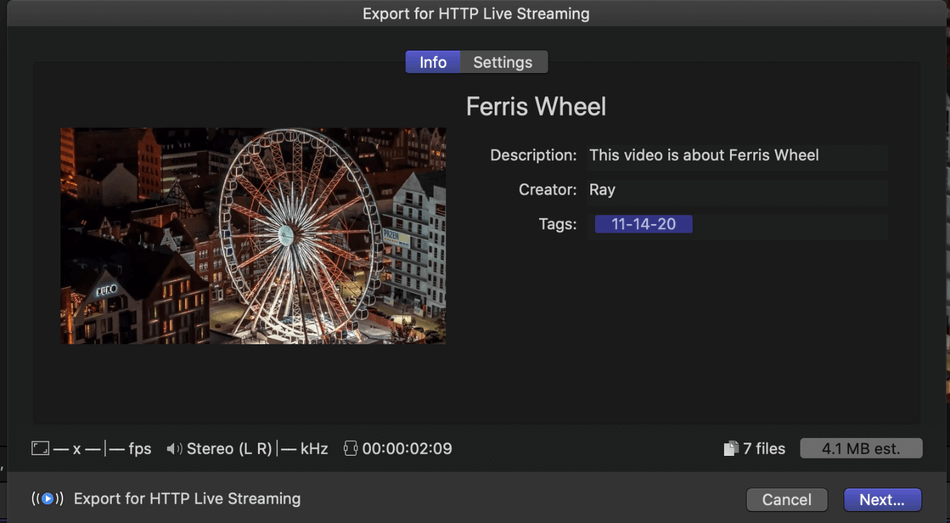
Export Live-Streaming Files in Final Cut Pro
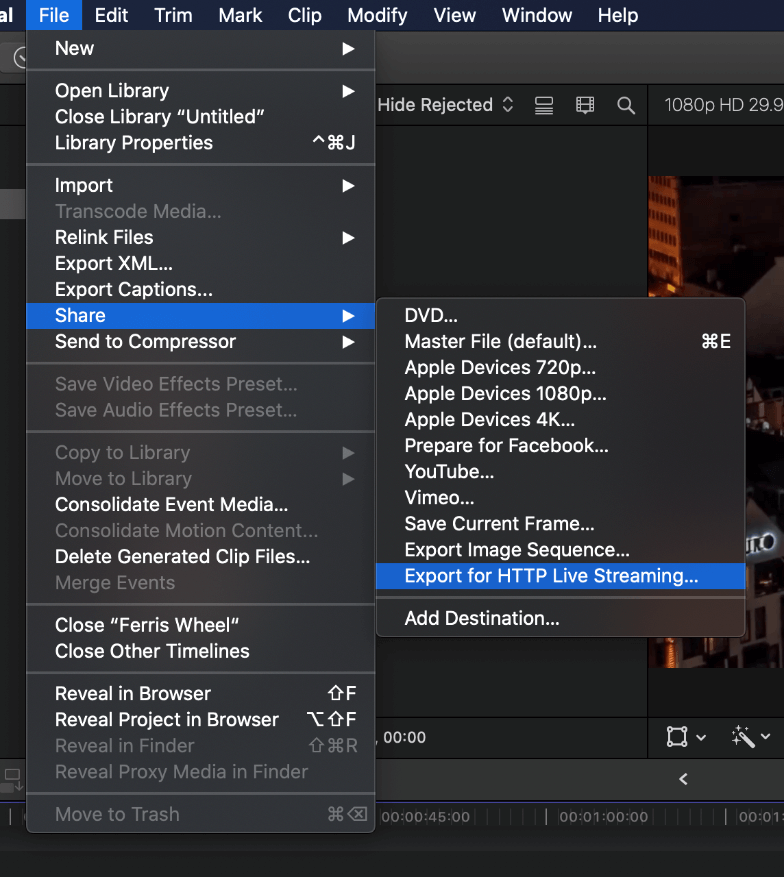
First, repeat the first two steps from the Exporting Image Sequences. Next:
- Go to File > Share > Export for HTTP Live Streaming (This isn’t a default destination. If it’s not appearing, add it by going to File > Share > Add Destination and in the Destinations panel, double-click to add HTTP Live Streaming.)
- The Export for HTTP Live Streaming Dialogue box will now be displayed. You can preview the video, change the title, description, creator, or add tags. File info will be on the bottom, also including the number of files that will be exported.
- When you go to settings, you can either export the file as a MPEG-2 Transport Streams or a Fragmented MP4. You can create versions for Cellular, Wi-Fi, and Broadband. The Color Space will be listed, and you can decide if you want to burn in captions.

- Hit Next, and you will be directed to pick a destination and save the project.
- The streaming files will be created, organized by type in folders.
These are all the basics for exporting a video in Final Cut Pro. Now you know how to export several types of files with ease.

Anne is a filmmaker and writer with a passion to bring stories to life. She has created several short films, specializing in stop-motion animation. Anne has over eight years of filmmaking experience, and she is always ready to share her knowledge with other creators. She started her company Anne Gets Creative in 2020.
Anne is extremely familiar with many Adobe programs: Photoshop, Illustrator, InDesign, After Effects, Premiere, and Audition, to name a few. She has also worked with other programs such as Procreate, Canva, iMovie, and Final Cut Pro. She always strives to give the best software reviews, researching diligently so her readers don’t have to.