(Last updated on November 2nd, 2022)
In this tutorial, we will be adding an adjustment layer in Adobe Premiere Pro. Adjustment layers are powerful, allowing you to add effects to your footage. Follow along to see how this is done, step by step. I will also be going over the Effects panel as a bonus.
Related: Final Cut Pro vs Premiere Pro | The Ultimate Battle (2023)
Adding an Adjustment Layer in Premiere Pro
- Go to File > New > Adjustment Layer to open the Adjustment layer panel.
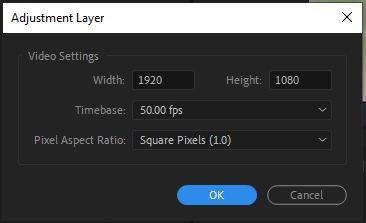
- Adjust the Height, Width, Timebase, and Pixel Aspect Ratio.
- Drag the adjustment layer item into the timeline then click and select the adjustment layer.
- With the layer selected, go to the Effects panel and search for the effect you want.
- Double click the effect to add it to the adjustment layer.
Read on to see the whole process in action.
Detailed Procedure
- Go to File > New > Adjustment Layer. If Adjustment Layer is greyed out, be sure to click out of any items selected in the Project panel. An adjustment layer panel will pop up.

- Here, you can adjust the height, width, Timebase, and Pixel Aspect Ratio of the layer. Once you are satisfied with the settings, click OK.
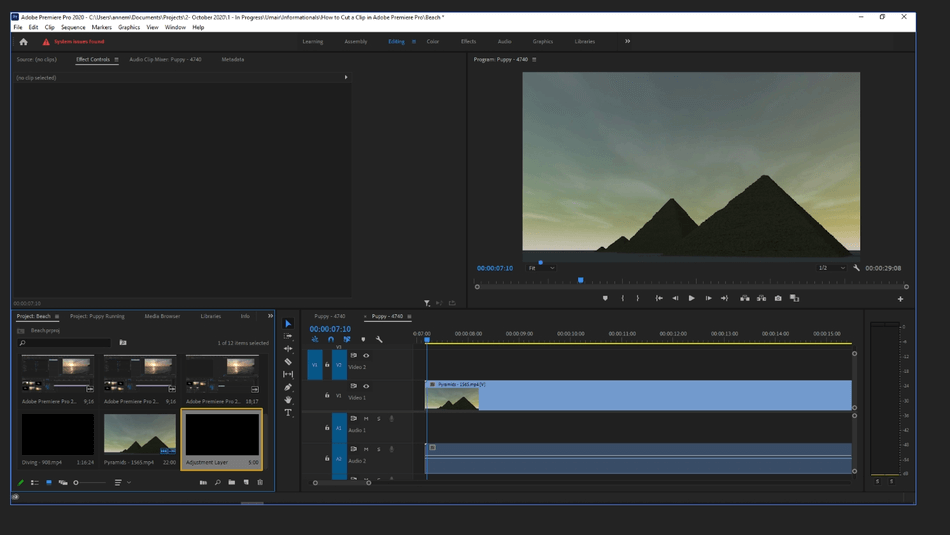
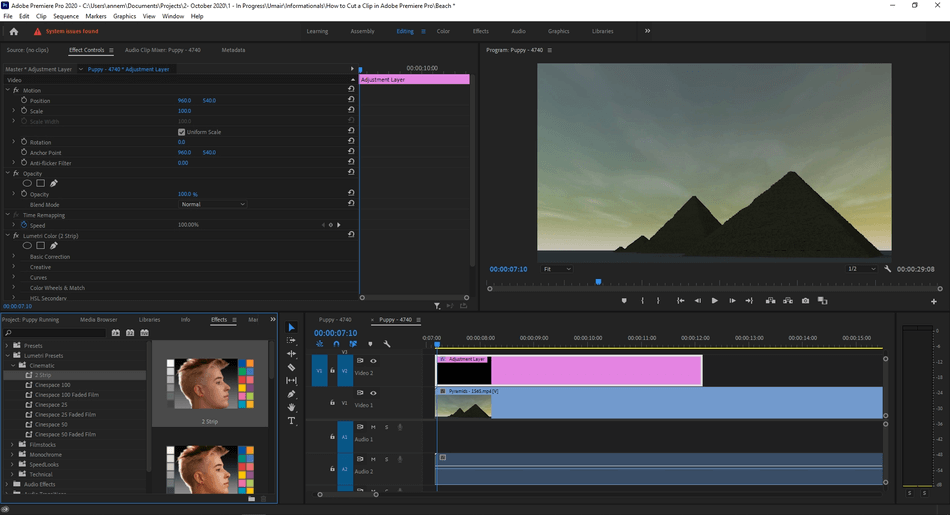
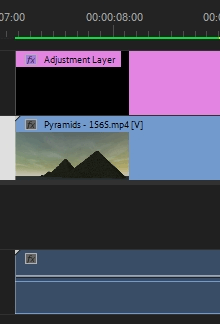
- Drag the adjustment layer item into your project timeline.
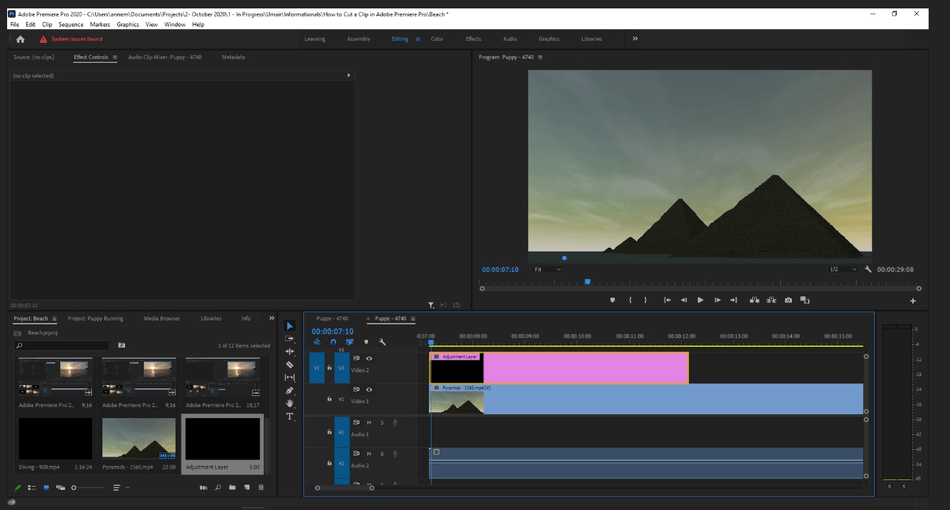
- Click and select the adjustment layer in the timeline. When selected, there will be a white border around the layer.
- With the layer selected, go to the Effects panel. (If not pulled up, go to Window > Select Effects. It will probably be in the bottom left panel. Search for it by clicking on the “>>” icon.)
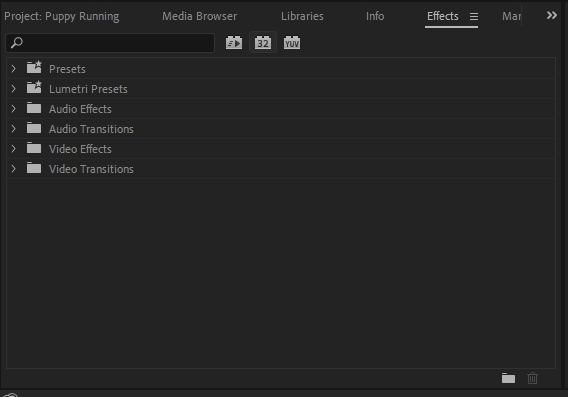
- Search for the effect you want. You can either click through the folders to browse or use the search bar to quickly find your effect.
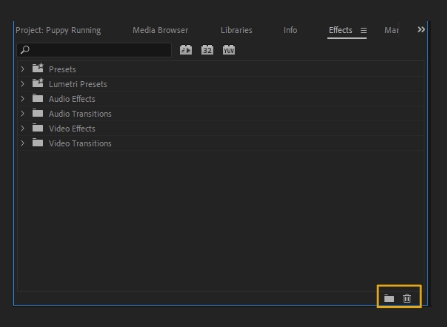
Referencing these three icons in the image below, you can also search by (reading the icons left to right) Accelerated Effects, 32-bit color, or YUV effects.

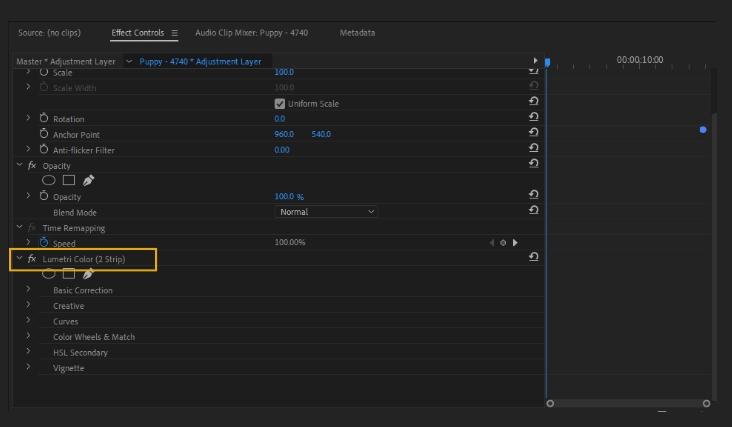
- Double click the effect you want; this adds it to the adjustment layer. You can also drag the effect to the clip or drag it to the Effect Controls panel. For this example, I will be using the Lumetri Presets > Cinematic > 2 Strip effect.
- In the Effect Controls panel, modify the feature as you see fit. Your new effect will appear below the default features.
- To remove the effect, select the effect, delete it using the delete button or right-click, and select Cut. If you want to remove all the effects from a clip, right-click a clip in the timeline and select Remove Attributes.
- To disable an effect, click the fx symbol next to the effect. When disabled, it will have a crossed-out line across the fx, and the name of the effect will be greyed out.

Effects
Adobe Premiere Pro offers many effects to choose from. There are four categories to choose from, Fixed, Standard, Clip-based, track-based, or Effect plug-ins. Let’s go over your options.
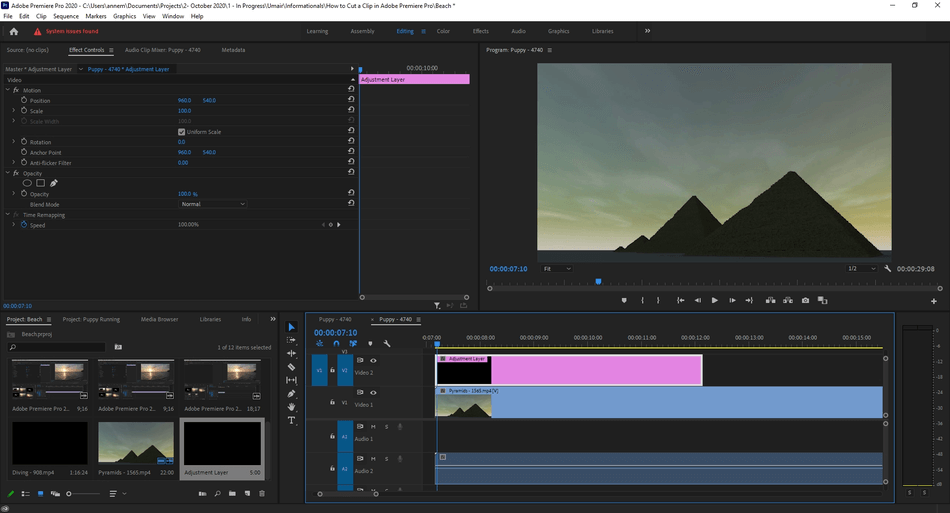
- Fixed Effects: Fixed effects are the built-in effects already tied to your clip. These are the default properties that you can modify:
- Motion: Motion controls the animation, scale, rotation, anchor point, and anti-flicker property of your clips. You can also composite them with other clips.
- Opacity: Controls the opacity of your clip. Using the opacity feature allows you to create fades, overlays, and dissolves. Using a pen tool or shape, you can also create a mask to control this property.
- Time Remapping: This tool lets you speed up, slow down, reverse, or freeze a clip. You can also precisely control the velocity.
- Volume: Volume lets you control the sound levels of your clip.
- Standard Effects: These are additional effects that you apply to a clip found in the Effects panel. You can use as many of the effects as you want on a clip, adjusting them in the Effects Control panel.
- Clip-based and Track-based effects: Clip-based effects alter individual clips in your project. All video effects are clip-based. Track-based effects refer to audio effects that can either be applied to tracks or clips.
- Effect Plug-ins: These are additional effects that are available from Adobe and external third-party vendors. Many plug-ins from Adobe After Effects can be used with Adobe Premiere Pro as an example.
- https://helpx.adobe.com/premiere-pro/plug-ins.html This link provides a list of third-party plug-ins for Adobe Premiere Pro.
- Stored files will be in the Plug-ins folder. Program Files\Adobe\Common\Plug-ins\<version>\MediaCore (Windows) or /Library/Application Support/Adobe/Common/Plug-ins/<version>/MediaCore (Mac)
- Many other creators sell plug-ins. While Adobe recommends using the default plug-ins for the best software performance, these can be a great addition to the program, giving you great effects and transitions to use for your projects.
As mentioned earlier, you can also search the effects by the categories Accelerated, 32-bit Color, and YUV.
- Accelerated Effects: Some effects take advantage of high-power graphics cards to make rendering faster. You will need a graphics card that is certified to support CUDA acceleration effects.
- 32-bit Color: These are the effects that support high-bit-depth processing.
- YUV effects: These effects process directly on the YUV values, never converting them to RGB. This process makes sure there is no color shifting. YUV is the color encoding system for analog television.
To organize the effects to make it easy to access, you can group them in customized bins. To group them:
- Press the folder icon in the Effects panel. This will create a renamable custom bin.
- Drag effects you like into the bin, creating a copy of the effect.
- If you don’t want a bin, you can delete it by hitting the trash icon or the delete button.
Additional Tips
Effects are Color Coded
Effects in Adobe Premiere Pro are color-coded. The fx badges are colored as such:
- Gray – No effect was applied.
- Yellow – Intrinsic effects like position, scale, and rotation have been modified.
- Purple – Non-intrinsic effects, like color, presets, and blurs, have been applied.
- Green – Intrinsic effect modified with additional effect applied.
- Red underline – Master Clip effect applied.
Below is an example of a purple fx badge:
These badges help the user identify the effects applied within the timeline.
Rendering
Adobe Premiere Pro will try to render playback for all sequences in real-time at a full frame rate. However, with complex sequences, you may need to generate playback files.
There is a bar over the clip in the timeline. This bar indicates if the clip has been rendered and if it is ready for real-time preview. If a clip is not rendered, there will be either a yellow or red bar indicating so:

Once processed, this bar will change to green. Green means that there are playable, rendered preview files.
When a bar is red, this means that the clip probably needs to be rendered to playback in real-time. Red bars can happen with a process-heavy effect like Time Warp Stabilizer. Premiere may even indicate that there needs to be a clip analysis, showing you a blue bar telling you so.
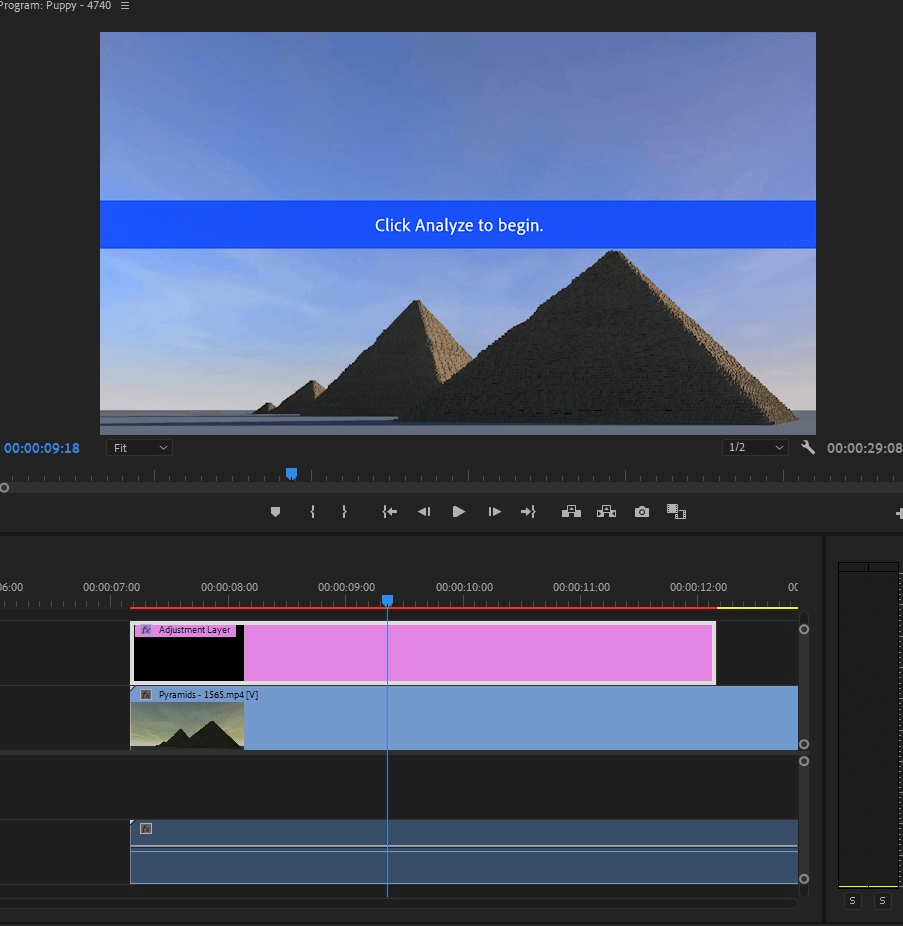
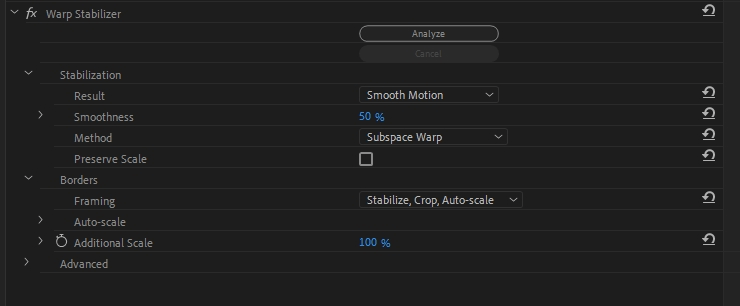
With an effect like Warp Stabilizer, you will go into the Effect Control panel, set your parameters for the effect, and then hit analyze. The analysis can take anywhere from seconds to minutes to even hours, depending on your computer’s processing power and your clip’s length. When you adjust the clip, you may have to reprocess.
Best Effects
Here are a few effects that are go-to’s for filmmakers. While there are many options to choose from, this list can get you started on some basics:
Stabilizing Footage – Warp Stabilizer
Warp Stabilizer is a powerful effect that will remove shake and jitter from your footage. This tool can turn shaky footage into smoother movement.
Blending New Audio with Old Audio – Exponential Fade
Exponential Fade is an excellent effect to blend two audio clips, giving you a clean finish. The effect fades the first clip and brings up the new one.
Blurring Video – Gaussian Blur
Use Gaussian Blur to blur out your video. You can use it by masking part of your clip, blurring out a small section, or blurring out the entire video. You can control and animate the amount of blur too. Gaussian blur is great for transitions as well.
Create a Time-lapse – Time Remapping
Adjust the velocity in the Time Remapping tool to speed up or slow down your clip. This effect is included as a fixed effect.
Color Grading – Lumetri Color
Use this tool to color correct your work. You can do basic correction, adjust curves, and more.
Add a Lens Flare – Lens Flare
The lens flare effect lets you add a realistic lens flare to your video. You can adjust the position, brightness, lens type and blend the effect into your footage. You can adjust the keyframes for the flare center to animate the effect.
This concludes a full overview of applying an adjustment layer and examining the options of the Effects panel. If you need additional assistance, visit helpx.adobe.com. Here, there are lessons and tutorials with searchable options to help you find the answer to your question.

Anne is a filmmaker and writer with a passion to bring stories to life. She has created several short films, specializing in stop-motion animation. Anne has over eight years of filmmaking experience, and she is always ready to share her knowledge with other creators. She started her company Anne Gets Creative in 2020.
Anne is extremely familiar with many Adobe programs: Photoshop, Illustrator, InDesign, After Effects, Premiere, and Audition, to name a few. She has also worked with other programs such as Procreate, Canva, iMovie, and Final Cut Pro. She always strives to give the best software reviews, researching diligently so her readers don’t have to.