(Last updated on November 30th, 2022)
Filmora or Movavi, which video editing software is better in 2023?
Read this ultimate Filmora vs. Movavi comparison to find out which one is the best editing platform for you.
Both Filmora and Movavi are commonly used video-editing programs for beginners. They are both reasonably priced and offer free versions for trial use to see if the program is for you.
Related: 10 Best Apps to Fix Blurry Pictures in 2023 (Top Picks!)
Choosing a video-editing program as a beginner is a very important decision, as this will be the tool that you learn the ever-evolving video production skills on necessary to gain the upper hand in the media department. Fortunately, you’ve found this comparison, which highlights the pros and cons of two of the most-used video-editing platforms for beginners.
Filmora vs Movavi: Comparison at a Glance
1. Ease of Use
Winner: Movavi. Both Filmora and Movavi are beginner video-editing programs, but Movavi is easier to use of the two. Because of its simple interface, preset effects, and title selection, Movavi allows first-time editors not to get hung up spending enormous amounts of time on one portion of a video. Instead, users can complete a video with preset effects and titles in a short amount of time.
2. Preset Effects
Winner: Filmora. Filmora’s preset effects are the best of any other beginner editing platform. With customizable video and audio effects and animation presets, Filmora’s offerings are perfect for a new editor looking to improve their footage.
3. Titles/Text
Winner: Filmora. Filmora allows you to change the font, color, size, threading, leading, spacing, and thickness of your text to create unique and customizable titles. On top of that, the software offers a wide range of preset titles. Filmora is also compatible with many third-party titles.
4. Usage
Winner: Tie. While Movavi and Filmora are offered for slightly different users, the usage is split at a tie. Movavi is designed purely for beginning editors hoping to crank out a video in a fast and efficient manner. Filmora is more for the fine-tuning beginner editor that is seeking to learn more about video production.
5. Workflow
Winner: Filmora. The workflow in Filmora is a bit more clearly outlined and established than that of Movavi. Filmora also offers a good amount of online support in both tutorial and video form. This is extremely helpful for users of all calibers.
6. Pricing
Winner: Movavi. The basic Movavi version is priced at $39.99 while the basic Filmora package is priced at $59.99, so Movavi wins the pricing category. However, both platforms are offered in many different pricing options.
Short Verdict
Movavi is a fast and beginner-friendly video editor with an intuitive interface, while Filmora is an all-in-one tool boasting a powerful feature set. If you are new to video editing, go for Movavi. But if you want to be a long-term video editor, Filmora would be the better choice.
1. Ease of Use
Both Filmora and Movavi are considered beginner editing programs by most of the film industry. However, if we were to choose one that is easier to use it would be Movavi. Filmora is designed for a slightly more experienced editor, or at least someone that seeks to learn more advanced techniques or put a bit more time into the project to achieve professional results.
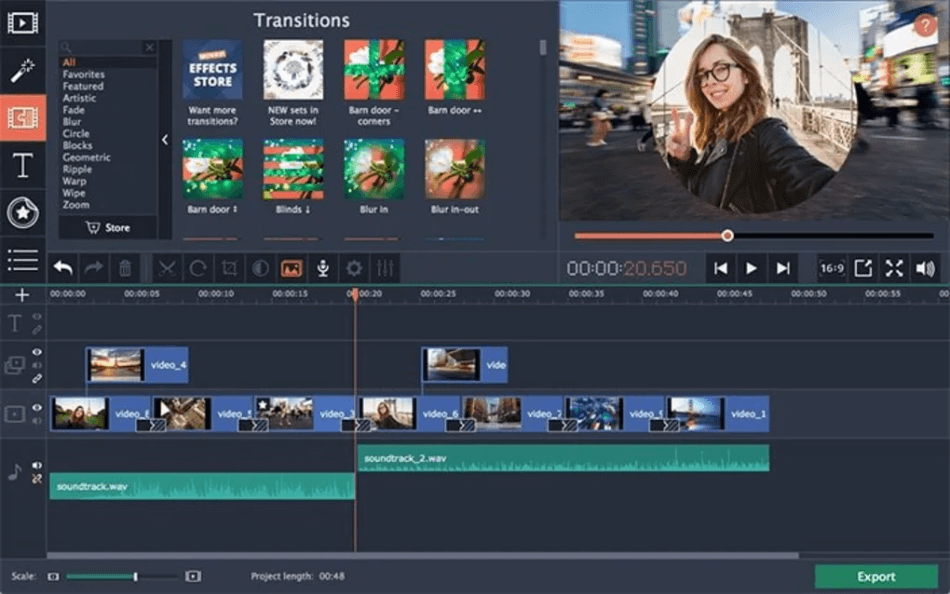
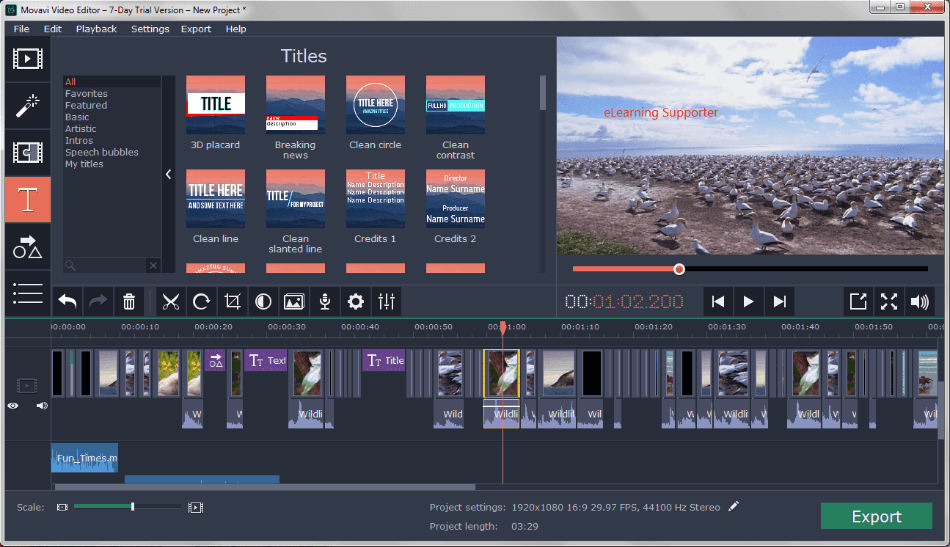
Movavi prides itself on its easy to use preset effects which we will touch on later. The interface is also designed effectively to fit a first-time editor. In the timeline, you will see the large transition markers to signify where you’ve added transitions.
On top of that, the layout is easily understandable. On the far left, you will find different types of interfaces that you can toggle between. These are clipping for clip trimming, effects for applying effects and graphics, transitions for applying transitions on both audio and video, text for adding titles, and color for color correction.
To the right of the navigation, you will have a sub-navigation panel to determine which types of clipping, transitioning, effect placement, and the color correction you will be pursuing. To the right of that will be the actual effect panel. Then on the far right is the playback panel. Finally, along the bottom will be the timeline, which is nice and large to distinguish between clips, transitions, and effects easily.
Filmora has a bit more of a learning curve. However, that means that you also get to use more advanced features and create a slightly higher quality production in the end.
The FIlmora interface is similar to that of Movavi, however, with different branding and functionality. In the top left corner, you will find the project panel. This panel shows the media that you’ve imported to put into the timeline, the audio effects, titles, transitions, video effects, elements like preset effects, and toggles to manipulate the graphics on a clip in the timeline, and split-screen mode.
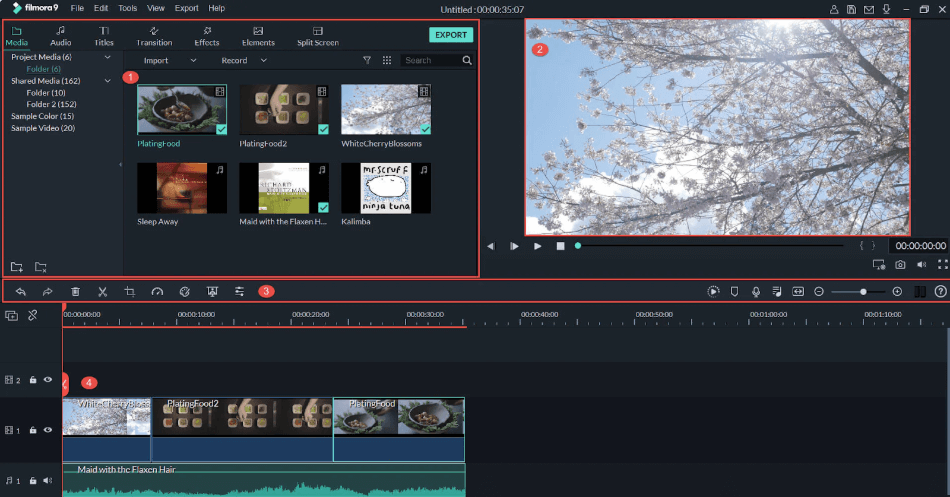
In the top right, you will find the playback panel for viewing clips in the project panel and the project in the timeline. The skinny strip in the middle of the interface is the toolbar. The tools can also be accessed using shortcut keys. And finally, along the bottom, you will find the timeline. As you can see, the timeline is a bit more challenging to process as a first-time user, but the functionality is greater than that of Movavi.
Winner: Movavi
2. Preset Effects
Based on our use and customer reviews, the overwhelming consensus is that Filmora offers better preset effects than Movavi. However, let’s talk about what Movavi has to offer first.
Movavi is stocked full of preset effects. These include backgrounds like beaches, gradients, the city at night, and many more. You can easily overlay text onto these backgrounds, blur them, and make a sleek lyric video in a fast and efficient way.
Movavi also has preset overlay videos that are transparent so you can place them on top of the original video without having to key out black or rotoscope out the background. These overlay videos vary in nature as some are money falling, roses popping up, balloons flying across the screen, and many more. In fact, combining the overlay and background video would provide the assets to create a finished video right on the program. These videos are crisp HD videos so you won’t have to worry about pixelated images.
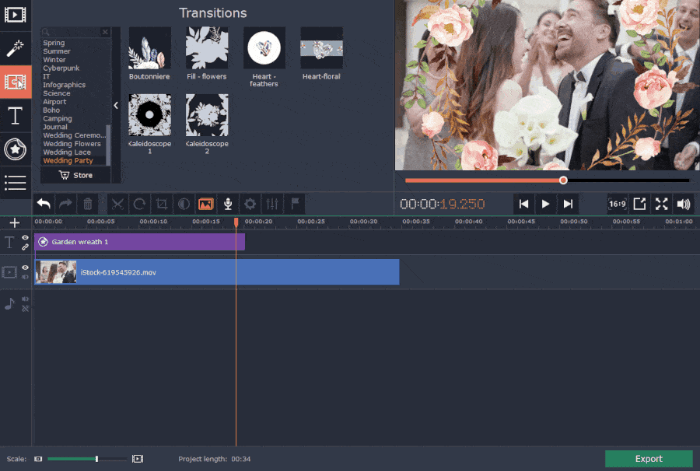
Movavi also offers impressive light leaks. These are currently a trendy way to improve the quality of your video, add in smooth transitions, and spice up footage that lacks dynamism.
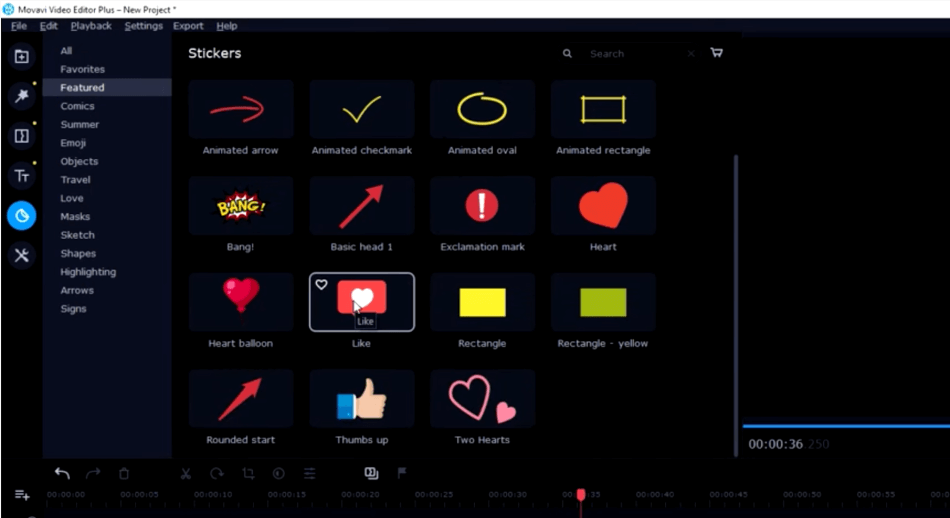
And finally, another handy preset effect that Movavi offers are stickers. These are very convenient for adding animated circles around a portion of your video, adding arrows pointing to a specific part of your video or an object, and adding simple thumbs up or hearts. This tool saves loads of time if you frequently animate these yourself in an editing program.
Filmora also offers an enormous amount of preset effects in animated art that can significantly improve your videos. You can find over 245 preset effects in the elements tab of the interface.
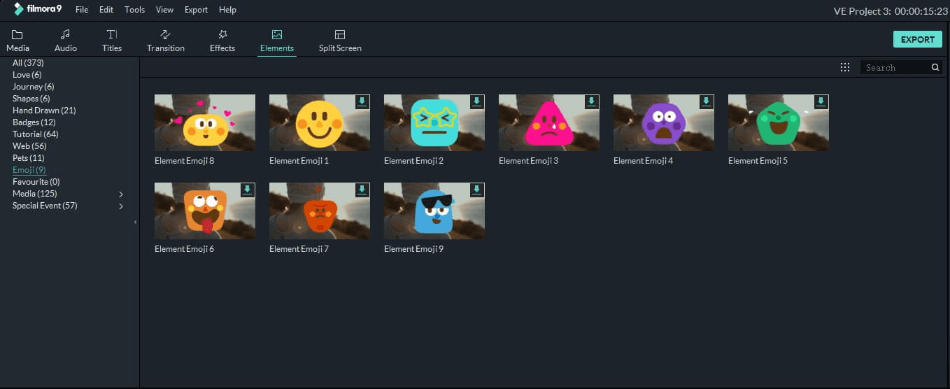
What’s most impressive about Filmora is the amount of third-party preset effects that can be downloaded and placed into the software. This allows for a much more customizable and collaborative approach to editing. Third-party presets from sites like Videohive, Filmstock, and Elemental are what take Filmora to the next level in the preset effects category.
Winner: Filmora
3. Titles/Text
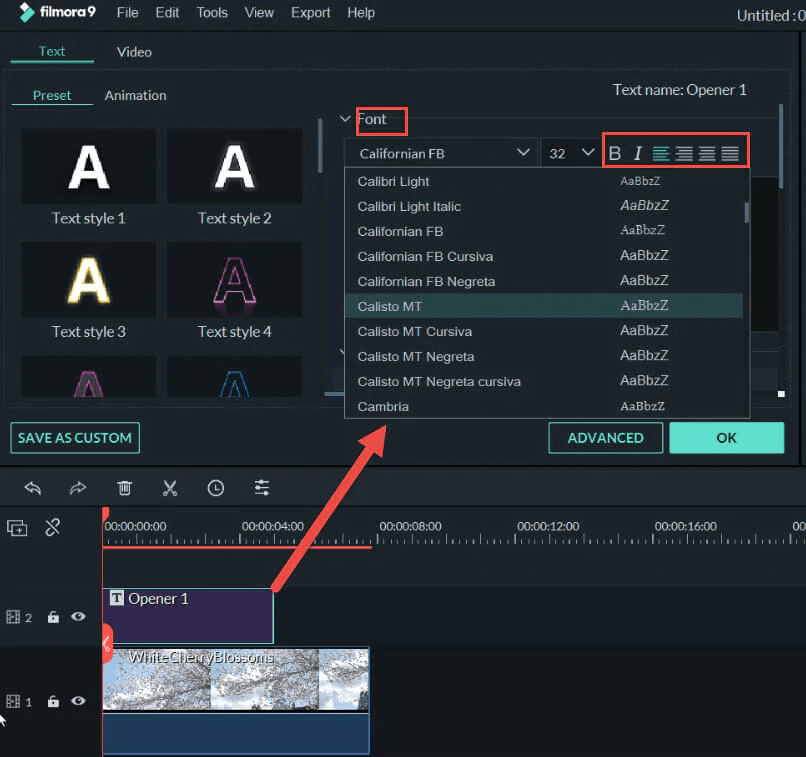
Filmora and Movavi both offer an assortment of preset titles. But if you want to take your project to the next level, the Filmora text and titles will help get you there.
Filmora allows users to create titles with customizable size, font, color, leading, and spacing. On top of that, simple but sleek animations can be implemented to add high quality yet unique titles to your videos.
Some of the preset titles that Filmora has can also give the desired results if they fit the mood and tone of your project. The lower-third titles and moody text make your project more fun and exciting. You’ll instantly be impressed when placing this text onto your videos.
Movavi also allows for customizable text using the preset titles that you can add to your project. However, these titles lack in diversity and uniqueness which means that you frequently see them in other projects online. This is something that prevents your project from standing out from the crowd. However, if you’re more focused on quickly finishing up a video, then Movavi titles might be for you.
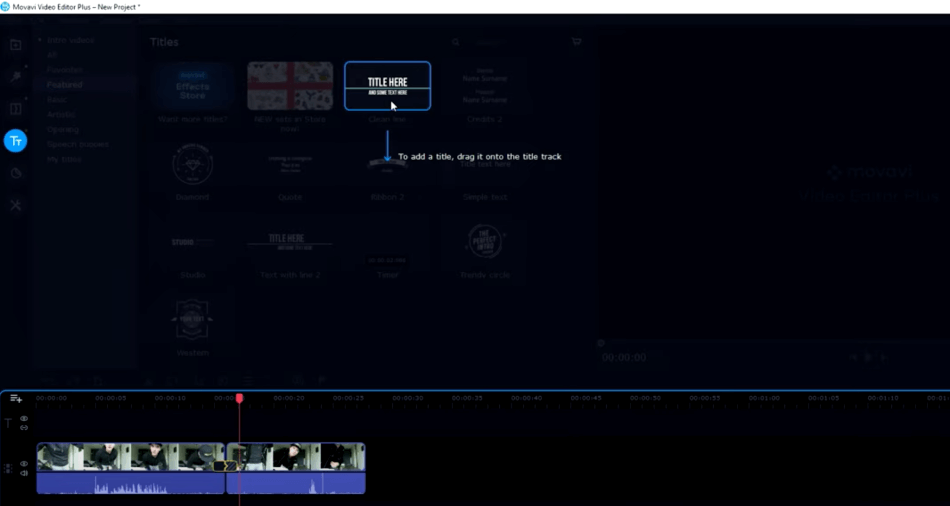
It’s also very easy to add titles to your project in Movavi. After dragging the “title here” selection onto your project, you can easily change the text. Oftentimes, however, you can’t change the size or font of the text, which does limit your ability to add uniqueness to your project.
Winner: Filmora
4. Usage
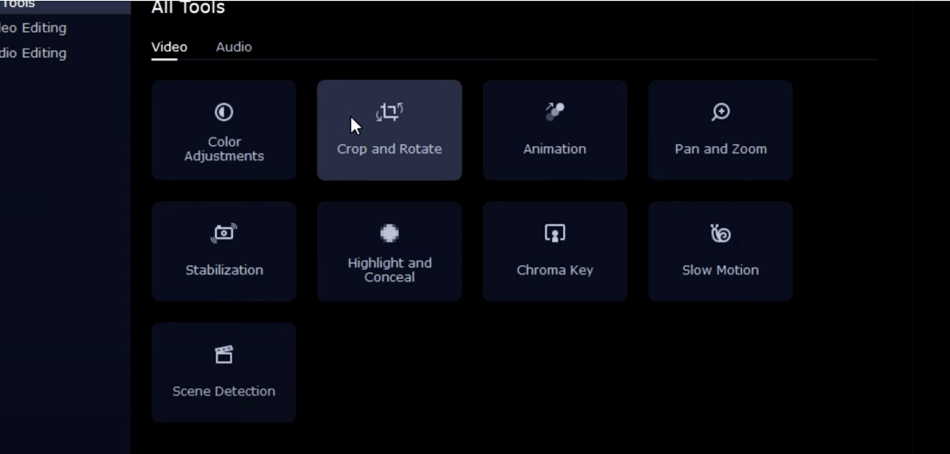
There’s an array of user-friendly tools in Movavi that make it a straightforward platform for first-time users. You have access to tools like color adjustment, cropping, animation, pan and zoom, stabilization, highlight and conceal, chroma-key, slow motion, and scene detection.
The stabilization tool, in particular, is one that your normally find in high-end editing programs like Premiere Pro and Final Cut Pro. The tool helps to make your shaky footage look smooth and professional.
The animation tool in Movavi is also a high-end offering, as you can animate your footage by adding keyframes, the overlay presets, stickers, and much more. This allows for more customization for your project.
Filmora has its own type of user base with a specific blend of new editors as well as slightly experienced editors. This has driven up the quality of what Filmora offers, as the users are more focused and experienced than that of the Movavi user base.
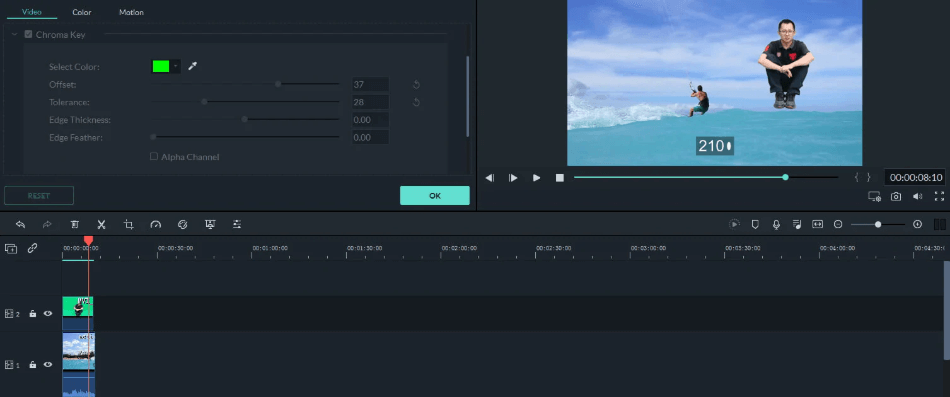
On top of everything that Movavi offers, Filmora has a more sophisticated video stabilization tool and a chroma-key that can key out even imperfect green screens, as well as other colors.
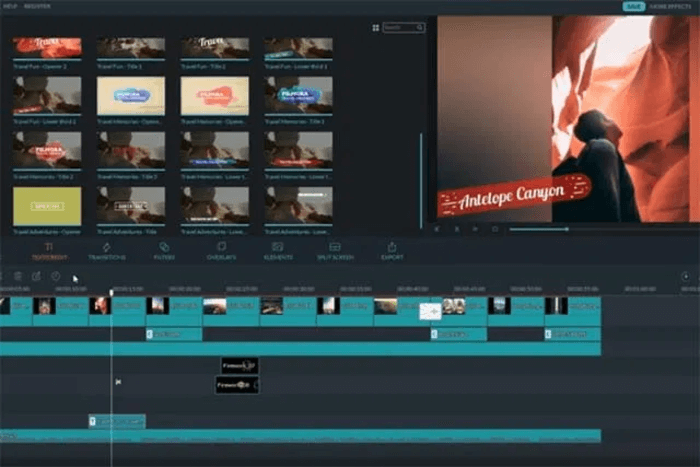
Another effect that is often used by Filmora users is the split-screen effect. This allows you to edit multiple different screens simultaneously into the same frame, which has a preset border for quick, seamless and effortless split-screen edits.

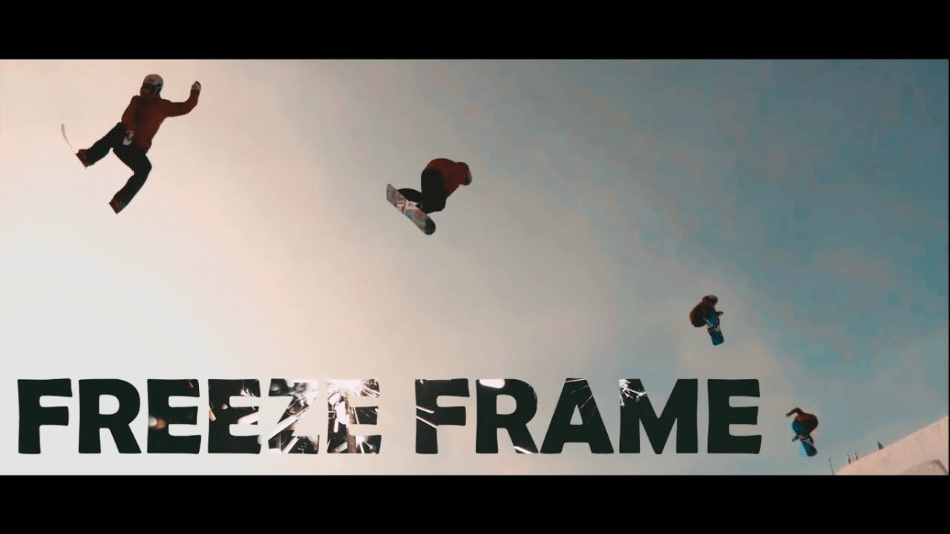
Another advanced effect that is fairly easy to implement in Filmora is the freeze-frame effect. This allows you to freeze a portion from multiple different parts of the video while the main video continues to play. It’s quite difficult to explain. This image below might help conceptualize the freeze frame effect. There are many tutorials online for this and many other Filmora effects.
These advanced effects have elevated Filmora into a tier of video-editing performance that lies between a professional video-editing platform like Avid Media Composer or Premiere Pro and a beginner platform like Adobe Premiere Elements or Movavi.
Winner: Tie
5. Workflow
Movavi has three primary interfaces: the video-editor, video converter, and the screen recorder. The video-converter allows you to import videos from 180 different formats into your project. You can also trim, stabilize, crop, and rotate the clips before you even get them into the video-editing interface. Like the title suggests, the video-editor is for editing videos. This means that this interface holds the tools and features necessary to edit videos, like a timeline, playback panel, tools, and effects. You can also export videos from the video-editing interface.
The screen recorder interface allows you to record your screen at 1080p and 60 frames per second. This is ideal for tutorial videos and ripping videos from websites.

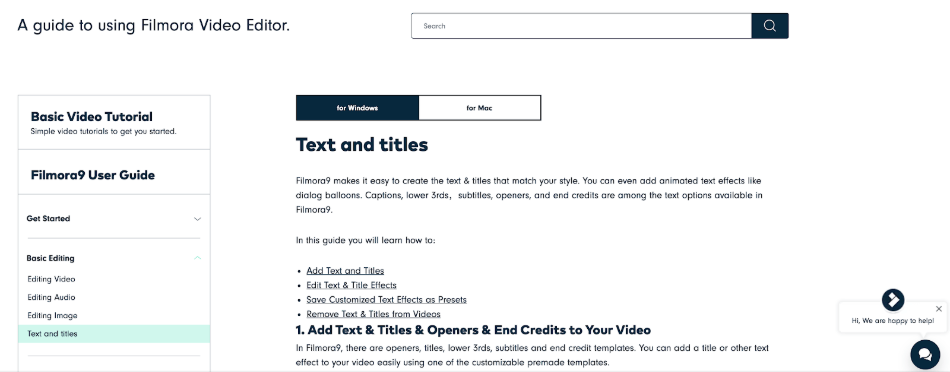
The Filmora workflow can certainly be customized, but the best method of working is the recommended workflow on the Filmora website. Wondershare offers extensive tutorials on just about every type of basic editing technique you would want to implement. This allows beginners or first-time users of Filmora to learn the program the way it was designed. Whether that’s better for you or not, it’s available and easily accessible online.
Winner: Filmora
6. Pricing
| Product | Regular Price | Discounted Price |
|---|---|---|
| Adobe Creative Cloud | $52.99/month | Check here |
| Filmora | $39.99/year | Check here |
| Movavi | $79.99/year | Check here |
Both Movavi and Filmora are offered in different types of packages.
The basic Movavi video-editing platform is offered at $39.95 but limits you to only 6 layers of video and audio. For $59.95, you have access to 99 layers of video and audio, which you would be crazy to use all of!
The most comprehensive Movavi offering is the business package priced at $99.95. This allows up to two users to use Movavi at the same time, which potentially saves a significant amount of money. The Movavi business package also includes an extensive selection of preset media loaded onto the platform.
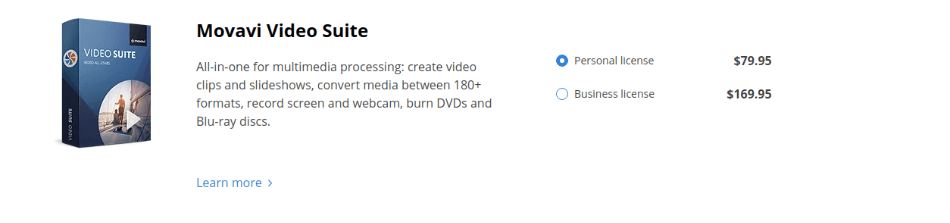
Finally, the Movavi Video Suite is offered at $79.95. This includes the three interfaces: video-editor, video-converter, and screen recorder.
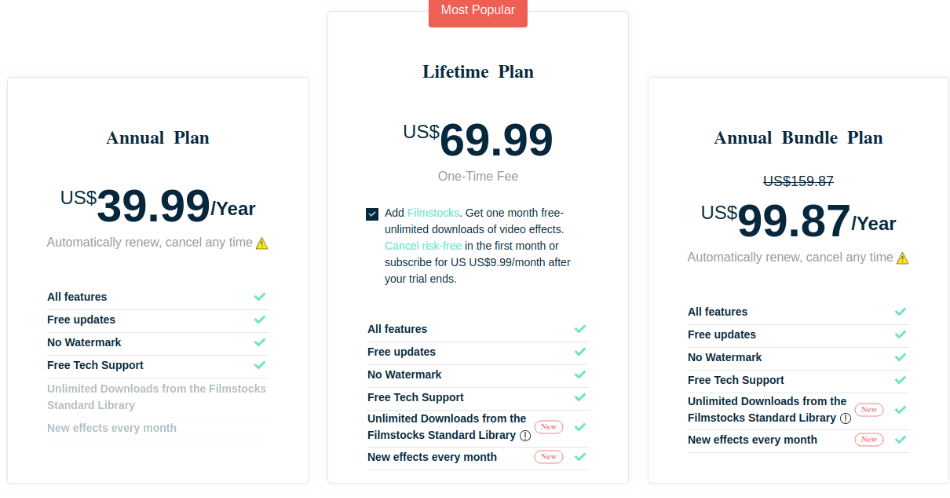
Filmora is priced at $59.99 for the basic package. This can also be split up into monthly payments of $7.99. The business package is priced at $79.99 per year or $12.99 per month, and allows you to use Filmora on multiple computers.
Overall, because the basic Movavi version is priced slightly lower than the basic Filmora offering, Movavi wins the pricing category.
Winner: Movavi
Final Thoughts
Both Filmora and Movavi are fantastic video editing tools. Filmora is designed for a slightly more experienced editor and is best for people looking to achieve professional results. In contrast, Movavi is more beginner-friendly but still has all the essential features of an excellent video editor.
Both Filmora and Movavi are designed for beginner video-editors rather than the expert or professional end of video production. However, the different user bases can be determined by the functionality of the two software.
Movavi is designed purely for beginner editors that are seeking a program to edit a video from start to finish quickly, and that allows the user to place in preset effects that don’t need fine-tuning for uniqueness. This will enable you to finish a video in Movavi significantly faster than in Filmora.
Filmora users are slightly different. You’d feel more inclined to edit with Filmora if you are seeking a video that is a bit more unique and stylized. Filmore will require you to put in a bit more effort, but it will help you accomplish your desired style with customizable presets and effect controls.
Overall, we recommend Filmora as the better video-editing program based on online support, customization effects, and controls it offers.
Frequently Asked Questions
Based on extensive use of both programs and the comparison of hundreds of customer reviews, Filmora is the better choice between the two platforms.
No. Movavi is a video-editing program designed for beginners. A virus in the system would effectively eliminate their name in the video-editing industry and tarnish any reputation they have built with customers.
If you use the trial version of Movavi, your exported video will most likely have a watermark. However, with the purchase of the software, your exports are free from watermarks.
Filmora is designed for beginners and first-time editors. There are many online tutorials and videos available that help you through your first editing experiences with Filmora.

Chris is an LA-based filmmaker and video editor who has a passion for writing and creating video content. He has produced and edited a wide variety of projects, most notably his documentary series “Off the Cuf,” which explores the world’s most fascinating and obscure communities. He has over 10 years of experience under his belt and is known for explaining complex concepts in simple, easy-to-understand way.
He is extremely familiar with all the top video editing software out there such as the Adobe Premiere Pro, Adobe After Effects, Final Cut Pro, iMovie, Adobe Animate, and DaVinci Resolve. Chris also has extensive know-how of top graphic design & photo-editing tools, including Photoshop, GIMP, Canva, Snappa, and more.
very well comparison i think i like filmora as compare to other softwares
I would definitely go for Filmora as it is user friendly with some learning curve. It is fast and gives adequate customization options to me and its pricing is a no brainer. Very nice article. More power to you Chris. Kudos !!
Thank you. Glad you liked it 🙂 Don’t forget to buy it using the links on this page if you want to get a special discount on Filmora. Plus, you will be supporting us as well 🙂
Ermmm… I was going to go for for Movavi as I am a complete beginner and only edit video every few months so I forget things in between so I just like to get in from work sit down and not bother with too many options and tabs etc! But now I learn that the ‘stabilization’ tool is better in Filmora I am not sure what to do – can you see the difference I wonder as I have some shaky music footage I want to use stabilization on? Some one once described Filmoras’s stabilization tool as a but like an elastic band but it might have been improved by now?
Secondly, I have heard that the conversion quality is better (if not faster ) with Filmora – again quality both audio and visual is import to me so I am now doubting Movai which is a shame as the interface seems bigger and easier ot use – be nice to hear a comparison with another suite I’m going to look at ‘Correl’? (having already rejected VideoPad).
Hi, has Filmora screen recorder too?