(Last updated on November 2nd, 2022)
Want to know how to mask in After Effects? You have come to the right place!
In this tutorial, I will teach you how to create a mask. Masks let you determine the visibility of part of a layer. They are created by drawing paths on any layer with a visual component. This feature is useful for composite projects with many layers, adding or removing objects, and transitions.
Related: Adobe Illustrator vs CorelDRAW: Who Wins & Why? (2023)
How to Mask in After Effects
- Open up your composition.
- Select the layer you want to mask.
- Click the Shape icon and select a tool.
- Drag out the shape.
Continue reading for more details.
Detailed Procedure
In Adobe After Effects, there are two ways to make masks. You can use the pen tool or the shape tool. Let’s start with the shape tool.
Masking in After Effects with the Shape Tool
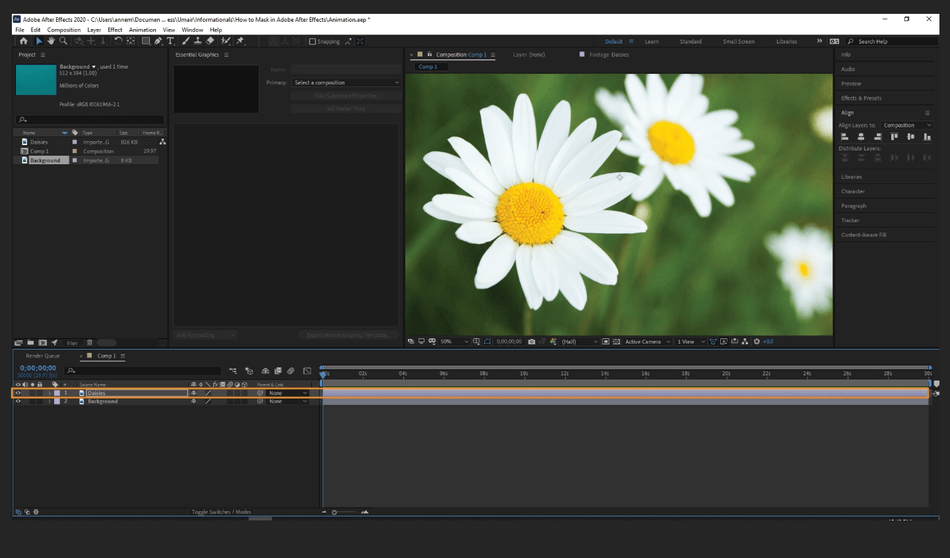
- First, double-click on your composition to open it up.

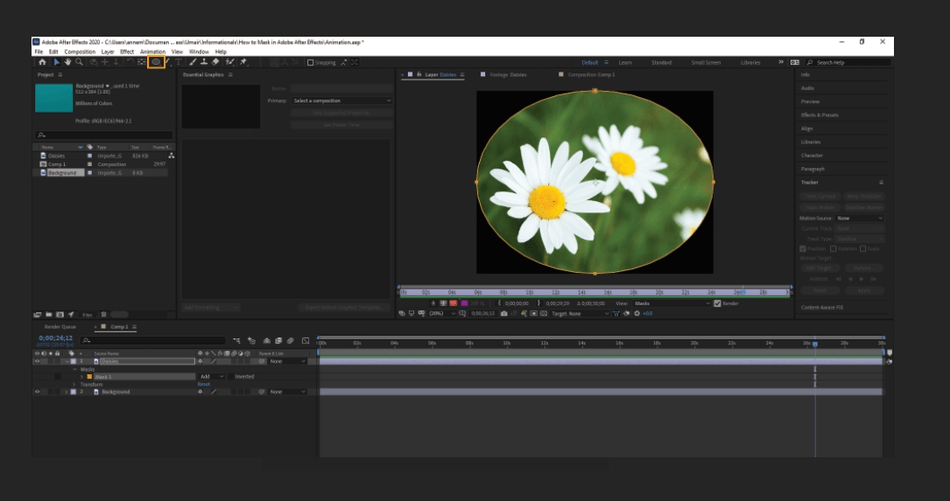
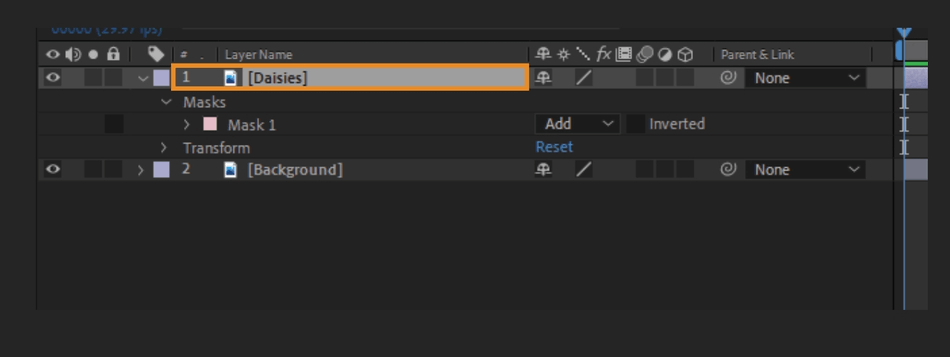
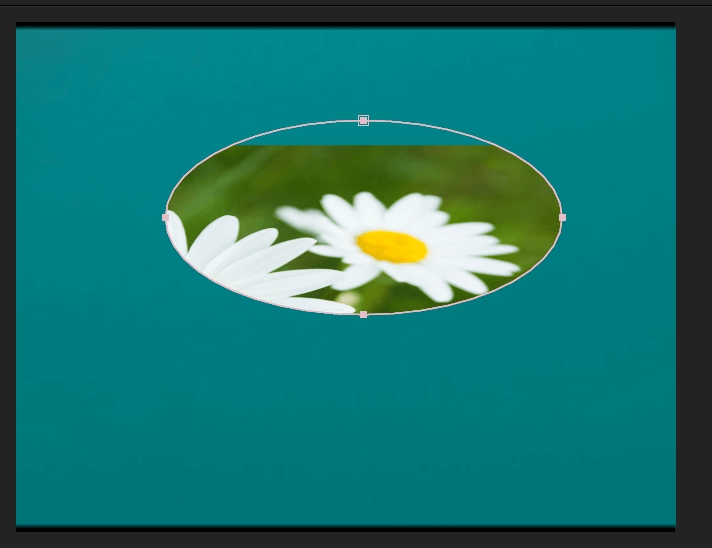
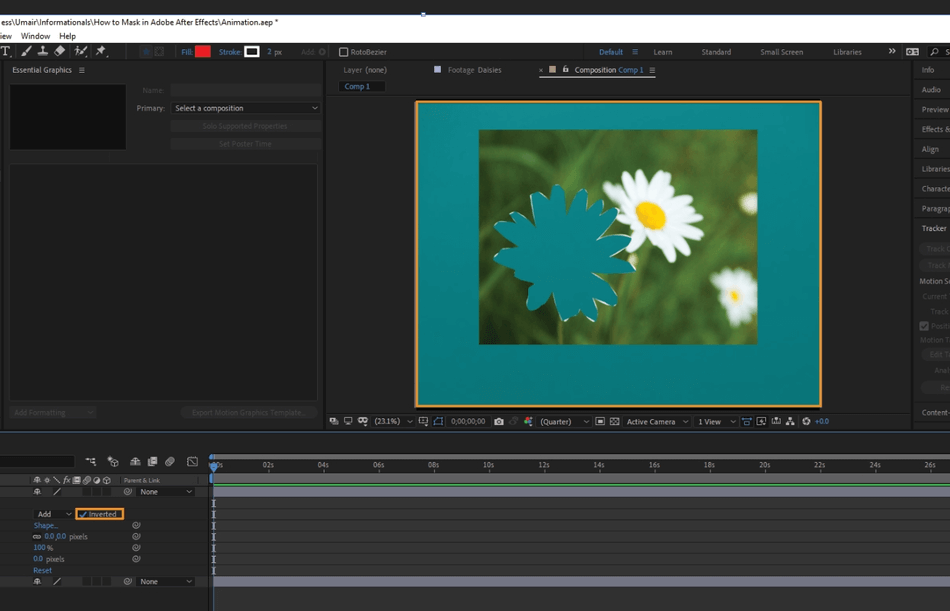
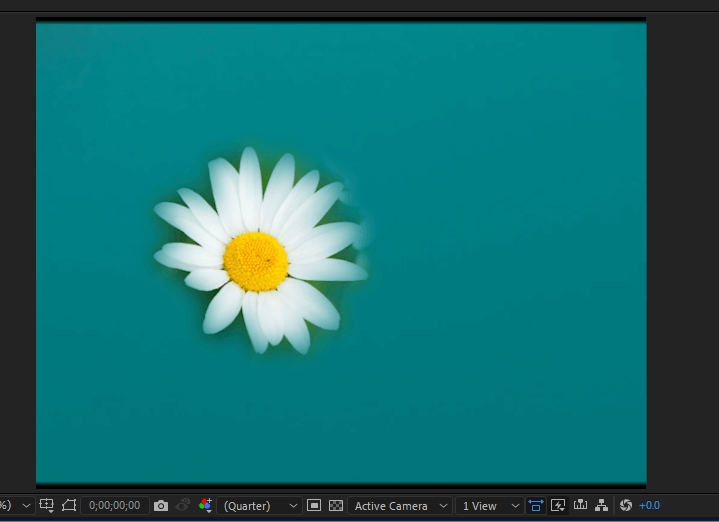
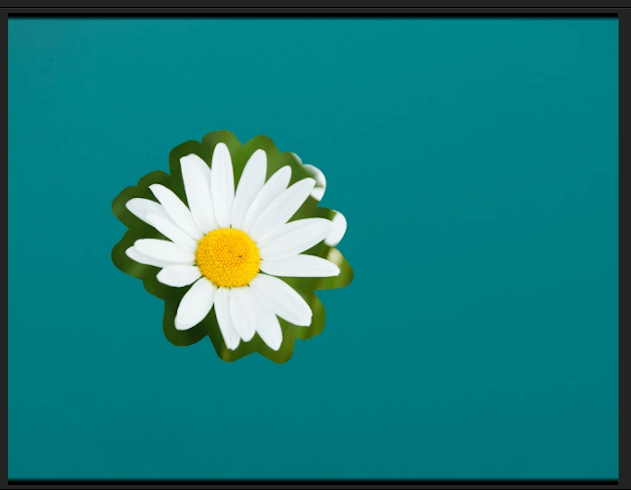
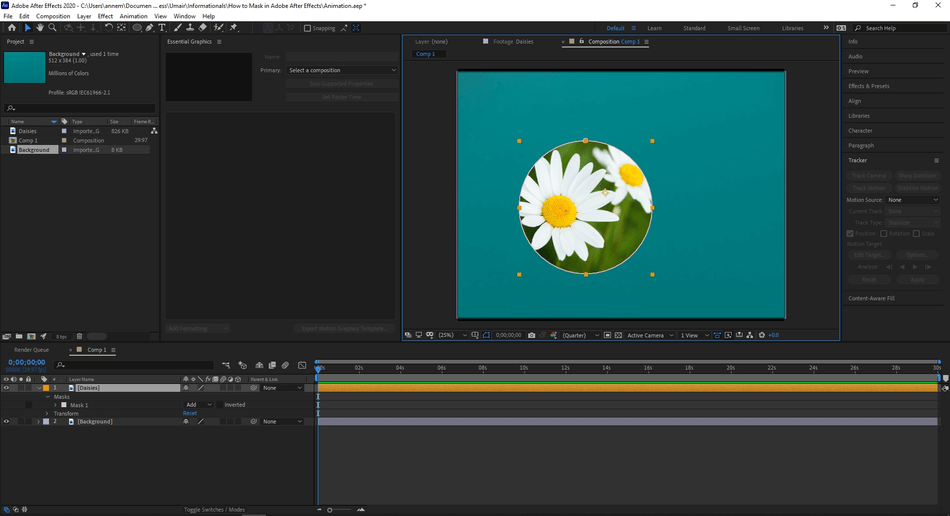
- Here, we have two layers, a daisy layer, and a background layer. I want to mask the daisy onto this teal background, cutting out the excess background behind it. First, select the layer you want to mask. In this case, select the upper layer.
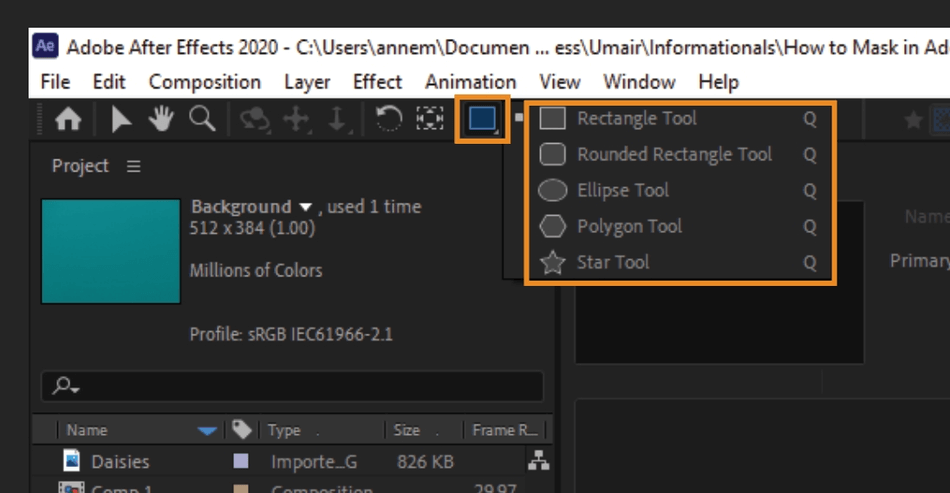
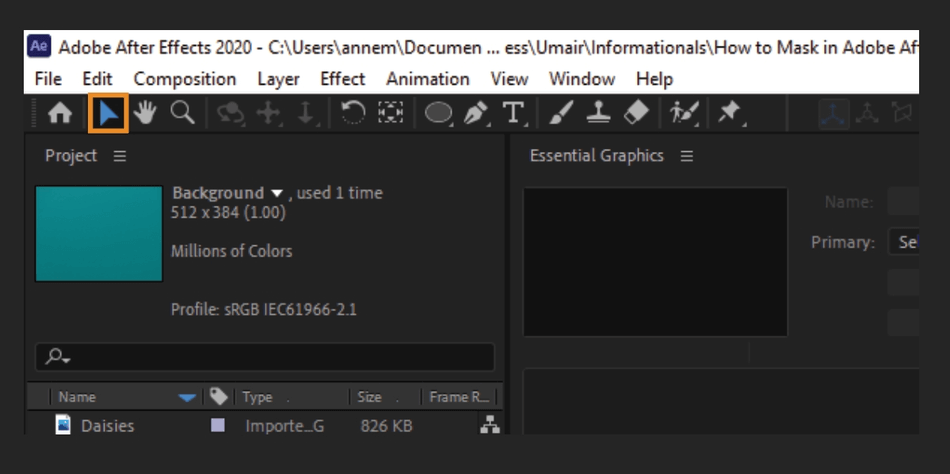
- With this layer selected, hit the shape icon in the top toolbar. You must have the layer selected before clicking into the shapes tool. Otherwise, you will create a new shape layer instead of a mask.
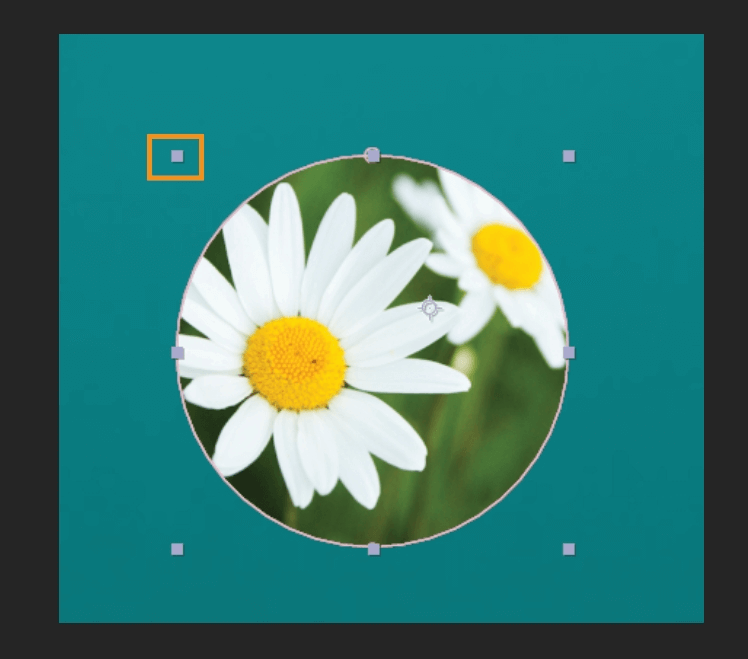
If you click and hold, a variety of shapes will pop down. Here, you can select from the Rectangle Tool, Rounded Rectangle Tool, Ellipse Tool, Polygon Tool, and Star Tool. You can also cycle through them using the Q command. For this tutorial, I’ll select the Ellipse tool.
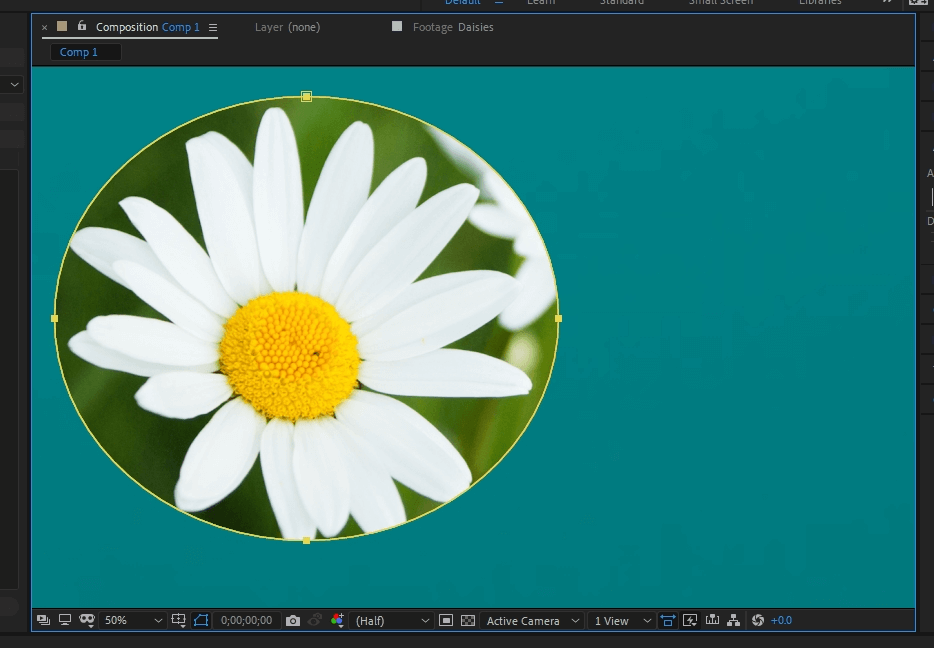
- After you select your shape, click and hold into the composition and drag out the shape. Here, you will see the top layered image already masked, cutting out the rest of its layer. Only the image inside the mask will be visible.
Tips
- You can repeat this process as many times as you want, moving through steps 1-4 to create multiple masks within the layer.
- Once you drag the shape to your desired size, hold down the spacebar to change the ellipse’s position before letting go of the mask.
- To create a mask, you must have the layer selected. If the layer isn’t selected, you will be creating a shape layer, an entirely new layer with a shape fill.
- If you want to fill the frame with a shaped mask, double click on the shape icon. The shape will fill the frame. Make sure if you are using this technique to have the layer selected. If you have a mask selected, the new mask will replace the selected one.
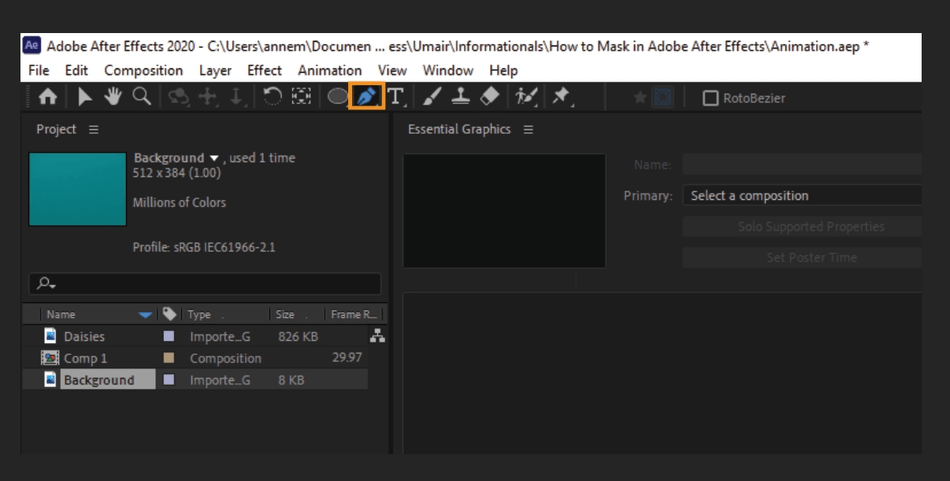
Masking in After Effects with the Pen Tool
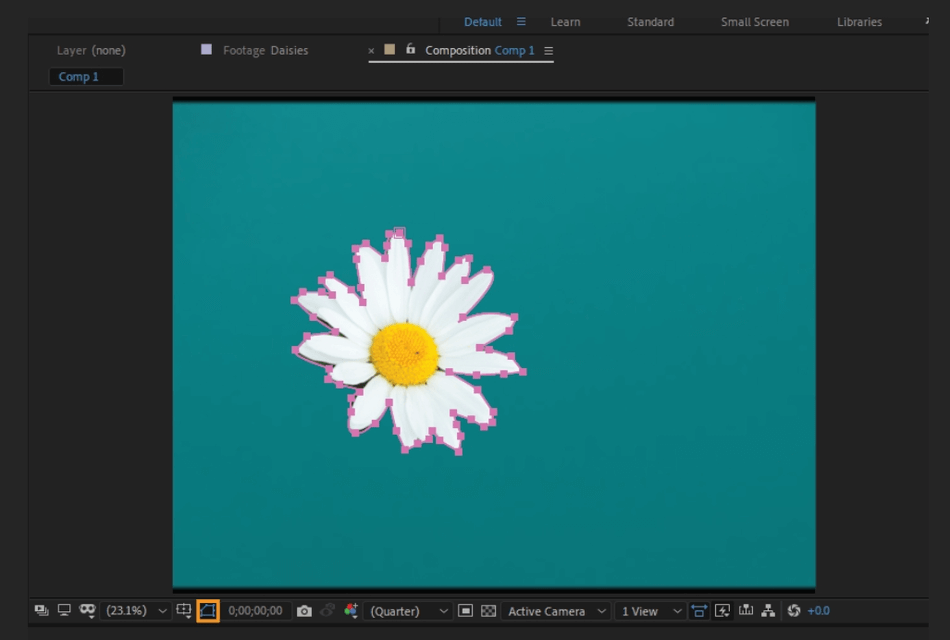
- Double-Click into your composition Layer.
- Select the layer you want to mask.

- Click the Pen tool in the toolbar. You can also use the command G to select the tool and cycle through the options.
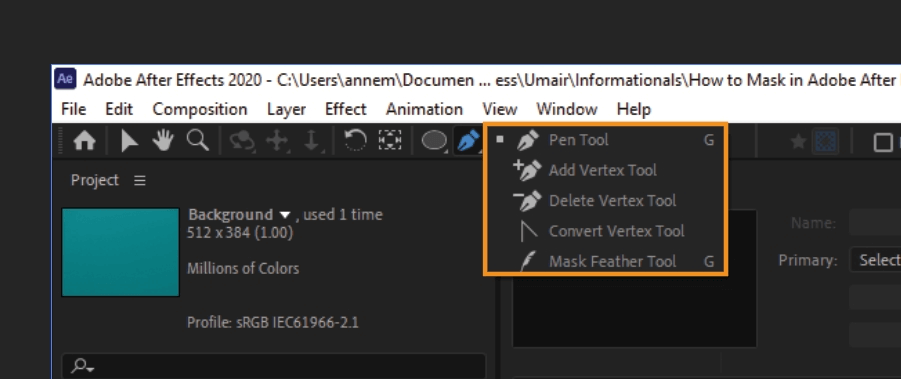
For this tutorial, we will be using the pen tool. If you click and hold, there will be other options.
- Add Vertex tool adds a point to the path, and the Delete Vertex tool deletes a point in the path.
- Convert Vertex Tool converts straight vertexes into curves and vice versa.
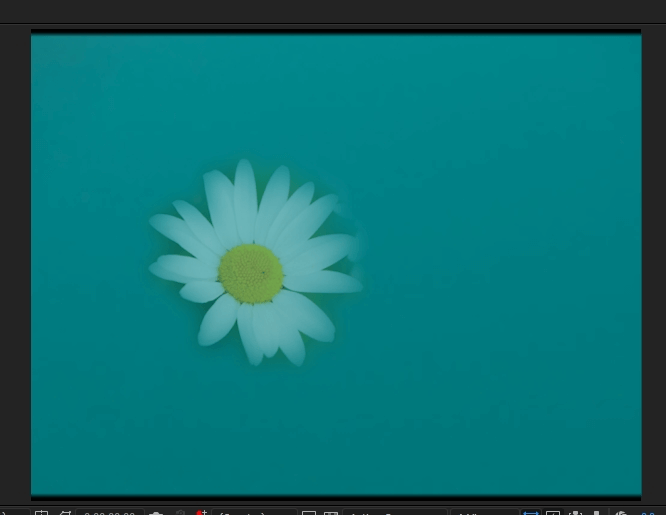
- Mask Feather Tool creates a feathered radius around your object. The best part about this tool is the ability to create a non-uniform feather, useful when you need variable blending.
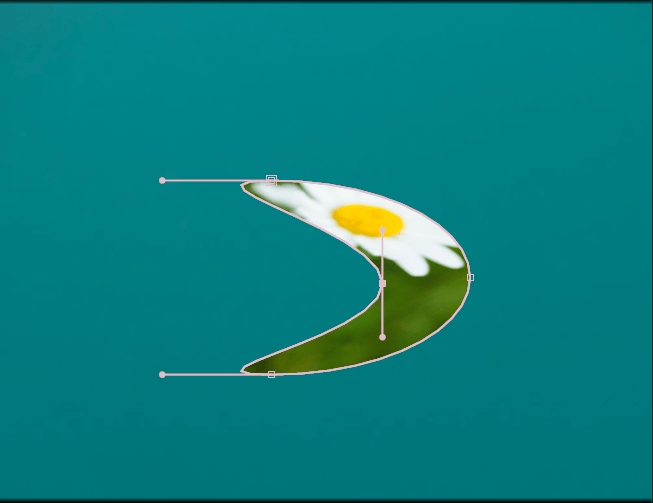
- Click into the Composition panel on your layer, creating points around your image. As you click on the image, the pen tool leaves points that connect as you create your shape or outline the image. If you click and drag, Bezier handles will come out of the point, allowing you to adjust the line’s curve.
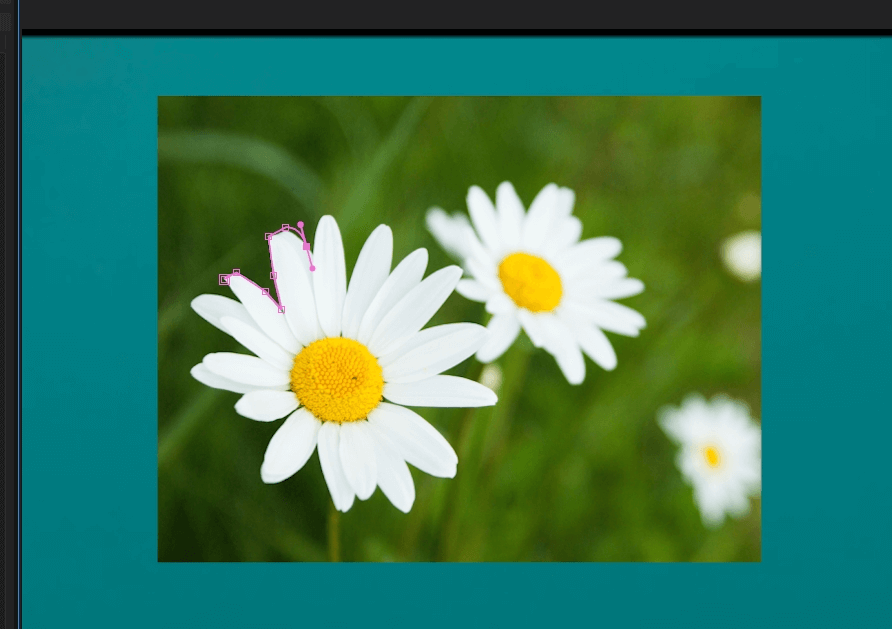
- To close the shape, you will click on the first point while creating the mask. (A little circle will appear next to it.) Clicking this point will close off the mask shape. Now, your image is masked.

To Alter the Mask’s Shape
- Activate the selection tool. Either click on the arrow icon in the upper toolbar or press keyboard shortcut V.
- Next, select the image layer by clicking on it.
- With the image layer selected, the layer will show up as selected in the composition panel. Click and drag any of the outer squares to change the layer’s height, width, and scale.
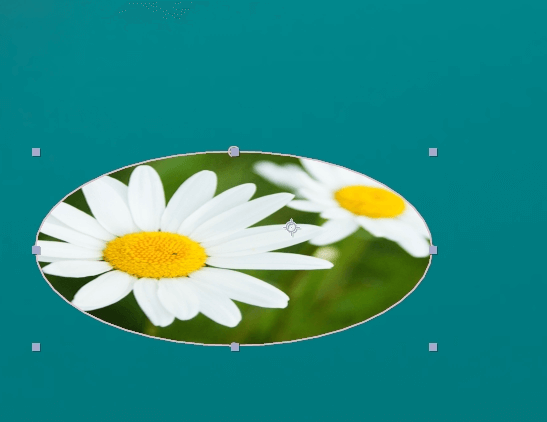
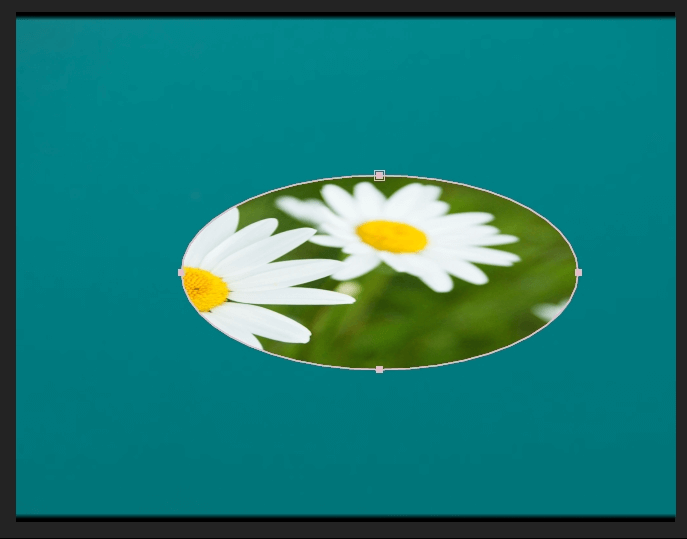
- To change the mask’s shape, click a square that borders the outline of the mask and drag. Bezier handles can appear. You can drag those to change the shape of the curve.
- To change the position of the mask, select the mask layer.
- Click the border of the mask and drag it to your desired location.
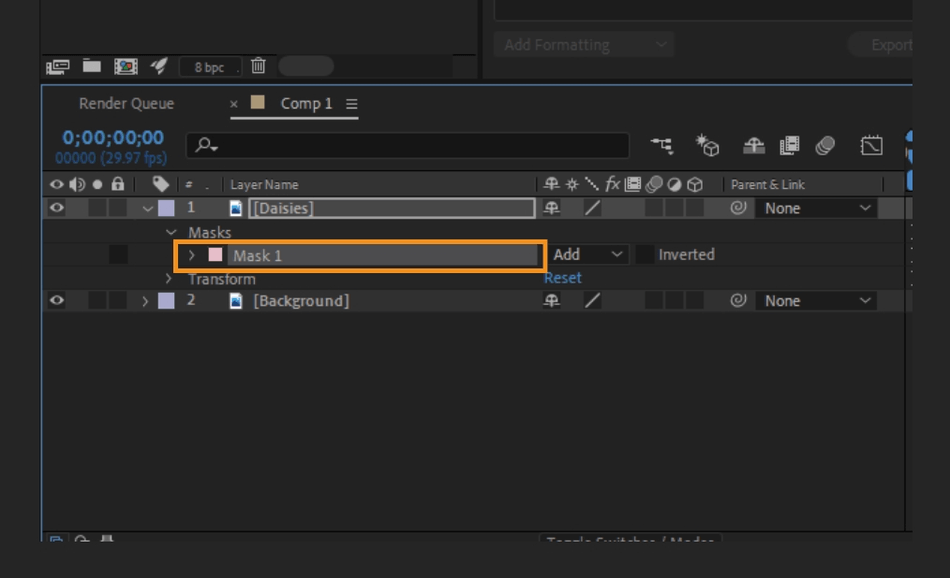
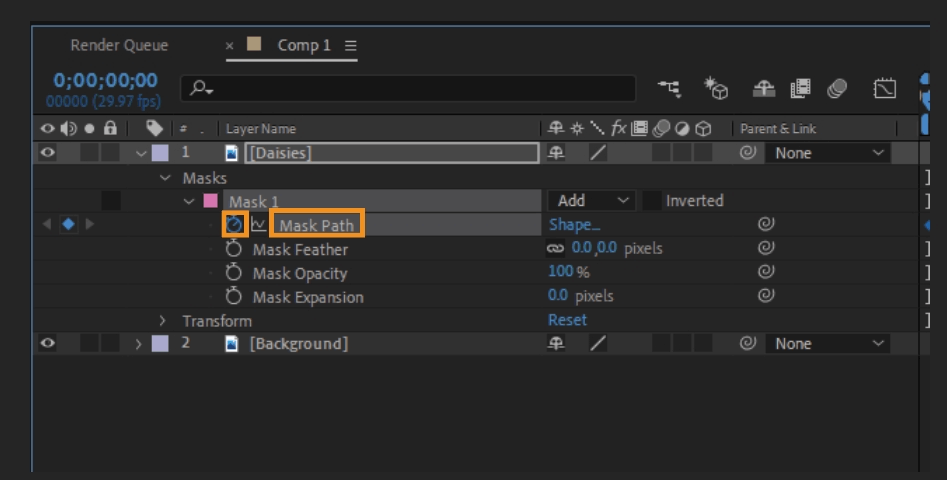
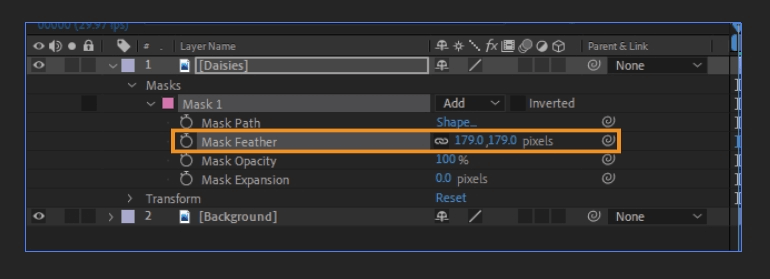
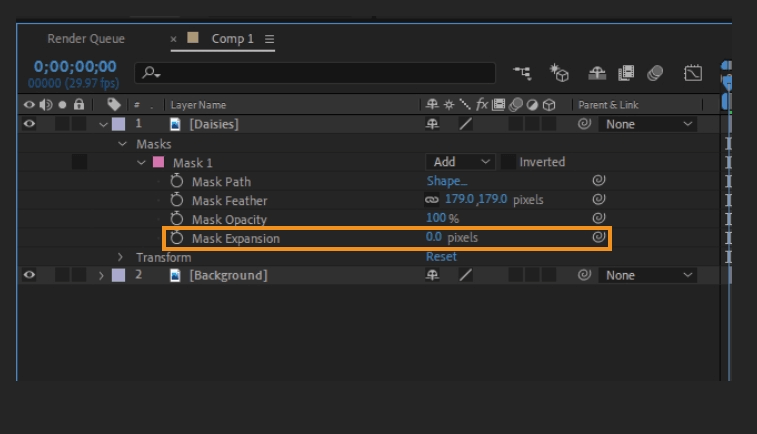
Mask Properties
Masks have four properties—path, feather, opacity, and expansion. Click the arrow next to the mask name to reveal the properties.
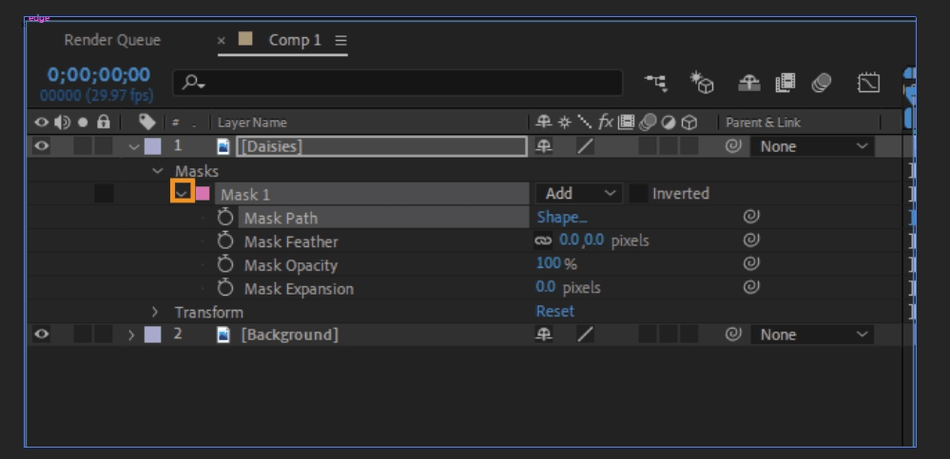
The choices to the right of the mask change how the mask behaves.
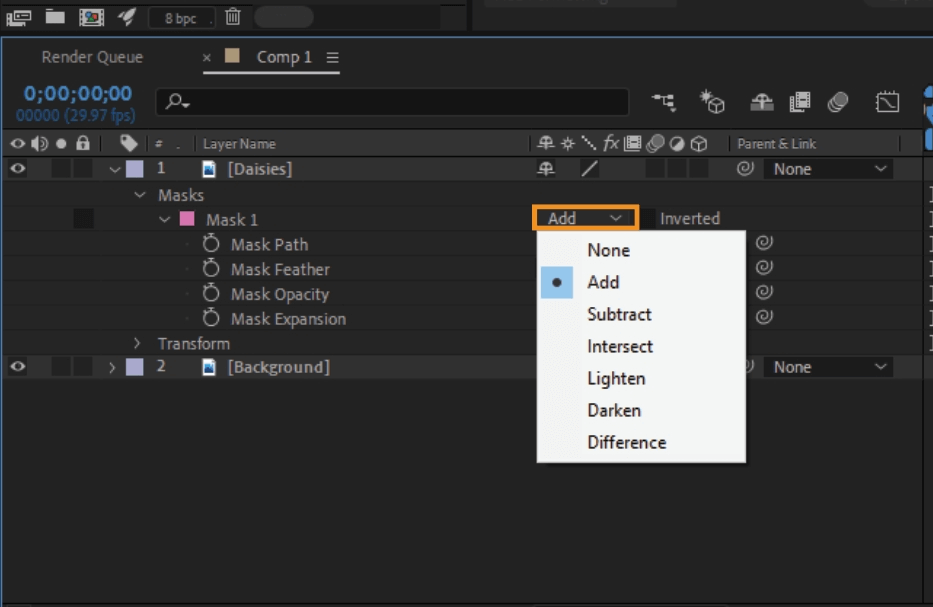
- None turns off the mask on the alpha channel of the layer.
- Add adds the mask to the masks above it in stacking order, cumulative with the masks above it.
- Subtract subtracts the mask to the masks above it in stacking order.
- Intersect adds the mask to the masks above it in stacking order, cumulative with the masks that overlap, full opacity in the areas that don’t.
- Lighten adds the mask to the masks above. Where masks overlap, the highest transparency value is used.
- Darken adds the mask to the masks above. Where masks overlap, the lowest transparency value is used.
- Difference adds the mask to the masks above. In areas that overlap, the influence of the mask is subtracted from the masks above it. In areas without overlap, the mask operates as it would by itself.
Checking Inverted on or off inverts the area of the mask.
Pressing the stopwatch icon enables keyframes for the property. You can change the property value from keyframe to keyframe to create animation.
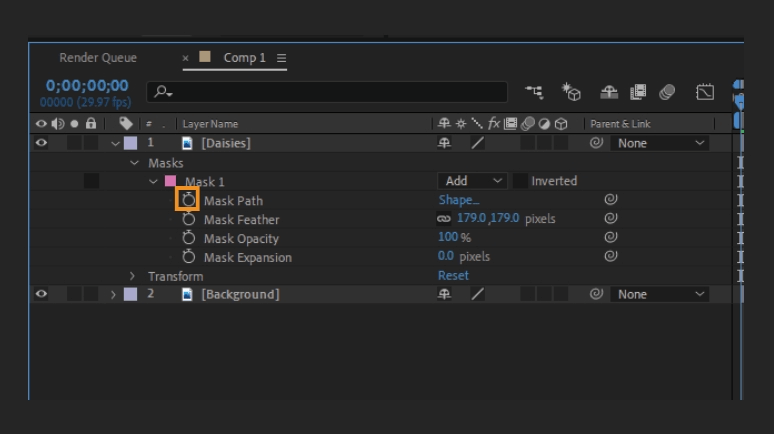
Path: Change the path of the mask. If you turn on the keyframe icon, you can create an animation, moving the mask points for each keyframe.
Feather: This feature feathers the mask’s border, making the selection less harsh, blurring the lines.
Opacity: Changes the transparency of the mask.
Expansion: Mask expansion expands or reduces the pixels on the border of the image. If you make this number negative, it will reduce the mask border, and if you increase it, it will expand the mask border.
Additional Tips and Tricks
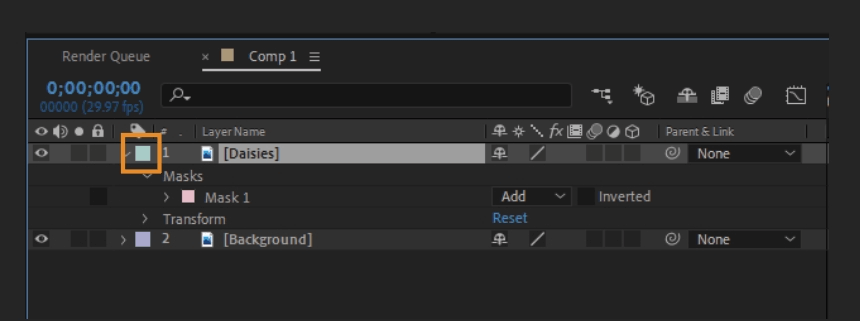
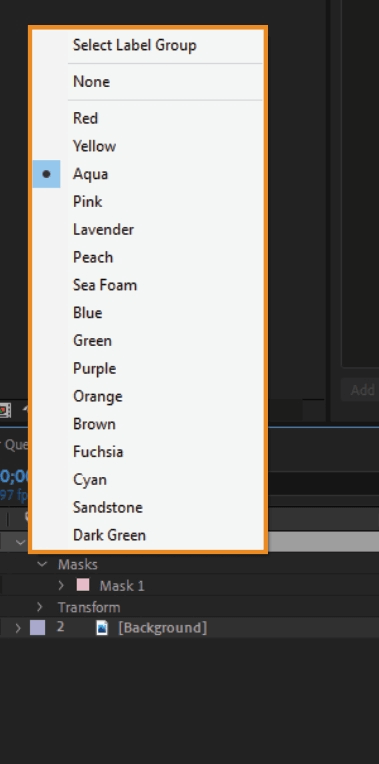
You can color-code layers and masks in After Effects. To do this:
- Click into the square next to the layer name.
- Choose from the list of colors. For instance, for this layer, I’m going to change it from green to orange.
- And now, this layer is color-coded orange. You can see the color when the layer is selected in the Composition panel and in the Timeline panel.
- if you hold down the shift key while scaling, this will constrain the proportions of the image.
- To delete a mask, select the mask layer and hit the delete command.
- You can change the order of layers and masks. Select the layer and drag it up and down to reorder.
- If you want to see all of the masks in a layer, use the M command. Press this command twice to see all the mask layers in a layer.
- Click the Toggle Mask And Shape Path Visibility icon to switch the border on and off. Turning the border off is helpful for actions like feathering the mask.
And that concludes the basics of masking in After Effects. You can now create masks with the pen and shape tools and can adjust them with ease.

Anne is a filmmaker and writer with a passion to bring stories to life. She has created several short films, specializing in stop-motion animation. Anne has over eight years of filmmaking experience, and she is always ready to share her knowledge with other creators. She started her company Anne Gets Creative in 2020.
Anne is extremely familiar with many Adobe programs: Photoshop, Illustrator, InDesign, After Effects, Premiere, and Audition, to name a few. She has also worked with other programs such as Procreate, Canva, iMovie, and Final Cut Pro. She always strives to give the best software reviews, researching diligently so her readers don’t have to.